Hello everyone, today I am sharing my October project for the Gypsy Soul Laser Cuts blog. I could not let the month go by without a project befitting the spookiest of holidays. Imagine a foggy, moonless night in Old Salem. Adjacent to the rows of tombstones and monuments stands a historic manse. The door is ajar, why not take a peak... what's inside is absolutely morbid.
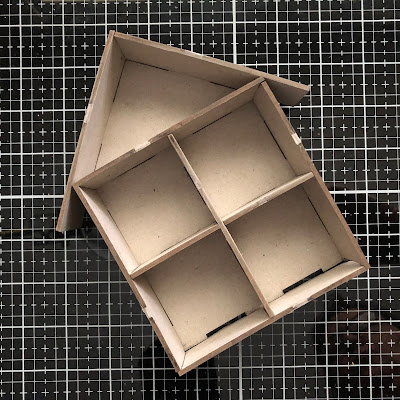
I begin with a Gypsy Soul Last Cuts mini house room box. Using an exacto knife, I cut apart wall, roof and divider pieces. As usual, I do a test fit to understand how all the pieces fit together. Then, using acrylic paint, I add paint along all the edges and at areas where pieces join together. This allows me a bit of play when I am cutting and attaching papers into the sections (if a paper cut is slightly off, the gap does not show). The "attic" area is covered completely with the paint. Since I want it too look like an unfinished attic space, I will not be covering any of these surfaces with paper.
When the paint is dry, I assemble the house. Applying a thin line of glue along the edges and tabs, I then secure the pieces in place. Sometimes it helps to clamp the pieces while drying. When the piece is assembled and the glue is dry, it is time to add the details. I begin with the outside of the house.
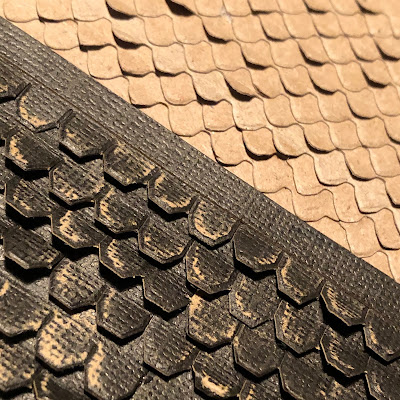
Using a die that cuts different styles of shingles and shakes, I select a style to use for the main exterior clapboards. I cut rows of siding from blackout kraft cardstock, then lightly sand and ink them to create an aged and weathered appearance. I begin adding the die cut pieces to the house, working from the bottom up so that the shingles can overlap and stagger mimicking traditional siding. Work on row at a time all the way around the three sides before moving onto the row above.
I have always admired the special details that are found on historic houses. I thought it would be fun to add a section of fish scales in the upper gabled area. Before switching patterns, I add a frieze (trim) board across the rear to transition to the new pattern. When the fishscale shingles are all in place, I add trim boards along the angled edges to finish the look. The roof is completed in the same manor as the exterior walls, but using heavyweight kraft paper inked with distress ink.
Now it is time to finish the interior rooms. I select papers that give the look of historic wallpapers and plaster. Each "room" is finished in a different paper. Measure and cut a square for each rear wall. Then, cut a strip of matching paper that will cover both the side walls and the ceiling. When papers are cut for each room, ink all of the edges with a dark brown or black ink.
To add an element of authenticity, create "cracks" by tearing into the paper and inking the torn area. You can also create the appearance of leaks within the walls by dripping dark ink down the wall sections.
The "wood" floors of each room are made by cutting pieces of woodgrain embossed paper that's been inked and and painted. All of the papers are attached to the surfaces using collage medium.
In keeping with the undertaker theme, I decide to give each room its own function that would be found in a funeral home. Starting with the attic, I adhere small pieces of hay randomly on the floor where a skeleton lies. The only remains of a long forgotten guest from years ago.
Located on the second floor is a mourning room, complete with prayer candles. An area to gather and contemplate lost souls.
Adjacent is a store room for found objects; misplaced parts and pieces.
The selection room can be found on the first floor. Here you can find items for all your funeral needs- from flowers to urns and caskets.
The undertaker's office completes the tour.
Two tiny eye hooks are screwed into the gable to secure a hanging sign. The undertaker is open for business, established 1876.


I hope you have enjoyed this haunting holiday make, perhaps you are inspired to create one of your own. If you've run out of time, consider making a house for a different holiday. I can imagine a wonderful Christmas inspired elf's workshop, or an easter egg factory. The possibilities are endless with the GSLC mini house room box.
Thanks so much for stopping by today, I truly appreciate it.
Enjoy these hallowed days.
Ann
xxx
supplies used:
Gypsy Soul Laser Cuts used: mini house room box
Distress products: collage medium, inks, paint, blackout kraftstock,
Tim Holtz Sizzix Alterations: village rooftops Bigz die.halloween mixed media (bats), 3D embossing folder lumber
Ideaology & Ideaology halloween products: paper stash, resin pumpkins, skulls, cameo, mini vials, quote chips, clippings stickers, charlotte, ephemera, snippets, industrial trims (discontinued)
misc. halloween plastic skeleton pieces, stretchy skeleton, dried flowers, pine needles, twine, faux spider web, hot glue gun, hay


3 comments:
The siding and roofing are my fav parts. LOVE your design, and the innards are so spooky cool too!
Positively amazing, Ann!!! The true architect came shining through, on THIS make!!! BRAVA! ��������������������
How fun! This looked like it was so much fun to create and I love all of your details and how you've described the purpose of each room. Love the spare parts room--every manse needs one of these! Happy Halloween!
Post a Comment