Tuesday, December 22, 2020

decadent display

Hello everyone, today I am sharing "decadent display" a faux gingerbread village decor piece. This will be my last post as a team member for Gypsy Soul Laser Cuts. It's been such a pleasure creating for Gina for the past three years. I've truly enjoyed working alongside the many talented designers from the team and have made some special friends. I am so grateful to have had this opportunity.
When the holidays wind down, I like to have some pieces of decor that I can leave out through the long cold days of January. I thought it would be fun to create a faux snowy gingerbread village that will last into the new year (and beyond). 
The Gypsy Soul Laser Cuts spool large (coming soon) is the perfect size display base for these GSLC cabana row mini houses. My project uses three of the five houses that come in the set, and I plan on making the two additional houses into "gingerbread house" ornaments for my Christmas tree.
The set of cabana row mini houses contains five different style houses. They arrive flat, with pre-scored lines for easy assembly. The roofs pieces are also scored. For this display, I am using the three smallest houses. 
I measure the outside walls of each house and cut a corresponding piece of dark brown kraft cardstock to match. If you find it easier, you can also trace the gable walls onto your paper and then cut it out. I also cut corresponding papers for each roof. I cut each panel as a separate piece to mimic how an actual gingerbread house would be assembled. Once all of the papers are cut, it is time to draw the facades. 
I use a pencil to draw basic shape outlines for doors and windows then, using a white uniball signo pen, add all the details. I draw different shingle patterns for each house roof. Be sure to edge each panel with a line of white "icing".
While the inked details are drying, partially assemble the chipboard house bases. It is easiest to attach the roof prior to closing up the bottom. This way you can reach into the house and assure that the flaps are secure to the underside of the roof pieces. When the chipboard houses are formed, paint the edges with white acrylic paint or white gesso and allow to dry.
When the white paint has dried, adhere the paper facade pieces to the chipboard house base. White craft glue works well and gives you a little open time to adjust the pieces into place. 
To create the display base, I trace the spool top and bottom onto a piece of white cardstock and cut out the circles. On the opposite sides of these pieces, I attach some patterned tissue paper with collage medium. When the collage medium is dry, I add a layer of vintage collage medium to give the tissue a soft sepia colored finish. The spool core is finished in the same manner. 
After the tissue paper sides with collage medium are completely dry, flip the circle pieces over and attach the cut piece of white cardstock. Arrange the houses and trace the base onto the cardstock. Add texture paste to the areas surrounding the houses and while it is still wet, sprinkle with fine clear glitter for a sparkling snow effect. Allow to dry. 
Attach the spool core to the flat circular pieces with collage medium. Each chipboard circle has an indention where the spool core should be situated. Since the tissue paper  is thin, it allows the indention to show and the core is easily placed central to the circle. Let dry overnight. 
Adhere the "gingerbread houses" to the spool top with white craft glue. I also add a few dyed and glittered sisal trees to create the scene. 
The base of the display contains glittered decorative deer and more of the dyed sisal trees. Place the items along the base and secure with glue, making sure that the composition balances with the houses on the top.
The last step is adding pieces of faux Dresden trim along the edges of the spool top and bottom. I use die cut impresslit pieces that have been rubbed with bronze paint to highlight the embossed designs. 
Thanks so much for taking the time to stop by the blog today, I hope that you have been inspired to perhaps create your own decadent display! Each house has the ability to be any style you wish, from traditional to whimsical, let your imagination soar.

I want to thank Gina and the entire team at Gypsy Soul Laser Cuts for the wonderful experience I have had as part of their design team. I could not have asked for a better group of creatives!

life is sweet, enjoy every moment...
Ann
xxx 


supplies:
 cardstock- dark brown kraft
Distress collage medium- matte, vintage
Distress stain - peeled paint
Distress glitter- vintage platinum glitter dust, rock candy
Distress texture paste- opaque
Gypsy Soul Laser Cuts-
Ranger Dina Wakley- white gesso
Tim Holtz Ideaology- decorative deer, woodland trees
Tim Holtz / Sizzix Impresslits- 3D provincial mini
Uniball Signo white gel pen


Tuesday, November 24, 2020

documenting december

 Hello everyone, I can hardly believe that we are nearing the end of November. When the pandemic hit, it seemed as though all of the months started blurring together, and before I knew it, six months had passed, then seven, etc... I've heard a lot about how people like to do daily journal entires for the month of December, helping them to stay focused on the joys of the season and allowing them to highlight and appreciate some of the important moments. I think this year, more than ever, this will be a valuable exercise. For this reason, I have created a December journal.

Today, I am on the Gypsy Laser Cuts blog sharing the journal I made for "documenting December." I start with a die cut journal base made from the Eileen Hull Sizzix Journal die. I cover the die cut pieces with some of my favorite Tim Holtz holiday papers and use a bunch of Gypsy Soul Laser Cut chipboard pieces as embellishments inside. There are so many different Christmas and holiday chipboard pieces in the GSLC shop to choose from. This post will highlight some that I use in this journal.


On the cover, I add an altoids tin topper 1 piece in each corner. I love how the design of these pieces plays off the paper pattern. For these pieces, I coat one side with Versamark embossing ink and then randomly sprinkle Distress embossing glaze in rustic wilderness onto the ink. The embossing powder melts when heated. To give it a grungy look, I sand off areas of the glaze, allowing the chipboard to show through. If you happen to add to much powder and are not happy with the shine, you can use a piece of steel wool to dull the finish. Its best to only add the embossing to one side of the piece, this will allow you to easily secure it to the cover with craft glue.
Inside the journal, the "signatures" are made from mixed media heavyweight paper and cut to size. Using a heavy weight paper will give me freedom to add different mediums to the pages. I stamp numbers into the corner of each page to correlate to the days of the month. I do not sew the signatures together, leaving them free to be removed. This will allow me the flexibility to journal, paint, stamp or draw onto the page without worrying about dirtying up any other pages. When I complete that day and it is completely dry, I can simply slip it back into place. I add some additional vellum sheets to the signatures for interest.
I use one of these vellum pages to showcase the GSLC believe Santa. After carefully removing the piece from the surround, I paint the chipboard with black soot Distress paint. Once the paint is completely dry, I use a silver leaf metallic paint pen along the outermost edge to highlight the figure and deer in the night sky. I attach the upper portions of some house die cuts along the bottom edge so that Santa can soar above the rooftops.
The Christmas shape set contains so many fun pieces that are perfect for embellishing the journal pages. I use various colors of Distress paint to add details to the pieces. Festive holiday lights stretch across the top of one of the pages. Each painted bulb is glued to the page and then I add the "wire" by drawing a curvy line between the bulbs so that they appear as if they are a string of lights, all connected to each other.
The stockings from the Christmas shape set can be decorated to look any way you chose. I opt for a simple approach by only painting the bottom portions with candied apple Distress paint. A very fine burlap string allows the three stockings to be "hung" across the page. You can also add stamped images or a monogram to really personalize the look.
I prepare a number of extra pieces that will be incorporated as I fill the journal. The smallest trees from the pine tree shape set are some of these pieces. I think it will be fun to add one when documenting the day we select our Christmas tree, as well as when we decorate our tree. These pieces are prepared by painting them with a coat of rustic wilderness Distress ink. If the weather is snowy on the day we pick out the tree, I may add a bit of grit paste to the branches or maybe even sprinkle some blizzard embossing powder onto the tips of the pines. The best part of having prepared pieces is the ease with which they can be added when the time is right. With December being such a busy month, being prepared will allow more time for other things as well as make it easier to create fantastic pages in minutes.
I intentionally leave many of the journal pages unadorned. This allows me the freedom to add notes, artwork, stamps, or even tags where I want. The GSLC small tag set is the perfect size to add into the journal. The set comes with ten (10) small tags. I make up a handful to coordinate with my journal. On one side of the tags, I attach a piece of holiday paper with collage medium. The edges of the paper are trimmed to fit the tag. I punch a hole in the decorative paper at the location of the existing hole in the tag, and insert a 3/16" colored eyelet. The reverse side of each tag is simply inked to allow for the addition of  notes or a picture. These will definitely come in handy when I begin documenting December.
Another piece that I have painted and am keeping handy is the layered frame carlon. This can frame up a neat saying, some ephemera, or maybe even a mini Santa pic! 
Maybe you are inspired to create your own December journal; Gypsy Soul Laser Cuts has a wide variety of pieces that would work perfectly for adding special touches to your pages. I know that I am looking forward to documenting December and being able to appreciate the little things each and every day.
Thank you so much for stopping by the blog today, I truly appreciate it. If you live in the United States, or celebrate Thanksgiving, I wish you and yours a day filled with gratitude and love. I will be back in December with my last Gypsy Soul Laser Cuts project of the year.

Be safe and take care,

Ann

xxx  


Gypsy Soul Laser Cuts used:

Altoids tin topper 1Believe SantaChristmas shape setLayered frame Carlon

Pine tree shape setSmall tag set

other supplies:

Distress paints and Inks

Eileen Hull / Sizzix Travel Journal Die

Tim Holtz Ideaology Christmas Paper Stash

Strathmore Mixed Media paper

Vellum

Distress Collage Medium: matte

Craft glue

Elastic cord 


Thursday, November 19, 2020

flower power

Welcome to the Glacé Paints from Ann Butler & Emerald Creek Blog Hop! 
I am so happy to have been asked to be a part of this special event. 
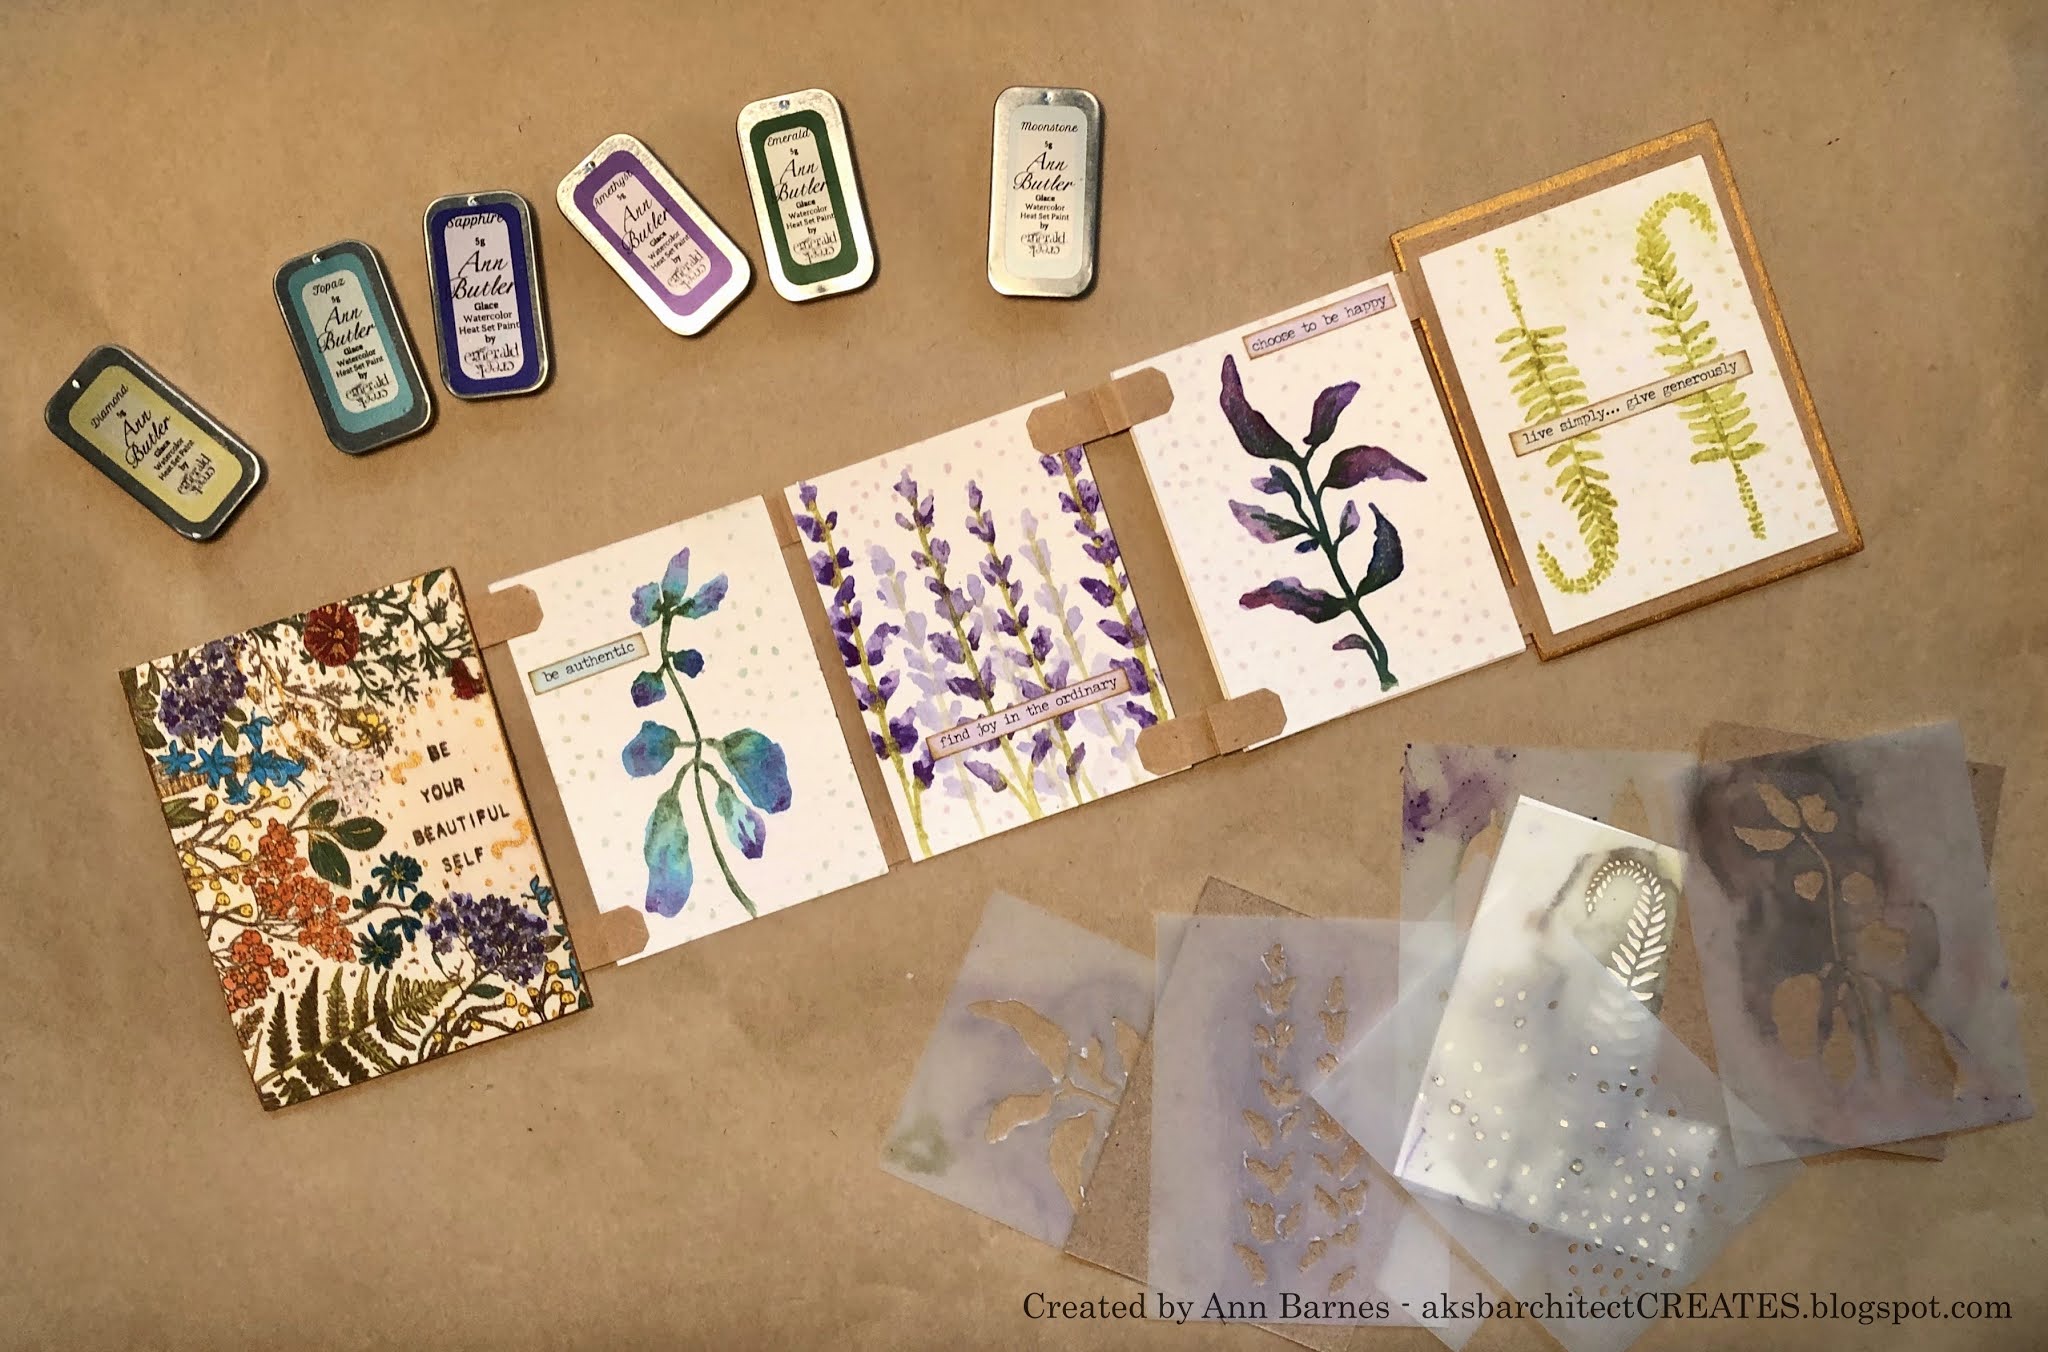
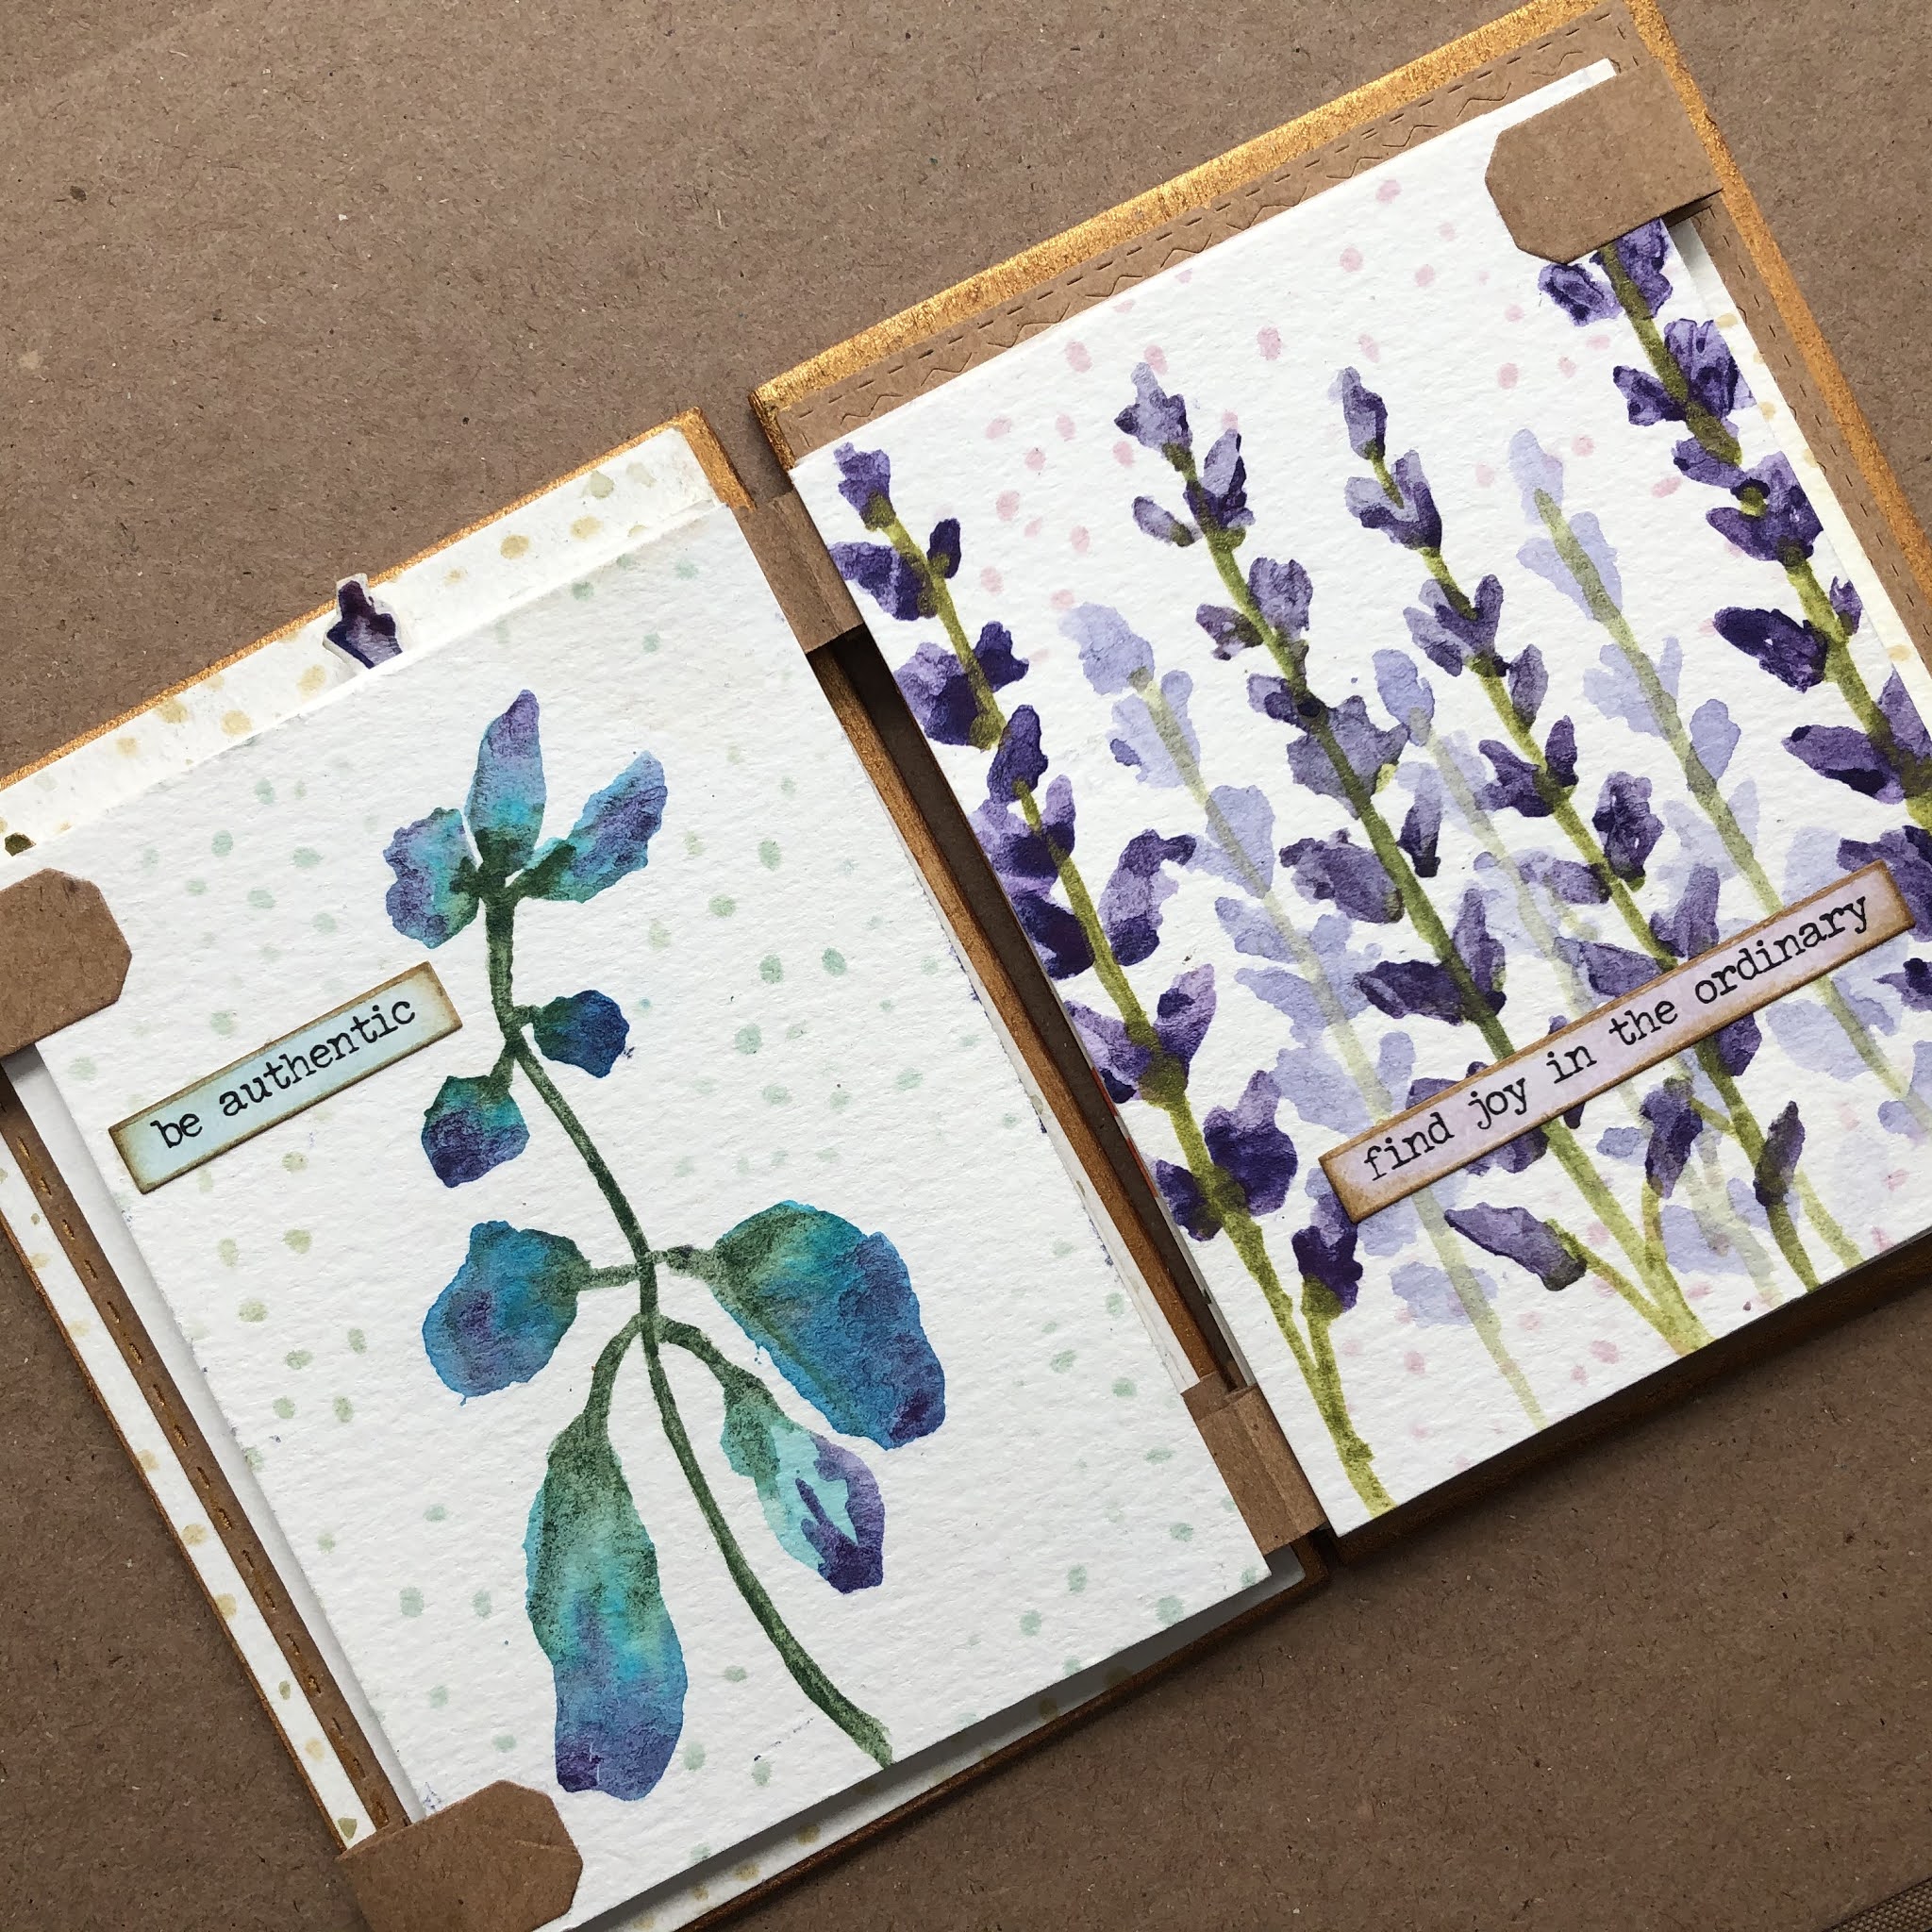
For my project I have created a "flower em-power-ment" accordion style booklet, something that can be opened and offer a positive message to whomever reads it.
This project uses Heat Set Watercolors from Ann Butler & Emerald Creek. Since this is a new product for me and I like to refer to color swatches, I begin by creating a swatch chart for the eight heat set paints. 
Next, I cut sheets of watercolor paper into 3 1/2" x 4" rectangles. These will be the pages in the book. 
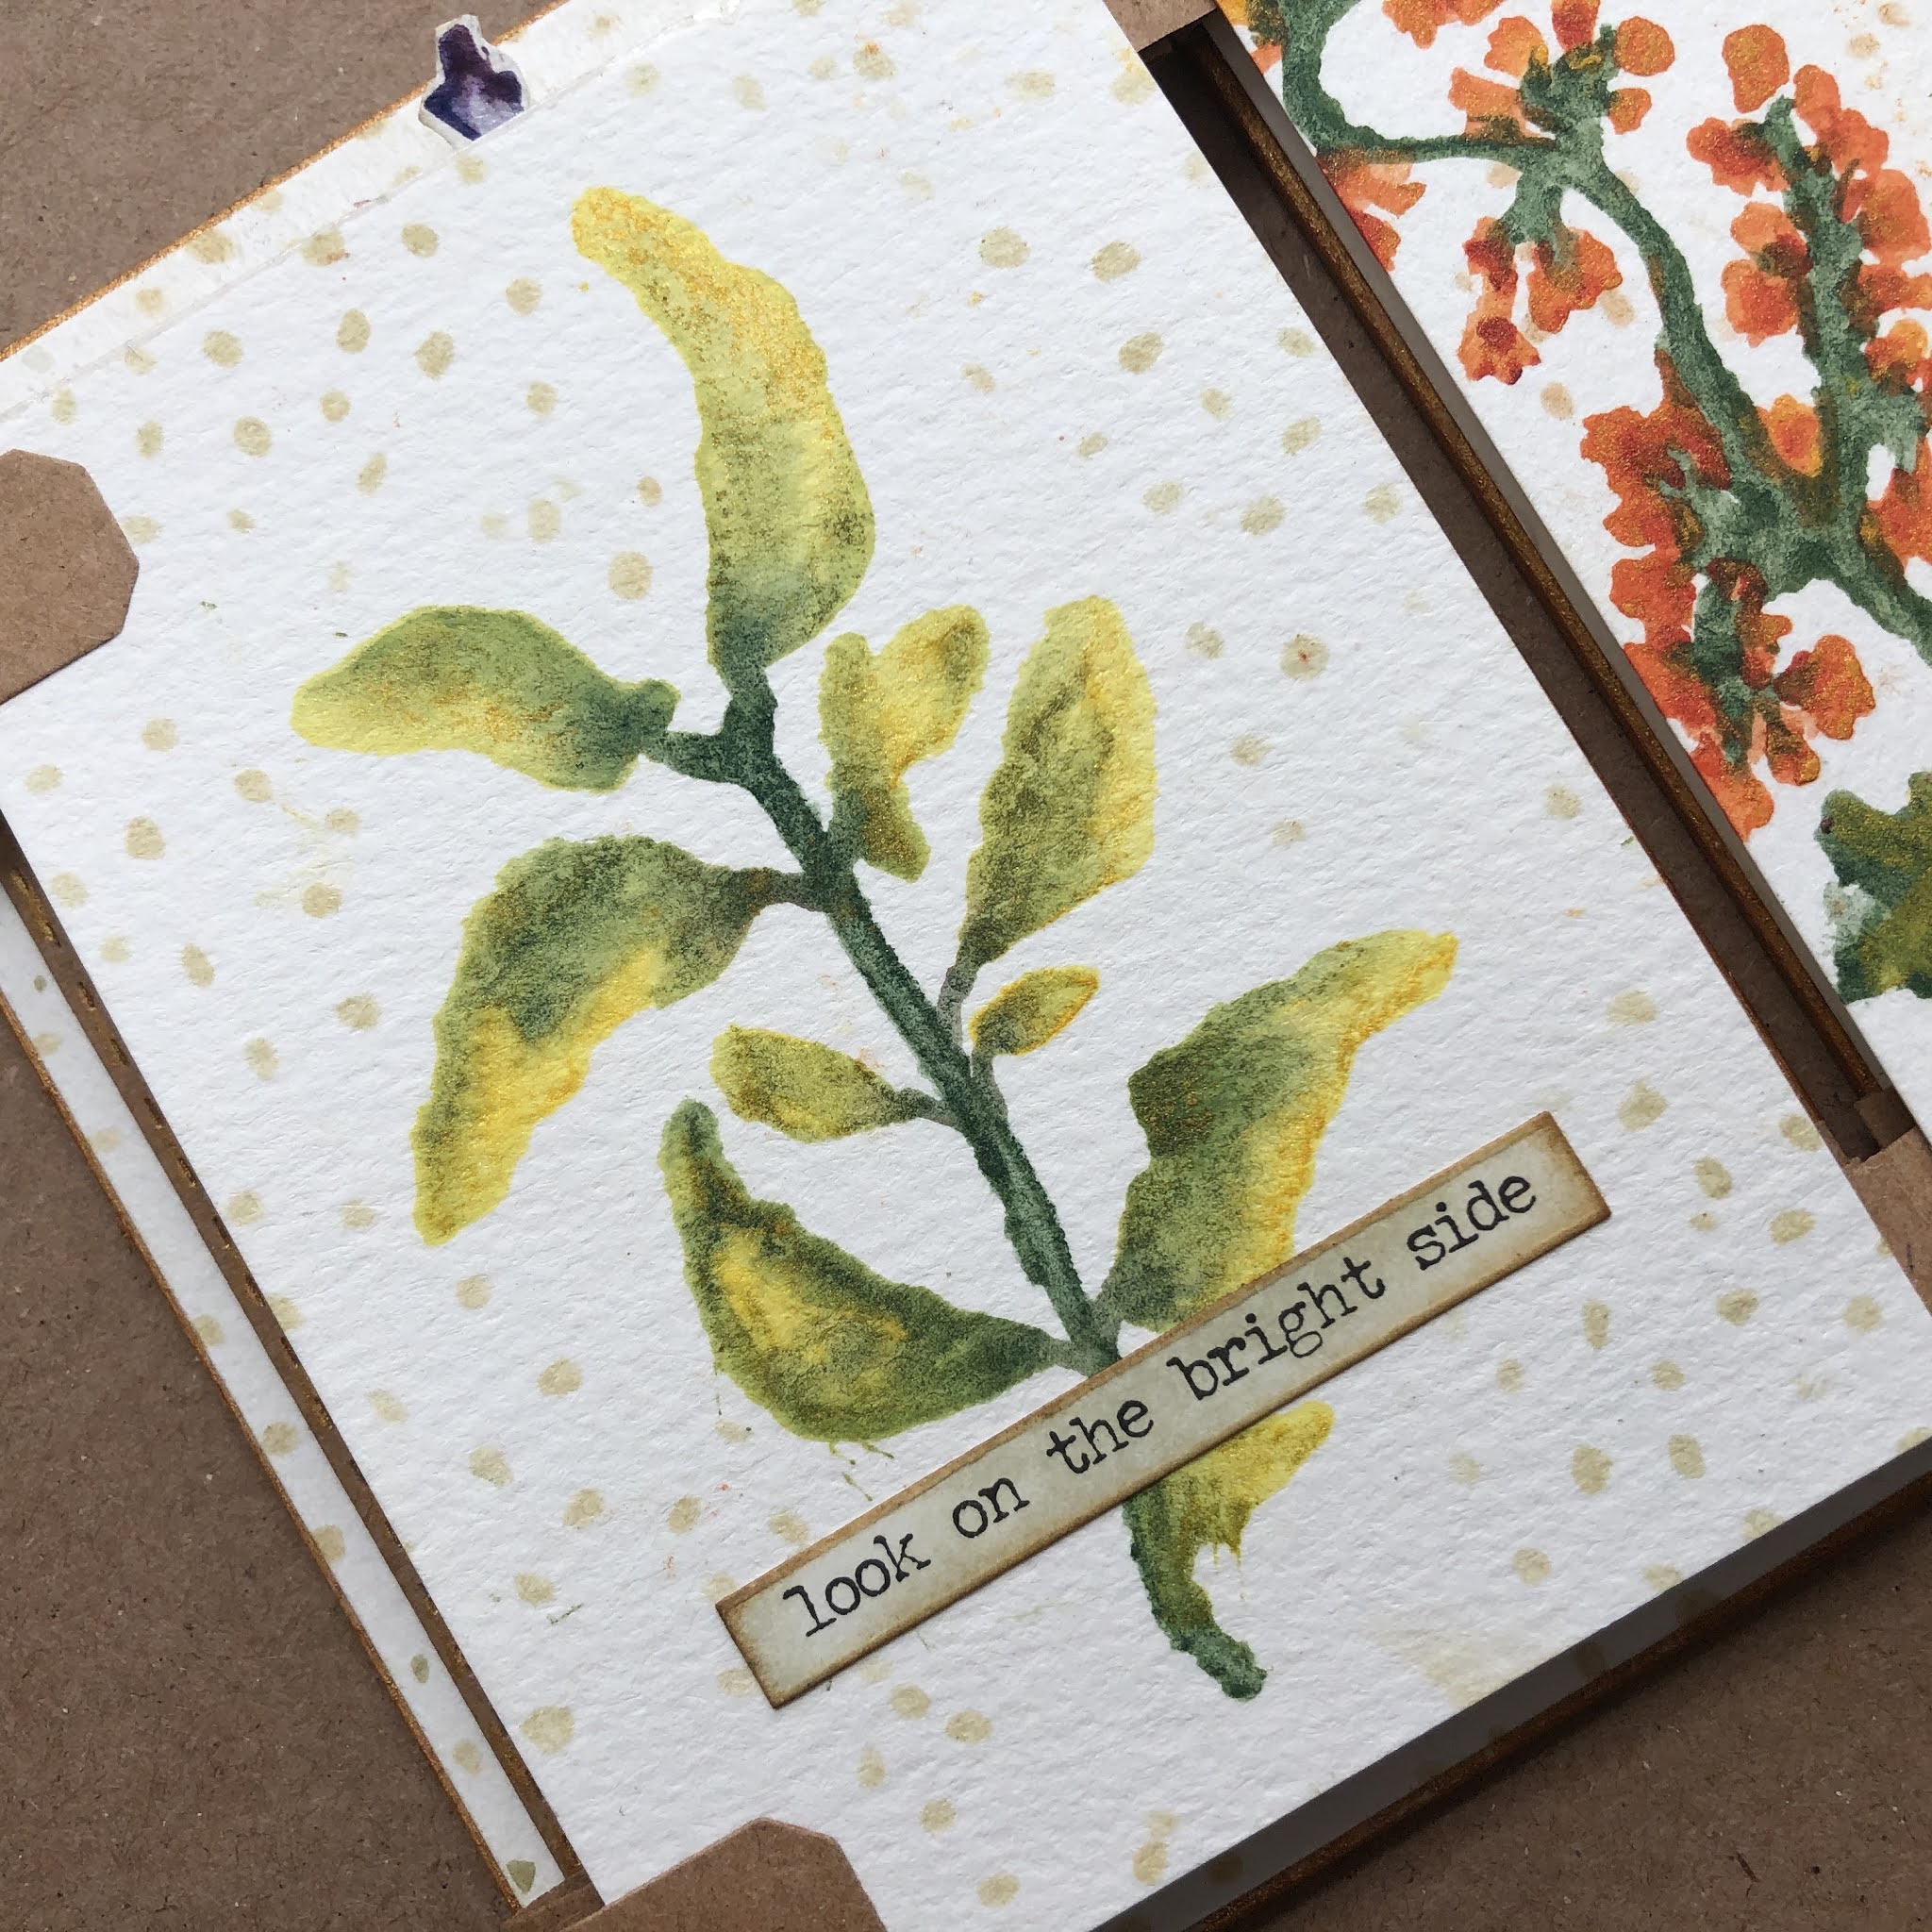
 Using ATC Mixup Missigman #2 Botanical stencil and Botanical Wildflowers stencil as guides, I paint the different botanicals in vibrant colors. 
When the paints are "set" with a heat gun, they tend to take on a shimmer effect. I preferred to use the paints in a thicker consistency than I would normally use a watercolor. This is completely up to personal preferences, the paints are just as vibrant when used with more water. 
The wooden front and back covers were stamped using archival ink and then colored with the heat set watercolor paints. I also used gold IZink pigment ink for the golden highlights and miscellaneous marks.
Once all of the pages were complete, I added additional details with ink, stamps and ATC Mixup Missigman #1 Art Marks stencil. The pages are attached to one another by kraft tabs which are adhered to the front and back book covers. 
Inside the front cover, a stitched slots pocket holds a few individual flowers that were created using the paints with stencils and then fussy cut.
I added positive messages to go along with the beautiful botanicals on each page.
One positive thought can change the entire direction of our day. 
I hope that these messages can keep the focus on what is important.
After I painted the back cover's botanical stamped image, I stamped Dream Big into the central area then I added gold IZink pigment highlights to complete the project. 
I want to add that I recently took the "Stencil Magic" online class by Rae Missigman and Sandi Keene (PopUp Art Classes). This was enlightening and taught many ways to use stencils, and included watercolors, a medium that I had not really considered combining with stencils before. It definitely sparked some of the ideas that I put to use in this project, along with a quote from LadyBird Johnson
"where flowers bloom, so does hope"

I hope that you have enjoyed this project. 
Thanks so much for taking the time to stop by;
  be sure to stop by the other artists participating in the hop and leave comments along the way. 
There are wonderful projects and inspiring ideas!
~Ann
xxx

 Visit the Emerald Creek blog hop post by Kim Evans HERE
Visit Katelyn Grosart's blog post HERE


GIVEAWAY
A $25 Prize Pack from Emerald Creek!

Enter to win by leaving a comment below.
Then be sure to visit the other blogs in the hop and comment to win.
The winner will be selected on Monday November 23!
(One comment per blog please.)

Thursday, November 5, 2020

there's a new StencilGirl® in town

Hello everyone, today I am thrilled to finally share some wonderful news with you. I have officially become part of the StencilGirl® family of stencil designers! Words can not even begin to describe the excitement I feel. I have always been a huge fan of the StencilGirl® company. I love their product and am honored to have my designs in their line. I can't wait to see how others envision and incorporate them into their own art and creations.
There are three sets of stencils in the Alphabet Mix-Up ATC Stencil release. Each of the letters of the alphabet is created by a pattern whose name begins with that respective letter: arrows=A, bamboo=B, etc.

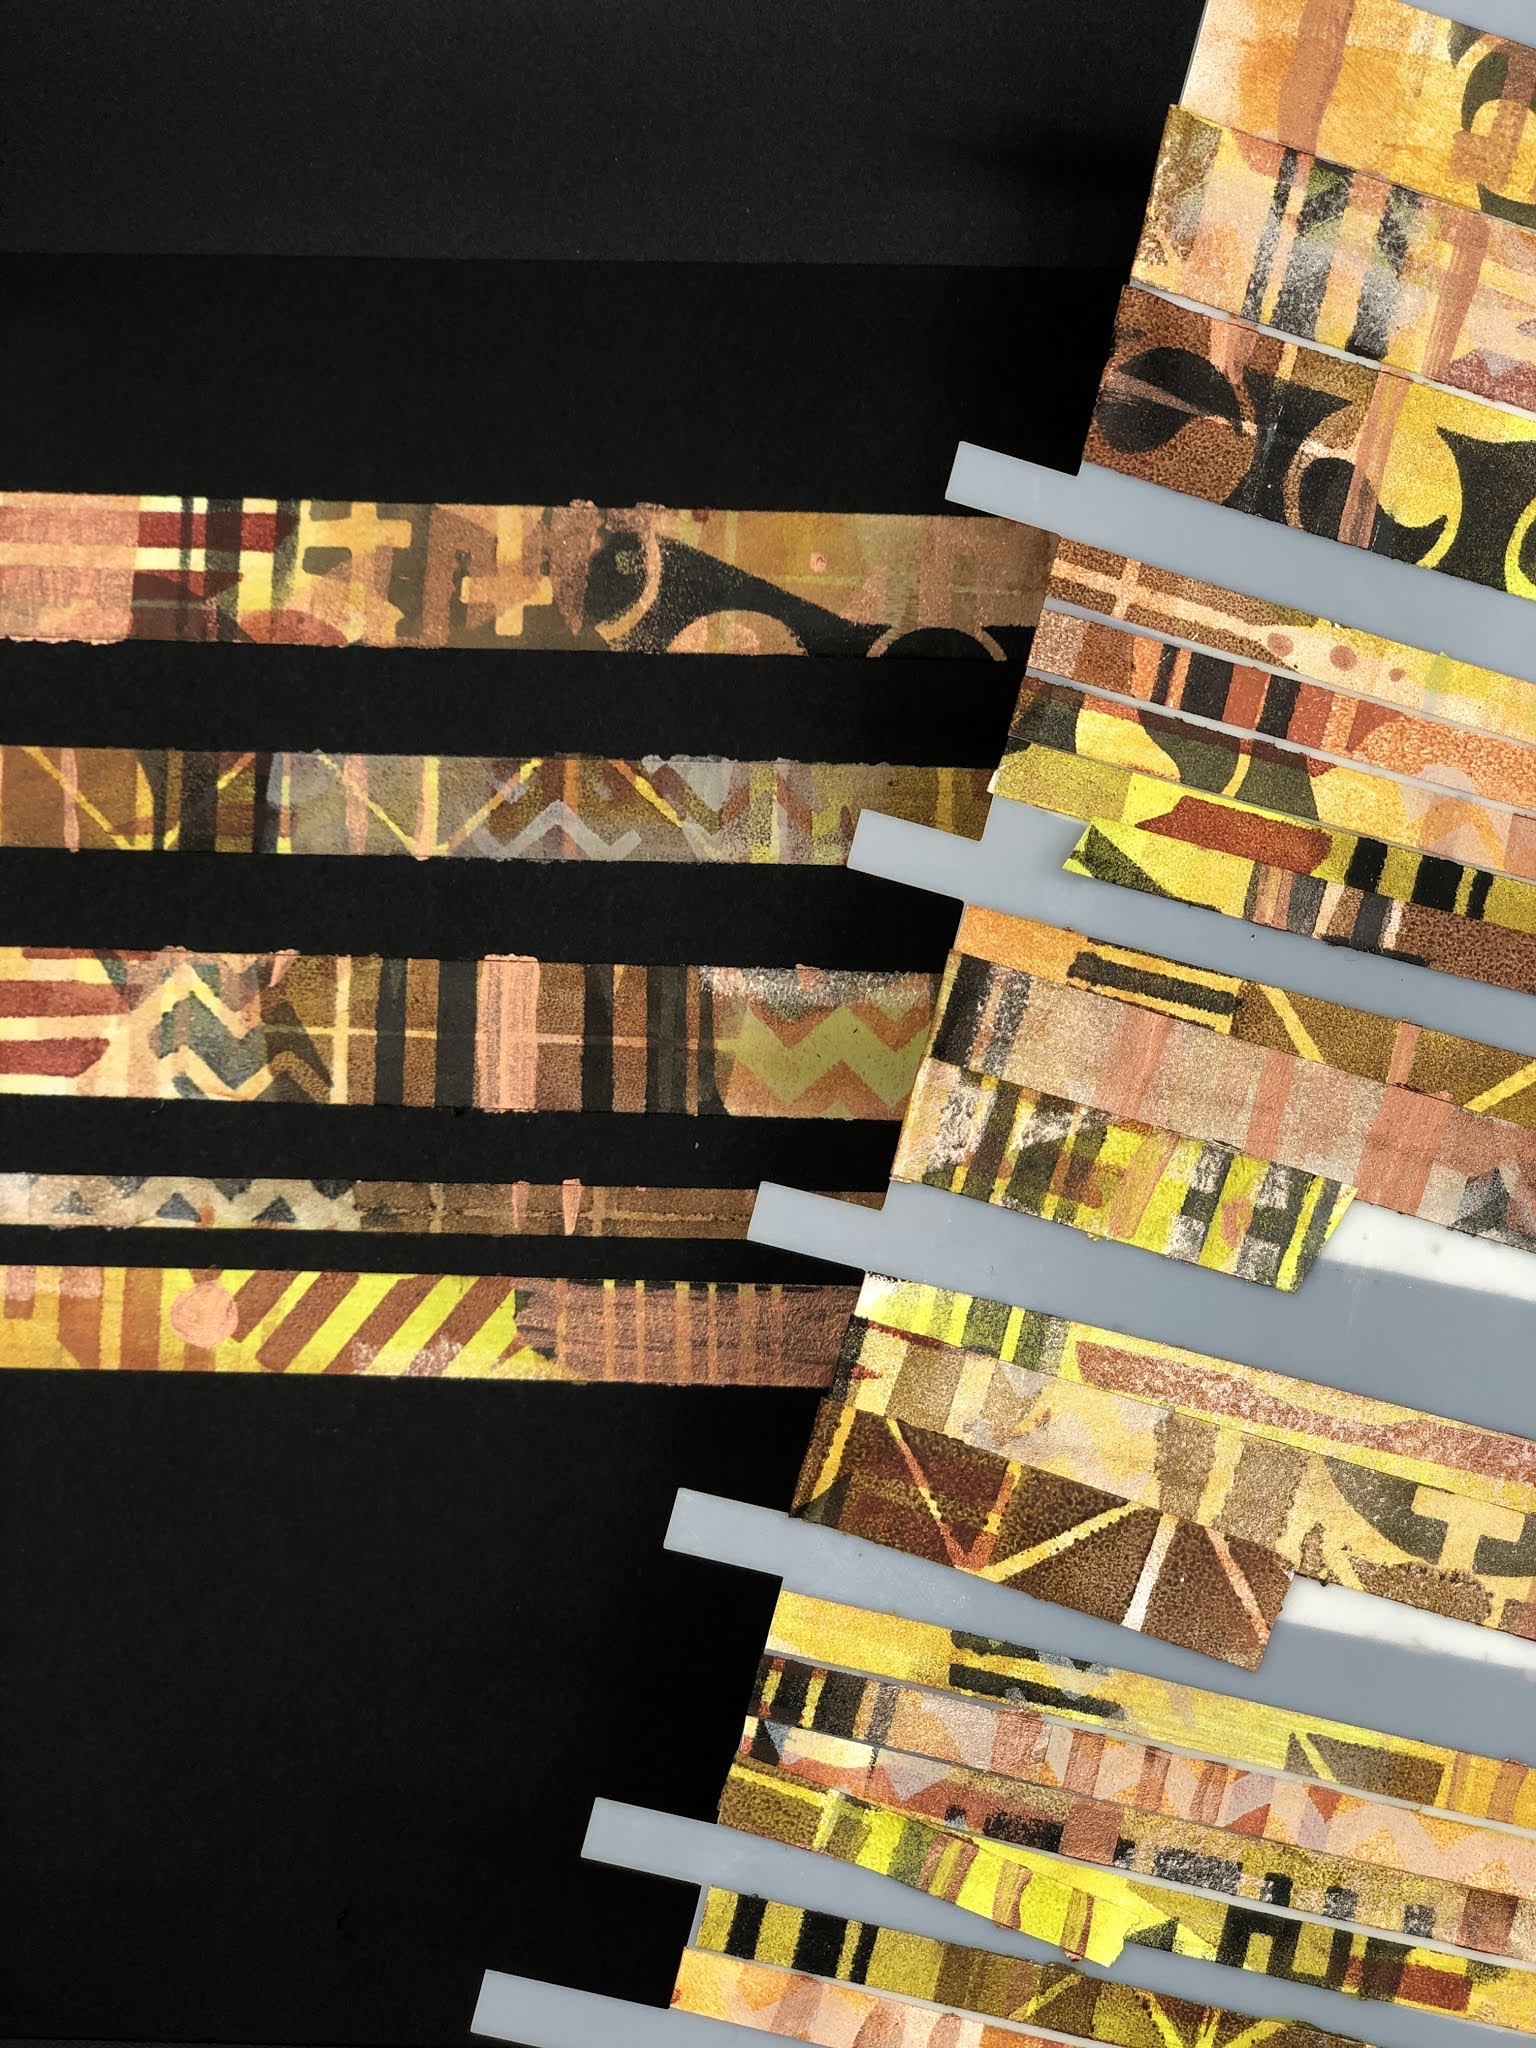
When my proof sets arrived in the mail, I could not wait to take them out and play! These stencils arrive on a 9x12 sheet, which can easily be cut down into nine separate ATC sized stencils or left as a single sheet with the nine designs all in one place. I have a habit of cutting my stencils up, I find them easier to manipulate when they are smaller in size.

There are so many different ways to use these stencils, whether your intent is to use an entire letter, or simply to use a bit of pattern from within, the possibilities are endless! Today I am sharing some of the art I created with my stencils. Using paint and gesso, I made art tapes to use in journal spreads or card making, then put it to use in a few journal spreads. Each of these spreads uses a different set of stencils.


You can use the letters individually to create monograms for gift/favor bags or a banner for special occasion.

You can even use them to personalize a canvas tote.
I am excited to see how what ideas you have for these stencils, and would love for you to tag me so that I am sure to see! You can find these stencils and more at StencilGirl®.
I am looking forward to hopefully adding more stencil designs in the future!
Thanks so much for stopping by!
Ann
x