Hello everyone, today I am sharing "decadent display" a faux gingerbread village decor piece. This will be my last post as a team member for Gypsy Soul Laser Cuts. It's been such a pleasure creating for Gina for the past three years. I've truly enjoyed working alongside the many talented designers from the team and have made some special friends. I am so grateful to have had this opportunity.
When the holidays wind down, I like to have some pieces of decor that I can leave out through the long cold days of January. I thought it would be fun to create a faux snowy gingerbread village that will last into the new year (and beyond).
The Gypsy Soul Laser Cuts spool large (coming soon) is the perfect size display base for these GSLC cabana row mini houses. My project uses three of the five houses that come in the set, and I plan on making the two additional houses into "gingerbread house" ornaments for my Christmas tree.
The set of cabana row mini houses contains five different style houses. They arrive flat, with pre-scored lines for easy assembly. The roofs pieces are also scored. For this display, I am using the three smallest houses.
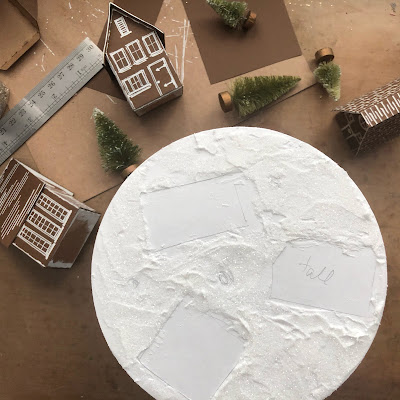
I measure the outside walls of each house and cut a corresponding piece of dark brown kraft cardstock to match. If you find it easier, you can also trace the gable walls onto your paper and then cut it out. I also cut corresponding papers for each roof. I cut each panel as a separate piece to mimic how an actual gingerbread house would be assembled. Once all of the papers are cut, it is time to draw the facades.
I use a pencil to draw basic shape outlines for doors and windows then, using a white uniball signo pen, add all the details. I draw different shingle patterns for each house roof. Be sure to edge each panel with a line of white "icing".
While the inked details are drying, partially assemble the chipboard house bases. It is easiest to attach the roof prior to closing up the bottom. This way you can reach into the house and assure that the flaps are secure to the underside of the roof pieces. When the chipboard houses are formed, paint the edges with white acrylic paint or white gesso and allow to dry.
When the white paint has dried, adhere the paper facade pieces to the chipboard house base. White craft glue works well and gives you a little open time to adjust the pieces into place.
To create the display base, I trace the spool top and bottom onto a piece of white cardstock and cut out the circles. On the opposite sides of these pieces, I attach some patterned tissue paper with collage medium. When the collage medium is dry, I add a layer of vintage collage medium to give the tissue a soft sepia colored finish. The spool core is finished in the same manner.
After the tissue paper sides with collage medium are completely dry, flip the circle pieces over and attach the cut piece of white cardstock. Arrange the houses and trace the base onto the cardstock. Add texture paste to the areas surrounding the houses and while it is still wet, sprinkle with fine clear glitter for a sparkling snow effect. Allow to dry.
Attach the spool core to the flat circular pieces with collage medium. Each chipboard circle has an indention where the spool core should be situated. Since the tissue paper is thin, it allows the indention to show and the core is easily placed central to the circle. Let dry overnight.
Adhere the "gingerbread houses" to the spool top with white craft glue. I also add a few dyed and glittered sisal trees to create the scene.
The base of the display contains glittered decorative deer and more of the dyed sisal trees. Place the items along the base and secure with glue, making sure that the composition balances with the houses on the top.
The last step is adding pieces of faux Dresden trim along the edges of the spool top and bottom. I use die cut impresslit pieces that have been rubbed with bronze paint to highlight the embossed designs.
Thanks so much for taking the time to stop by the blog today, I hope that you have been inspired to perhaps create your own decadent display! Each house has the ability to be any style you wish, from traditional to whimsical, let your imagination soar.
I want to thank Gina and the entire team at Gypsy Soul Laser Cuts for the wonderful experience I have had as part of their design team. I could not have asked for a better group of creatives!
life is sweet, enjoy every moment...
Ann
xxx
supplies:
cardstock- dark brown kraft
Distress collage medium- matte, vintage
Distress stain - peeled paint
Distress glitter- vintage platinum glitter dust, rock candy
Distress texture paste- opaque
Gypsy Soul Laser Cuts-
spool large - coming soon, cabana row mini houses
Ranger Dina Wakley- white gesso
Tim Holtz Ideaology- decorative deer, woodland trees
Tim Holtz / Sizzix Impresslits- 3D provincial mini
Uniball Signo white gel pen


