Friday, September 27, 2019

holding onto hope

Hello everyone,
today I am honored to be a guest designer on the StencilGirl® blog
 where I am sharing all the details for "holding onto hope."
A painting that incorporates StencilGirl® stencils, paints, copper leaf and patina.


I really appreciate you stopping by, and hope that you are able to
visit the StencilGirl® blog to see all the details.
You can get to this StencilGirl® Talk blog post by clicking here.
  Many thanks to StencilGirl® for allowing me this wonderful opportunity. 
~Ann 
  xxx


StencilGirl® stencils used:
stone face (S696) by Tina Walker
stone statue (L737) by Tina Walker
wing stencil (L065) by Pam Carriker 

Wednesday, September 25, 2019

maiden voyage


"her maiden voyage"
~Ann Barnes

on her maiden voyage
all things bright and new
the sea of unchartered waters
drew her in yet made her blue

the currents tried to pull her
swirling this way and that
but she held steady to her course
knowing things, they do not last

of the many experiences, seen and heard
the parts that she holds tight
were the simple acts of kindness
the ones that made things right

it's the inner peace that matters
the one she's always had
the faith and hope and love,
putting good above the bad

her maiden voyage has ended
she has weathered the storm
and emerged victorious
for she has found her own


Today I am on the Relics & Artifacts Muse blog sharing a "cameo" I created with one of the pieces from the meerschaum reliquary kit, VerDay and a treasured piece of agate. 
I hope that you are able to stop by and discover my process and the inspiration behind it. 
You can get to the Muse post directly by clicking here.

My hope is for you to draw inspiration from the Relics & Artifacts blanks;
 to allow them to tell their stories through your eyes, and your art.
Thank you so much for taking the time to visit.
~Ann
  xxx

Wednesday, September 18, 2019

wicked ways

I always enjoy working on Halloween projects throughout the fall, and today, I am on the Gypsy Soul Laser Cuts Blog sharing my latest piece, "wicked ways." This piece uses a Gypsy Soul Laser Cuts filigree front shrine as its base. I love the size of this shrine, its generous interior provides the perfect opportunity for me to create a spooky scene. I have opted to use the WICKED word from the halloween word set in lieu of the filigree piece that comes with the shrine. I plan to use the beautifully detailed filigree piece for a future project.
I first paint all of the shrine pieces that I will be using with black paint. I do not add water, and try to use a light hand when applying the paint, ensuring that all edges are covered. This piece has a few edges that are exposed when it is assembled, and if you are not planning to cover the outside with paper, it is essential to paint the exposed edges the same color so the appearance will be seamless.
When the paint has dried, I select a paper for the interior of the shrine. I want the scene that I am creating to have a spooky quality, and find an old piece of decorative paper from my stash that will be perfect to achieve this. Since the paper is 12x12, and I want to be sure to include the area with the full moon, I lay the front piece of the shrine on top of the page to determine the area that I will need to cut out. The interior (back) panel is 4-3/4" x 5- 3/4". I also cut two adjacent strips (on either side of the main panel) to use on each interior side. These papers are inked around the edges and adhered to their respective pieces with collage medium. Once the papers are secured, I assemble the shrine box with more collage medium. I use clamps to make sure that everything stays in place as the glue dries.
Setting the shrine box aside, I work on the word Wicked that will adorn the top of my shrine. This piece is from the Halloween word set. I have other ideas for the remaining words from this set and really like how each word is cut from a different font. Knowing that there is a possibility that some sections of the word might extend beyond the top of the shrine, I paint both the front and back of the word with black paint. When the paint has dried, I coat the front side with VersaMark embossing ink and sprinkle with dragons egg embossing powder. This is then heat set. I consider adding another layer of embossing, but really like the texture that I have achieved with only a single application. I love the subtle metallic finish and the color works perfectly with my scheme. In order to keep the subtleness, but also ensure that the title is noticed, I use a silver metallic paint pen around the exterior edge of the letters. This will help the word pop without having to raise it off of the front panel. When the silver edge has completely dried, I attach the word piece to the shrine using collage medium.
Now it is time to set the scene inside the shrine. I spritz the cauldron piece from the GSLC be witched shape set lightly with water on both sides. I then gently bend the shape to create a 3-d effect. I allow the piece to dry in this altered shape. After it has dried, I coat the outside of the cauldron with embossing ink, then a layer of hammered metal embossing powder. Using a heat gun I melt the powder to a wonderful finish. The embossed piece is allowed to cool. I cut a piece of foam to raise the cauldron away from the back panel and use collage medium to attach the foam in place along the back.
A die cut witch figure is inked then covered in black soot glitter. To achieve the look of moonlight shining off her silhouetted figure, I die cut a second witch from silver cardstock and offset the two pieces. She stirs her magic potion with a "wooden" stick.
The interior base of the shrine is covered with moss; a few bones and a skull add to the spooky effect. Within the cauldron, pearls (colored with alcohol inks) create the perfect bubbly potion. Die cut bats are suspended with wire or attached to the interior of the shrine, enjoying the witch's cackling chant.
For the exterior of the shrine, I wanted it to remain simple. Black cardstock skeleton leaf die cuts are adhered to the side and fold-over to the back. An ephemera "poster" for the Witches Dance is the main attraction.
 
 
I hope that you have enjoyed this wicked piece, I look forward to sharing more of my Halloween projects over the next few weeks.  Feel free to leave a comment, I always enjoy hearing your thoughts or answering questions.
Thank you so much for stopping by,
 I hope that you have a creative day!
~Ann

      
supplies used:
Distress Collage Medium: matte
Distress Glitter: black soot
Distress Oxide Ink: black soot
Distress Paint: black soot
Distress
Emerald Creek embossing powders:
Magical Mysteries Dragons Egg, Hammered Metal
Gypsy Soul Laser Cuts:
filigree front shrinehalloween word setbe witched shape set
moss
Tim Holtz Ideaology:
baubles, boneyard, paper stash metallic kraft, skulls
Tim Holtz / Ranger alcohol inks:
 limeade, oregano
Tim Holtz / Sizzix dies:
bat crazy, skeleton leaves, witchcraft
thin jewelry wire

Thursday, September 12, 2019

art and soul

Hi everyone, September means back to school; 
the Emerald Creek Dares Challenge is embracing this event with the theme
 "Be True to your School"
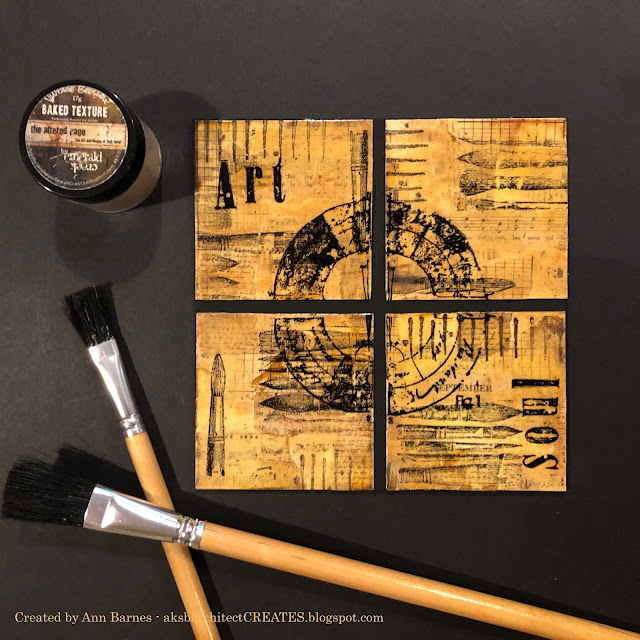
 I realize that many different types of students all have varying opinions on what will be their "best class" this year. I was always partial to math class; however, one of my other favorites tended to be art. Using this as inspiration for my September project, I have created a panel titled "art and soul."
I begin with four square panels of Bristol board.
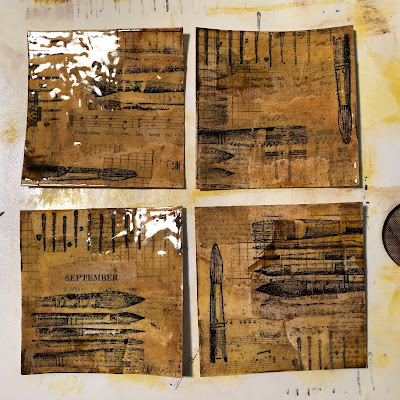
I then select different pieces of vintage papers from my stash that represent different educational subjects. I tear these papers into strips and pieces, then layer them onto the four panels using collage medium.
When the collage medium has dried, I add a layer of color with Paper Artsy fresco paint (butter). I also add layers of distress ink (fossilized amber and wild honey). When the inks are dry I stamp additional images onto the panels with black soot Archival ink and set aside to dry completely. 
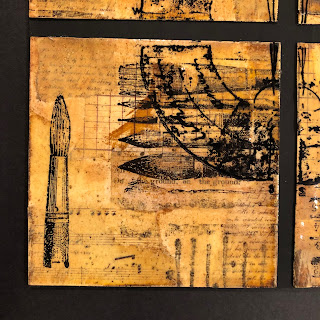
Next, I coat each panel with a layer of embossing ink then cover with a layer of Vintage Beeswax Baked Texture. This layer is heat set and then allowed to cool. When cool, an additional layer of embossing ink is added, then once again, covered with Vintage Beeswax embossing powder and heated. I add an additional layer of stamped images with Archival ink between coats of beeswax embossing to create added depth. 
I continue adding the layers of embossing until I am satisfied with the appearance. One of my favorite aspects of the Baked Texture Vintage Beeswax is the rich warm colors that emerge as the layers are built, these layers and colors are further enhanced by the colors that you have added beneath.
Using Staz-On pigment ink (black) I stamp my final images onto the topmost layer of embossing. The incredible color wheel image fit perfectly with my theme and then I added the words "Art" and "soul" onto separate panels. The four panels were then attached to a square base panel that was painted with flat black paint.
I really love the way that this piece turned out, looking at all the different layers and color gradients within each panel is truly satisfying.
The vintage beeswax is an amazing embossing powder. It is now available in a larger jar, which I am thrilled about. I truly believe this powder is best when applied in multiple layers and the larger jar ensures you won't run out in the middle of a project. It is a really great value as well.
Thank you so much for taking the time to stop by and learn about my piece.
Maybe it even inspired you to join the Emerald Creek challenge this month.
 Here is a link to enter if you dare!
~Ann

supplies:
Distress collage medium:matte
Impression Obsession / Seth Apter stamps:
color chart (H18088), primitives (3193-LG)
Paper Artsy fresco paints: butter
Ranger / Tim Holtz Distress Archival Ink: black soot
Stampers Anonymous / Tim Holtz stamps:
brush collection (P2-2111), mini worn text (CMS156) 
Staz-On Pigment Ink: black
VersaMark Embossing Ink


Wednesday, September 4, 2019

a creepy collective

In our house, the arrival of September means that Halloween planning is fully underway. To get into the spirit, as well as create a fun place to tuck mementos and pictures from the many spooky celebrations, I have created an extra large tag book I am calling "a creepy collective".
Today I am on the Gypsy Soul Laser Cuts blog, sharing the first of a two -part post.
In this first post I explain how I assemble the Gypsy Soul Laser Cuts tag book, and in part two, I will be sharing all of the decorated interior pages, loaded with fun Halloween ephemera, die cuts, embellishments and chipboard pieces from Gypsy Soul Laser Cuts.
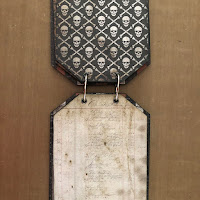
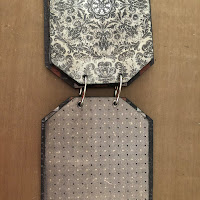
There are many different ways that this GSLC tag book can be assembled. It arrives flat in nineteen pieces, providing copious, varied surfaces for you to finish in your own style. Although I believe the traditional assembly would be to hinge along the short flat side of the cover tags and pages, I decided to hinge my book at the angled side. This leaves me added space for embellishments. Because the tag book is not pre-cut for any particular binding method, it allows you, the end user, the option to bind in any method of your choosing. As you can see, I have used a ring binding method.
So let's begin...
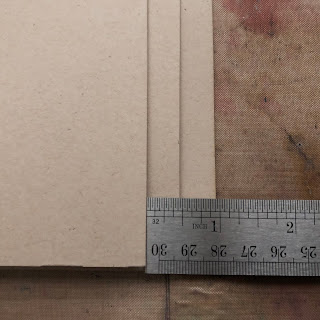
Here you can see all the wonderful pieces that are included in the Gypsy Soul Laser Cuts Tag Book set: covers, 6 pages, 6 inserts, 3 accent tags, and 3 belly bands. The covers are heavier weight chipboard to accommodate many mediums.
Each of the interior "pages" are pre-scored and have a small flap along one side. To assemble these pages, fold along the crease line and then use a bone folder across the fold for a crisp edge. Add a line of adhesive (double-sided tape or quick dry glue along the edge of the flap that folds in, and secure. All of the pages are assembled in this manner, allowing for them to be used as "sleeves" to tuck tags or papers inside. This will make it super easy if you want to include any brads or fasteners that may need to go through the page, later on.
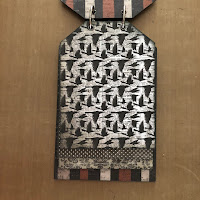
I often tend to have elements on my pages that overhang the edges, with this in mind, I decide that it would be fun to stagger the lengths of my interior pages. Once I have secured all of my pages, I determine the differing lengths for staggering. I cut down each page as necessary.  Knowing that I want a halloween theme for my tag book, I pull out all of my halloween papers to find the perfect pieces.
When selecting the papers for each page, it is important that you determine how you will be hinging the book, as well as the direction that you intend for the book to be "read." Since "a creepy collective" is going to be a flip book, I adhere the pages with any patterns/graphic with the appropriate orientation. To reinforce the folded edge, I add washi tape to each side, prior to adding any decorative papers. This is not a required step; however, if you intend to create a more interactive book, it is always a good idea to reinforce.
Using the staggered pages as guides, I trace the outlines and cut the shapes from my decorative papers. The edges of the page, as well as the decorative paper, are inked, and then using double sided adhesive tape, I attach the papers.
Now it is time to work on the front and back covers. Since I anticipate this book being handled a lot, I use distress collage medium to adhere the papers to the covers. The collage medium adds a protective coating that will withstand much use. Once the first layer of paper is attached, I add torn pieces of worn wallpaper.
I hope to achieve the look of a gallery wall in an old haunted mansion. The wall paper peeling and a collection of family portraits hanging. When the collage medium has dried completely, I add crackle finish to random areas, concentrating on the wall area. the resulting crackle is accentuated with a rubbing of walnut stain distress crayon.

 Once all of the pages have been covered and the front and back cover finishes are dry, I determine the best location for my binding holes.The first step is to determine the onset of the interior pages, be sure that wherever you decide to place your binding will incorporate the pages. I decide to use 3/16" eyelets to accommodate the binding rings. The holes are set an appropriate distance in to allow for a border around the eyelet. Using a crop-a-dial I punch my holes and set the eyelets. The next page is aligned, and the hole locations are marked then punched and eyelets set.
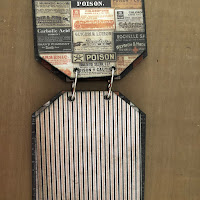
This ensures that all of the holes will be lined up and the pages will be easily flipped.  
Spooktacular alphabet die cut letters spelling "a creepy collective" give title to my tag book. Framed found relatives, some wearing die cut masks or a Gypsy Soul Laser Cut little crown, hung on the decaying "wall" complete the front cover.
The rear cover is finished in a similar way to the front; lacking the relatives, this cover is stamped and die cut letters read "and then there were none." A rodent from the Gypsy Soul Laser Cuts creepy critters set is inked, covered with collage medium, and attached to the bottom corner, trying to take a peek inside. I have hand drawn some cracks in the exposed plaster to add to the decayed wall appearance.

I hope you are inspired to create your own tag book.
I can envision this book being made in many different themes, for any holiday or special occasion.
I look forward to sharing the completed interior pages in my next blog post.
I have really enjoyed working on this project
 and appreciate you taking the time to stop by the blog.
~Ann


supplies:
Distress Archival Ink: black soot
Distress Collage Medium: matte, vintage
Distress Crayon: black soot, ground expresso
Distress Marker: carved pumpkin
Distress Oxide Ink:black soot
Gypsy Soul Laser Cuts:
tag book (coming soon), creepy critters, little crowns
Tim Holtz Ideaology:
adornments art deco fames, adornments halloween, halloween paper stash, foundry frames, halloween story sticks, hinge clips large, remnant rubs, worn wallpaper
Tim Holtz / Sizzix Alterations:
masquerade, spooktacular alphabet (retired), stitched ovals, stitched rectangles
Tim Holtz / Stampers Anonymous: Mr. Bones