Showing posts with label Sandra Evertson. Show all posts

Wednesday, September 25, 2019

maiden voyage


"her maiden voyage"
~Ann Barnes

on her maiden voyage
all things bright and new
the sea of unchartered waters
drew her in yet made her blue

the currents tried to pull her
swirling this way and that
but she held steady to her course
knowing things, they do not last

of the many experiences, seen and heard
the parts that she holds tight
were the simple acts of kindness
the ones that made things right

it's the inner peace that matters
the one she's always had
the faith and hope and love,
putting good above the bad

her maiden voyage has ended
she has weathered the storm
and emerged victorious
for she has found her own


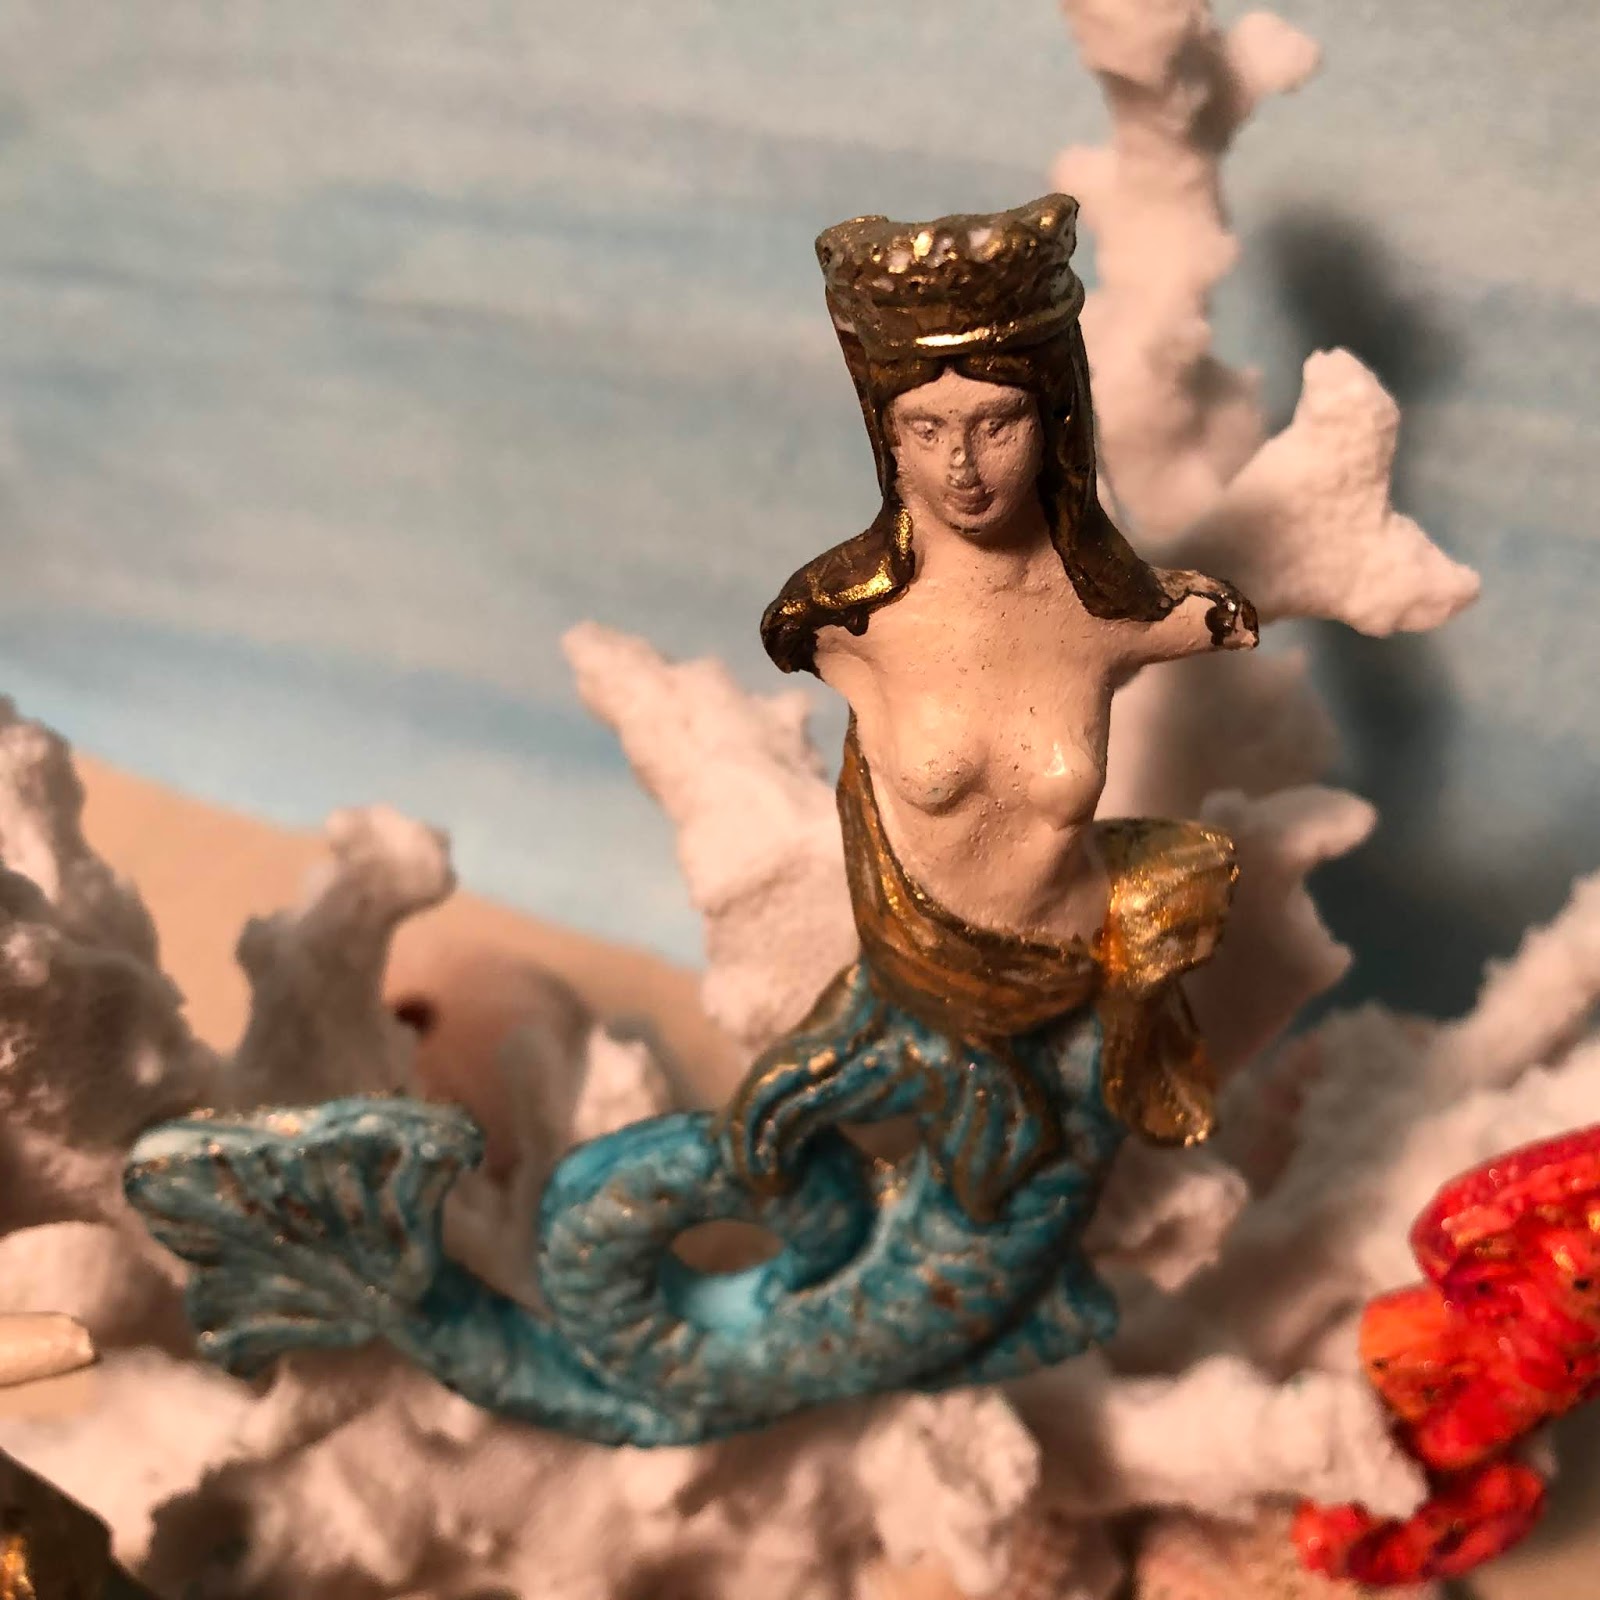
Today I am on the Relics & Artifacts Muse blog sharing a "cameo" I created with one of the pieces from the meerschaum reliquary kit, VerDay and a treasured piece of agate. 
I hope that you are able to stop by and discover my process and the inspiration behind it. 
You can get to the Muse post directly by clicking here.

My hope is for you to draw inspiration from the Relics & Artifacts blanks;
 to allow them to tell their stories through your eyes, and your art.
Thank you so much for taking the time to visit.
~Ann
  xxx

Thursday, August 1, 2019

regal residence


In the depths,
 under the sea,
reside the Queen and her King.
Long forgotten relics of what once was supreme,
they are lulled by the tides,
 at rest and now free.

Sometimes I look at a piece and am struck by an idea; the vision so clear that it is simply a matter of bringing it to life. When Sandra released the Relics & Artifacts Mermaid Set, I was fascinated by the intricate detailing and various pieces, and I was bombarded with creative ideas.
Today I am sharing the first of these inspirations, a regal residence.
I chose the coral piece as the foundation because of the stability of coral formations and the way that they stand as a protective force for the shores. A resilient residence for the Queen and her King.
The Mermaid Queen and Merman King are painted with acrylic paints with ink washes for their tails. Golden accents are added with oil based paints and iridescent inks.
Seahorses have always been a source of fascination for me,
 their myriad of colors and adaptation skills are amazing.
I wanted to create realistic looking specimens with intense color hues.
 These pieces are finished with acryic paints and various inks, then splattered with gesso. The two seahorses stand guard against intruders.
The seashell, caught within the coral tentacles,
 is inked to mimic something that may wash up on the shore.
Perhaps it hides a secret inside.
The starfish details are highlighted in gold,
reflecting whatever light finds its way to the sandy shores.


I have truly been inspired by the new Relics & Artifacts mermaid set; I look forward to creating another project with these incredible pieces.
I hope that perhaps you are drawn to create something of your own.
Thank you for spending time with me today,  I really appreciate it.
I hope you have a creative day,
~Ann
  xxx


This post was originally published on Sandra Evertson's Muse blog.

Relics & Artifacts Mermaid Kit

Thursday, May 16, 2019

sacred shrine


Today on Sandra Evertson's Muse Blog, I am sharing a sacred shrine,
my interpretation of the Relics & Artifacts Folk Art Retablo.
This is such an incredible laser cut piece with beautiful details and so many possibilities.
I hope that you can stop by to see the shrine and all of the special pieces contained within. You can get to the Muse Blog by clicking here.

My faith stands at the forefront in my life; it guides me, inspires me, and heals me.
When Relics & Artifacts introduced the Folk Art Retablo, I knew that I wanted to create a shrine to honor the Madonna, Holy Mary; and to do it in a way that would reflect the origins of the retablo and respect the style of its design....


materials:
Relics & Artifacts Folk Art Retablo
Relics & Artifacts Milagro I
Relics and Artifacts Mini Ex Voto
Relics and Artifacts Crosse Icons
Sandra Evertson Portugal Art Stamp
acrylic paints
brass nails
collage medium
crackle medium
crystal rhinestones
glass beads
jewelry findings
religious devotional items
wood glue
wood stain


Friday, March 1, 2019

Relics & Artifacts Muse - Lotus Blossom

Today I am on the Relics & Artifacts Muse blog, sharing a very special piece. 
The lotus blossom is a sign of awakening, rebirth, and enlightenment. I could not imagine a more appropriate project to begin my journey with Relics & Artifacts.


I hope that you will stop by and learn more about this fascinating laser cut lotus blossom and resin buddha from the collection. You can visit the post by clicking here.


I have included a list of supplies below for your convenience.
Thanks so much for stopping by,
I truly appreciate it.
~Ann
 xxx


supplies used:

Aleene's wood glue
DecoArt acrylic paint: dazzling metallic worn penny
DecoColor Premium gold oil based paint pens: extra fine, fine, chisel
Dina Wakley heavy body acrylic paint: penny, gilt
Distress paint antique bronze
Emerald Creek oil rubbed bronze embossing powder
Folk Art acrylic paint: brushed metal brushed bronze
gold gilding wax
 Minwax stains: golden oak, provincial
miscellaneous jewelry findings: headpins, gold chain
miscellaneous wooden beads
Ranger embossing ink dauber
Relics & Artifacts Deity Trio
Relics & Artifacts Lotus Blossom


Monday, August 27, 2018

MUSE of the deep - Relics & Artifacts MUSE guest ambassador post

Hi everyone, today I am honored to share with you that I have a guest ambassador post
on the Relics & Artifacts MUSE. I have always been awed by the beauty and incredible detail of Sandra Everton's pieces, and when I see the amazing artwork her deign ambassadors create with them, I am transported into the most magical of places. I hope that I am able to capture your imagination with my "MUSE of the deep." I am eager to share many more details and my step by step on the Relics & Artifacts Muse, you can access it by clicking here.


I am ever so grateful for the confidence that Relics & Artifacts had in me, allowing me this opportunity to create as a guest ambassador. This is the realization of a long time dream; it will most definitely always be a cherished experience.
Thank you for stopping by, I hope that you are able to hop over to R&A to catch all the details.
~Ann

List of supplies:

Sandra Evertson Relics & Artifacts: Coquille

alcohol ink: denim, mermaid, sailboat blue, stream
anita's all purpose pearl metallic craft paint
blank page muse stamps: vintage wavy banner line art rubber stamp
catherine moore character constructions stamp: she sells seashells #7
decocolor premium metallic oil paint marker: gold
distress ink: antique linen, crushed olive, faded jeans,
forest moss, gathered twigs, mowed lawn,  peeled paint
distress oxide ink: peeled paint, forest moss
distress paint: weathered wood
dciv mercury glass metallic foil cardstock
emerald creek/seth apter baked texture: dirty sand
gansai tambi watercolors: starry colors
mona lisa gold leaf
sizzix/tim holtz alterations: funky florals 1 & 3, garden greens
sizzix/tim holtz 3d impresslits: provincial mini
tattered angels verdigris glimmer mist
tim holtz ideaology: baubles, paper stash metallic kraft, vignette box
yupo paper     

Wednesday, April 4, 2018

frida kahlo shrine

Hi everyone, today I am on the Gypsy Soul Laser Cuts blog,
sharing this shrine I created to showcase some stamped images that I love.
It all begins with a Gypsy Soul Laser Cuts altoids tin book cover. This piece arrives in three, flat pieces. You can recycle a tin to use inside or find one in your local craft supply store. Being a wintergreen Altoids lover, I will be using one of the plentiful empty tins from my stash.
I know I will be using a stamped image on the cover of the "book" so I add a light coat of white paint to one side of and allow it to dry. One thing I love about the Gypsy Soul Laser Cuts is that they are very dense chipboard, and they accept all kinds of medium very well, especially paint. I will be using paint to color the stamped image, so I make sure to clear emboss it after stamping. The stamp I am using is Creation by Sandra Evertson from RubberMoon. There are four portals in this series and they are all fabulous. I chose this one because I will be cutting a hole in the center to allow the interior to be seen when the shrine is in the closed position and I can easily cut out the shape of the opening that this portal has.
Although the chipboard is dense, it can still be cut using an Exacto knife. The best way to get a clean cut is to make your initial line and then go over it as many times as necessary until you have cut through. Be sure to use a sharp/new blade. It may also work with a steel rule die; but since I was working within this portal I felt that hand cutting would be best. The next step is painting the pieces. I use a combination of acrylic paints, the main turquoise color is Deco Art Americana acrylic paint in Laguna. All of the pieces are painted on both sides. The other colors used are from an artist set of acrylic paints. I mixed different colors to create the hues that I was looking for and painted the stamped image. 
While I have the paints out, I also paint the tin that will be glued inside. For this I use the same Deco Art Laguna acrylic, and paint the inside with a coat of black. while that is drying, I die cut the greenery pieces using the Tim Holtz Tropical dies by Sizzix.
The focal point of the shrine is Alma another Sandra Evertson stamp by RubberMoon. When I began the piece, I was not sure if she would be situated behind the greens or in front. For this reason, I initially cut a piece of watercolor paper to fit within the tin. I stamped and clear embossed the image, then using distress ink, colored around her. I ultimately decide to locate her in front of the greens. This requires fussy cutting the image once it is completely colored.
 Since I am not using the lid on the tin, the spine width is a bit too wide. I measure the width that I want the spine to be, and cut it to that size. This narrower spine allows the top to rest on the tin when it is in the closed position. To create the hinge for the shrine "book", I use washi tape. I cover the tape with a coat of paint so that it is not noticeable when the shrine is in the open position. I add a few die cut palm leaves to add interest on the inside of the spine, as well as additional camouflage for the hinge.
Now it is time to assemble the remaining pieces. I locate the tin so that it is centered within the opening on the front panel, for a clear view within, when the "book" is shut. I mark where the tin corners need to be and use a strong adhesive to attach the tin to the back plate. I allow this to dry overnight before adding any embellishments.
 Then I add die cut fronds around the outside edges of the tin, as well as some tropical flowers. All of these pieces were cut using the Tim Holtz Tropical thinlet dies by Sizzix.            
               
                                       
For the spine, I cut a piece of green card stock a bit smaller than the thickness of the assembled "book" and using the Tim Holtz Leafy embossing folder, created a textured strip. I apply glue only to the flat center piece of the "spine"and attach the strip. This will allow the hinged areas to work freely while the decorative strip remains in place. 
I cut a label from natural paper and use small alphabet stamps to stamp "FRIDA". I ink the edges of the label with Distress Ink in peeled paint and crushed olive. This is attached to the top of the front panel with foam adhesive and two small, layered flowers are adhered at either side. 
 I love the depth I was able to achieve using the Altoids Tin Book Cover, and especially like that it can be opened and admired from a different perspective as well.  
That's all it takes to create this Frida Kahlo Shrine.
Thanks so much for taking the time to visit my blog,  
I hope that you are inspired to create something.
~Ann


Be sure to share your Gypsy Soul creations with us on the Gypsy Soul Laser Cuts Craft Group on Facebook. We would love to see what you are up to!