Showing posts with label halloween. Show all posts

Monday, October 24, 2022

hallo(DEX)ween collaboration for StencilGirl®

It's an All Hallows' Eve Masquerade at Lost Souls Garden and the guests have traveled from near and far to join in the fun!  Follow along as I introduce you to everyone...  
For this collaboration project, we were each asked to create a Halloween themed piece using StencilGirl® stencils and a chipboard roloDEX tray and cards by UmWowStudio. We were to use any other supplies we wished for the theme, and to let our imaginations take us where they may. The pieces created by each artist are truly wonderful, each a unique representation of the artists' style. It is definitely worth a hop over to the StencilGirl® Blog to check them all out. You can click here to visit.

Now, onto the details for my All Hallows' Eve Masquerade Attendees inDEX.
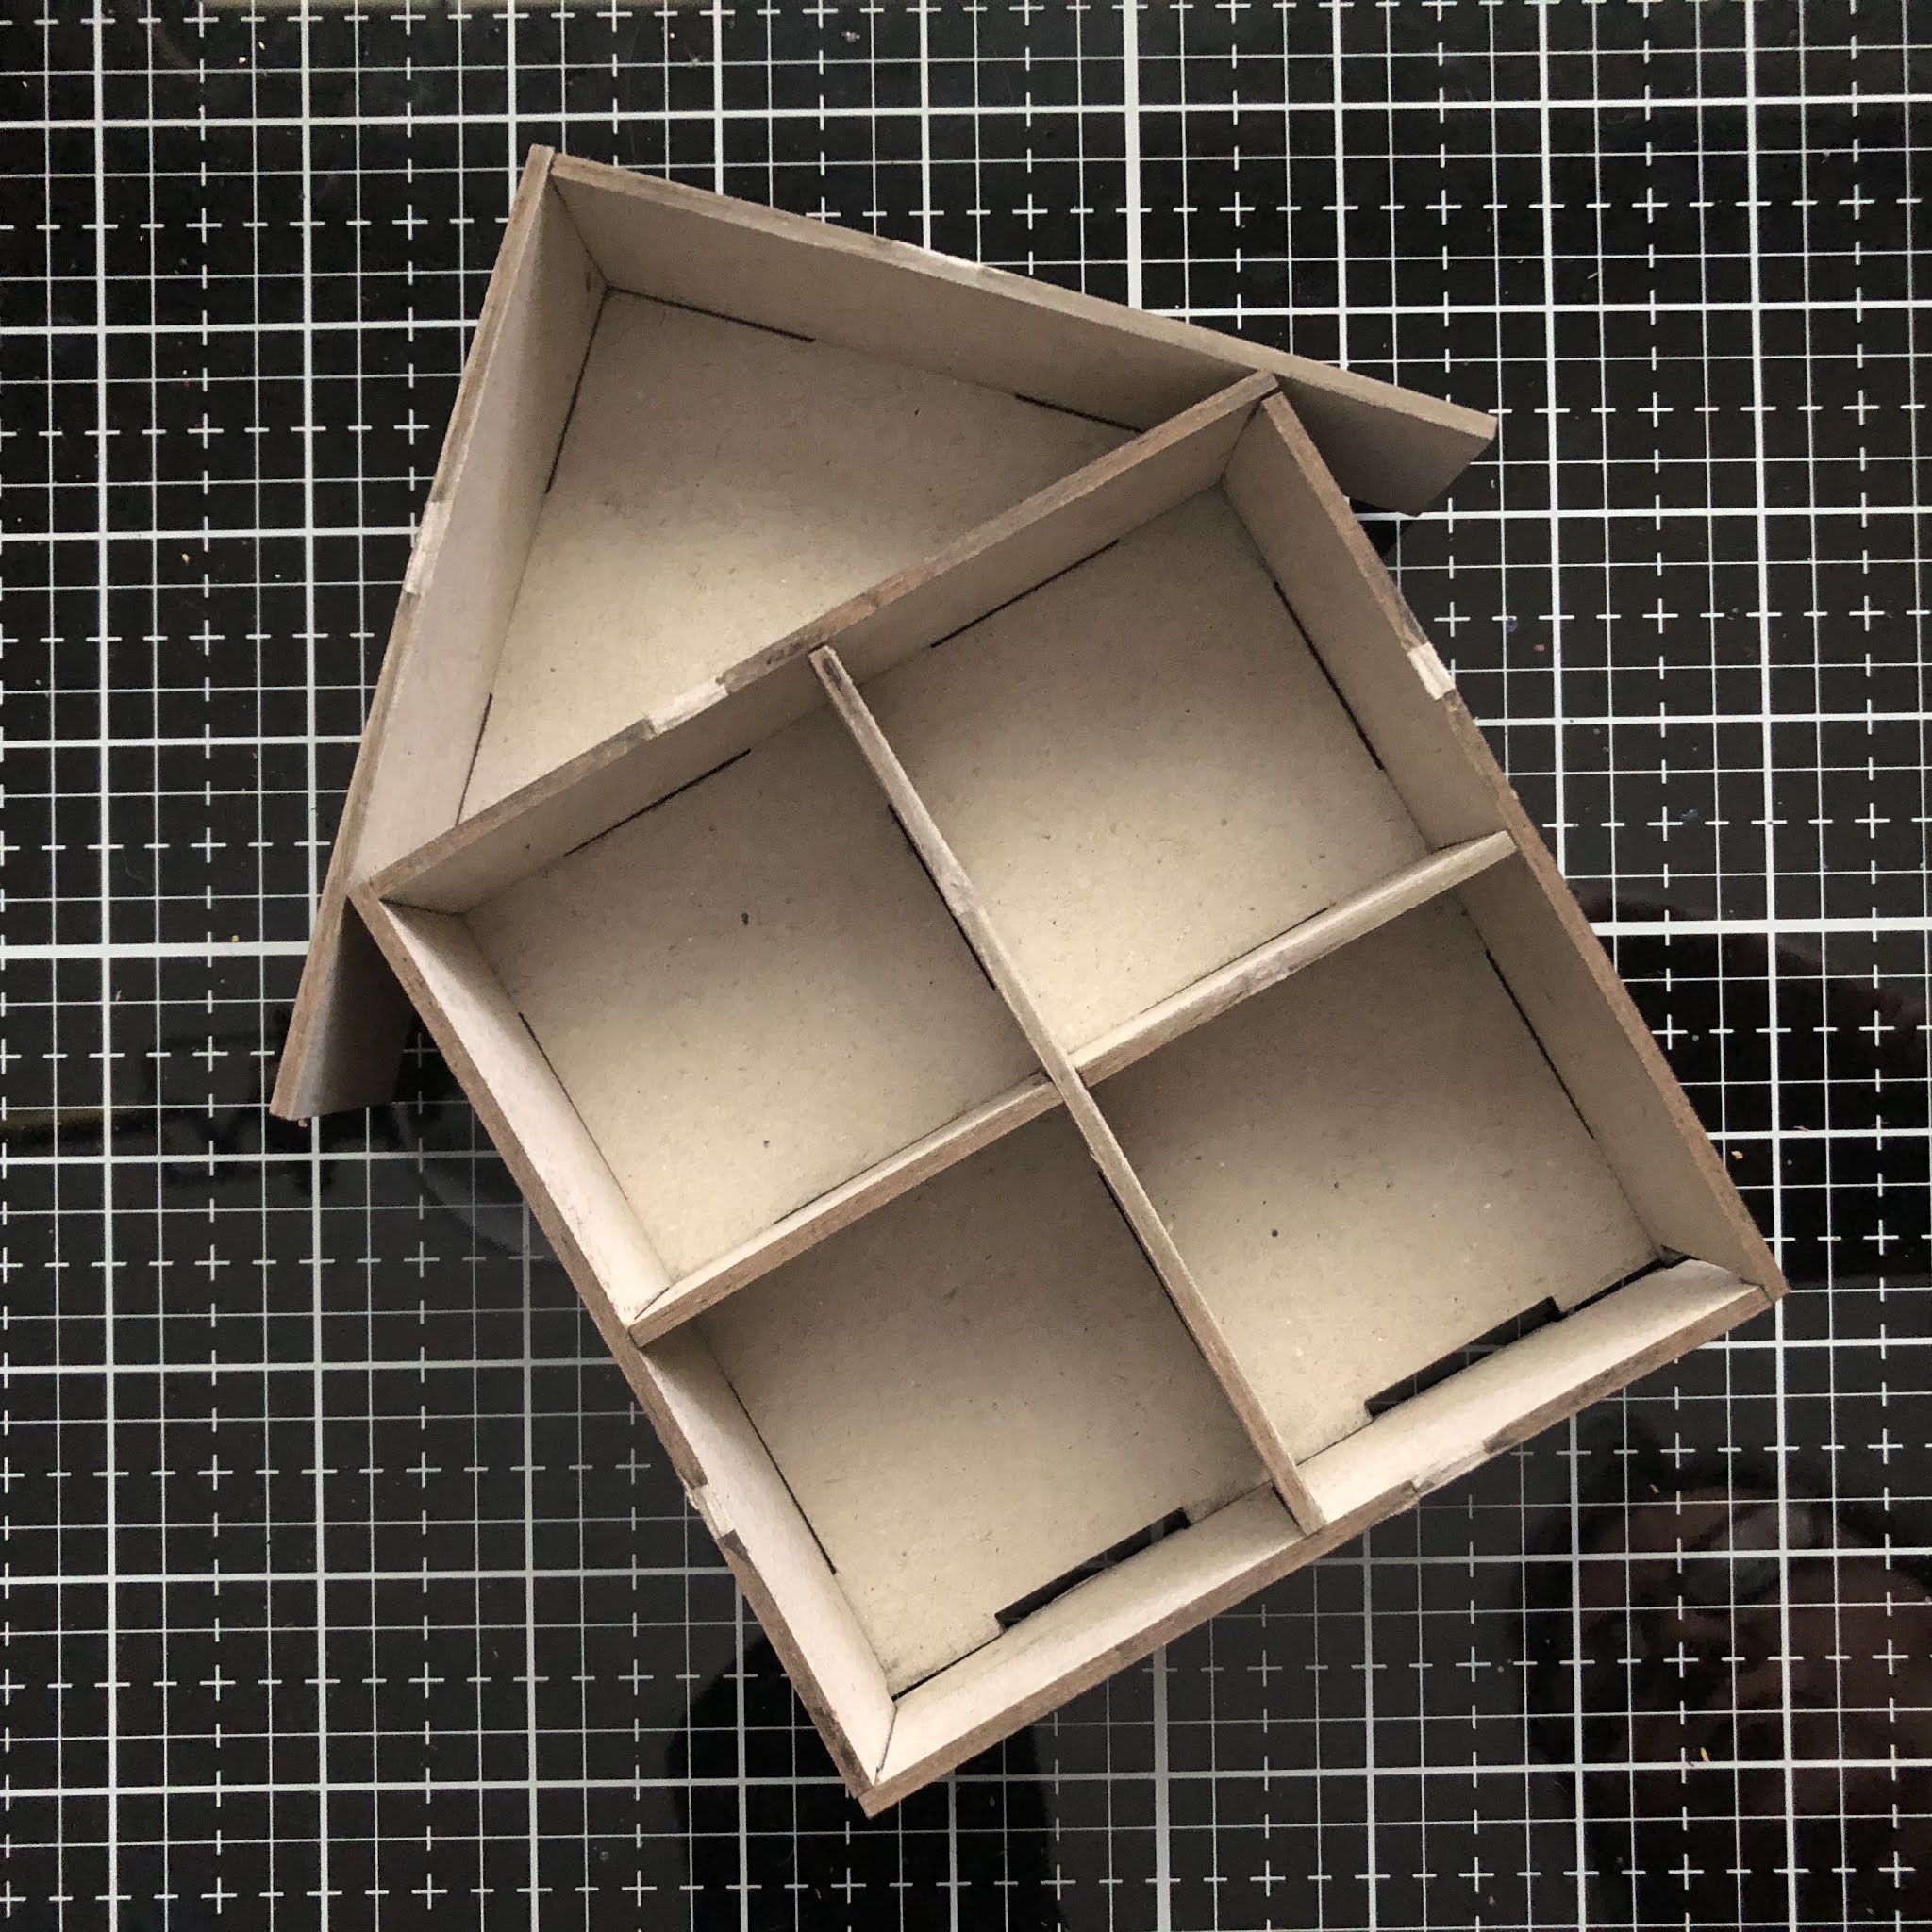
I began by assembling the tray, using glue to secure the pieces in place. Once dry, I spray painted the base tray black. The exterior sides were covered in backdrop paper (by Tim Holtz). Next, I traced the Botanical Wildflowers stencil (L774) onto black paper and cut out the pieces by hand. These pieces were then glued onto the outside of the tray to create the "garden." An inked Idea-ology quote chip and resin skulls (for feet) were added to complete the base tray. 
With the base tray complete, it was time to begin creating the cards that would fill it up. I wanted to create a garden gate to welcome all of the guests. Using a retired Tim Holtz Sizzix die, I cut two Gothic Gates out of heavyweight paper and adhered them together leaving the bottommost edges separate. the two bottoms were then glued to either side of a painted spine that would slide onto the DEX rails. Tiny type uppercase die cut letters were used to form the words Lost Souls Garden, and Golden bronze irridescent paint highlights were added. 
To further create the setting, I added a spooky moon with bats and shadowed vines. Using a half circle tall card, I painted a base layer of Golden bronze iridescent, then stenciled the Linear Textures (L857) vines with black gesso. The bat confetti pieces were painted with gesso then glued onto the "moon".
The next piece we encounter is the Masquerade announcement, an altered Idea-ology baseboard frame. The highlight of the announcement being the reverse side, where I used the Botanical Wildflowers (L774) mask and lightly applied the Golden bronze iridescent paint around it, creating an ethereal appearance.
The line up of attendees begins with the Forsaken ones, Alice and Herman. Each of these lost souls were abandoned at an early age; neither have been able to find their soulmate. They have both donned their fineries in the hopes of finding someone special at the event. The halos for both of the Forsaken were created using the Beautiful Halo (S543) stencil, with modification. 
Henry, the Undertaker, wears his majestic wings. Having to spend all his days with the dead, he looks forward to meeting up with other souls at the Masquerade. Henry's halo features the Beautiful Halo (S543) stencil, he also has a special detail on his lapel using a stencil from ATC Mixup Missigman #2 (L793).
The Gypsy, Madam, has traveled the world, oftentimes being called a weaver witch. Madam is always on the lookout for unique fabrics and fibers with which to weave her wonderful textiles. She has been known to cast spells through her complex weavings. Faithful Halo (S545)  creates the perfect backdrop for this attendee, whose woven skirt was made using the DEX weaving frame.
The Apothecary has volunteered to utilize his formulation skills and serve libations at the Masquerade. Clyde fancies himself a concoction connoisseur. He has a modified Faithful Halo (S545) to highlight his dapper attire.   
The next attendee is Palm Reader, Rosalie. When she is not reading palms, she can most often be found reading tea leaves, her true passion. I modified the Beautiful Halo (S543) stencil to incorporate some Botanical Wildflower (L774) stencil parts reflecting her talents. Rosalie's dress has an overlaid pattern from ATC Mixup Missigman #1 (L792)
The last Masquerade attendee in the tray is the Fortune Teller. Everett has his secured his future by predicting others'. Growing up, his favorite pastime was creating stories for his peers of where their futures would lead. After learning that many of his predictions became reality, Everett accepted his extra sensory abilities and decided to make a living from them. Lost souls are his favorites to work with. Faithful Halo (S545)
The final piece in my project is another Idea-ology Baseboard frame featuring the poem Night. The reverse side has been treated with the same technique used on the announcement, highlighting the Botanical Wildflowers(L774) mask. 
I truly enjoyed creating each of these pieces, and look forward to adding more. Working with the roloDEX system is addictive and playtime with StencilGirl® stencils is never ending fun.
It is always a pleasure to be part of Tina Walker's StencilGirl® Collaborations, and this Halloween themed project was no exception. I hope you can stop by the StencilGirl® Blog to check out all the awesome projects that were created! 

Thanks you for visiting my blog today, I truly appreciate it.
~Ann

StencilGirl® stencils used:

Botanical Wildflowers (L774) by Rae Missigman

ATC Mixup Missigman #1 Art Marks (L792) by Rae Missigman

ATC Mixup Missigman #2 Botanical (L793) by Rae Missigman

Faithful Halo (S545) by Pam Carriker

Beautiful Halo (S543) by Pam Carriker

Linear Textures (L857) by Lucie Duclos

UmWowStudio roloDEX used:

half circle tallhalf tabbed, spines, standard cards, weaving frame, roloDEX tray


Tuesday, October 27, 2020

morbid manse


Hello everyone, today I am sharing my October project for the Gypsy Soul Laser Cuts blog. I could not let the month go by without a project befitting the spookiest of holidays. Imagine a foggy, moonless night in Old Salem. Adjacent to the rows of tombstones and monuments stands a historic manse. The door is ajar, why not take a peak... what's inside is absolutely morbid.
I begin with a Gypsy Soul Last Cuts mini house room box. Using an exacto knife, I cut apart wall, roof and divider pieces. As usual, I do a test fit to understand how all the pieces fit together. Then, using acrylic paint, I add paint along all the edges and at areas where pieces join together. This allows me a bit of play when I am cutting and attaching papers into the sections (if a paper cut is slightly off, the gap does not show). The "attic" area is covered completely with the paint. Since I want it too look like an unfinished attic space, I will not be covering any of these surfaces with paper.
When the paint is dry, I assemble the house. Applying a thin line of glue along the edges and tabs, I then secure the pieces in place. Sometimes it helps to clamp the pieces while drying. When the piece is assembled and the glue is dry, it is time to add the details. I begin with the outside of the house.
Using a die that cuts different styles of shingles and shakes, I select a style to use for the main exterior clapboards. I cut rows of siding from blackout kraft cardstock, then lightly sand and ink them to create an aged and weathered appearance. I begin adding the die cut pieces to the house, working from the bottom up so that the shingles can overlap and stagger mimicking traditional siding. Work on row at a time all the way around the three sides before moving onto the row above. 
I have always admired the special details that are found on historic houses. I thought it would be fun to add a section of fish scales in the upper gabled area. Before switching patterns, I add a frieze (trim) board across the rear to transition to the new pattern. When the fishscale shingles are all in place, I add trim boards along the angled edges to finish the look. The roof is completed in the same manor as the exterior walls, but using heavyweight kraft paper inked with distress ink.
Now it is time to finish the interior rooms. I select papers that give the look of historic wallpapers and plaster. Each "room" is finished in a different paper. Measure and cut a square for each rear wall. Then, cut a strip of matching paper that will cover both the side walls and the ceiling. When papers are cut for each room, ink all of the edges with a dark brown or black ink. 
To add an element of authenticity, create "cracks" by tearing into the paper and inking the torn area. You can also create the appearance of leaks within the walls by dripping dark ink down the wall sections.
The "wood" floors of each room are made by cutting pieces of woodgrain embossed paper that's been inked and and painted. All of the papers are attached to the surfaces using collage medium.
In keeping with the undertaker theme, I decide to give each room its own function that would be found in a funeral home. Starting with the attic, I adhere small pieces of hay randomly on the floor where a skeleton lies. The only remains of a long forgotten guest from years ago. 
Located on the second floor is a mourning room,  complete with prayer candles. An area to gather and contemplate lost souls. 
Adjacent is a store room for found objects; misplaced parts and pieces.
The selection room can be found on the first floor. Here you can find items for all your funeral needs- from flowers to urns and caskets. 
The undertaker's office completes the tour.
Two tiny eye hooks are screwed into the gable to secure a hanging sign. The undertaker is open for business, established 1876.
I hope you have enjoyed this haunting holiday make, perhaps you are inspired to create one of your own. If you've run out of time, consider making a house for a different holiday. I can imagine a wonderful Christmas inspired elf's workshop, or an easter egg factory. The possibilities are endless with the GSLC mini house room box.
Thanks so much for stopping by today, I truly appreciate it.
Enjoy these hallowed days.
Ann
xxx 
supplies used:

Gypsy Soul Laser Cuts used: mini house room box 

Distress products: collage medium, inks, paint, blackout kraftstock, 

Tim Holtz Sizzix Alterations: village rooftops Bigz die.halloween mixed media (bats), 3D embossing folder lumber

Ideaology & Ideaology halloween products: paper stash, resin pumpkins, skulls, cameo, mini vials, quote chips, clippings stickers, charlotte, ephemera, snippets, industrial trims (discontinued)

misc. halloween plastic skeleton pieces, stretchy skeleton, dried flowers, pine needles, twine, faux spider web, hot glue gun, hay 


Wednesday, October 2, 2019

open if you dare


October is finally upon us; for a lot of people, that means a Halloween crafting frenzy. I am joining in the fun today, sharing a fancy fold Halloween Card design for Gypsy Soul Laser Cuts.
I love making these types of cards, they are so fun to open and discover all that lies inside, and the design allows for many opportunities to incorporate all sorts of holiday ephemera. 
Let's get started.
To create the card base, you will need a square piece of paper. For this card, I have used a 12x12 sheet of black cardstock. The piece is folded into quadrants and then, using a bone folder, I ensure the creases are sharp. Next, open the sheet to a flat position and fold the entire square in half, diagonally. Use the bone folder to ensure a crisp diagonal fold and then flatten the sheet once more. The card base is ready to be adorned.
Using some of my favorite decorative papers, I cut a 6x6 square panel that will be attached to the card cover. I build my scene on this paper and set it aside. It is important to note that I set this aside and always attach the cover panel last. This allows me to attach fasteners through the card base that can be concealed. I also find that creating the cover panel first, allows me to set the tone and theme that can then carry throughout the interior. Since the cover is not attached, I can refer back to the design without having to open and close the card multiple times. Most importantly, as many of you know, I love making the cover dimensional, when the panel is secured in place the open card does not lay flat. It is much easier creating the interior when it is flat, thus not crushing the cover design. 
The focal point on the cover of my card is one of the houses from the Gypsy Soul Laser Cuts haunted houses set paired with "frightful" from the Halloween word set. The haunted houses set come with three different designs, I paint both sides of the house I am using with black soot paint. Once dry, I coat the front side with Deco Art one step crackle and allow it to work its magic. Once the crackled finish is completely dry; to accentuate the crackle and dull some of the shine, I rub distress crayon in fired brick and gathered twigs over the surface and into the cracks. 
I color a piece of vellum with fossilized amber distress oxide, spritz with water and allow to dry. I use this vellum to fill the window openings. From the back side, pieces sized to cover the entire openings are adhered with collage medium around the window opening edges. 
I carefully remove the word "frightful" from the Halloween word set. This set contains five Halloween words, each in a different font. "Frightful" is an extremely delicate font, use extra caution when removing this from the surround. Once I have removed the word, I use use twisted citron distress oxide ink to add color to the chipboard. I add the ink in layers, allowing to dry in between each coat to give the word a wonderful intensity of color. I then coat the colored word with glossy accents, to add stability and shine. I set the coated word aside to dry completely.
While the glossy accents is drying, I am able to work on the background. Using a die, I cut random patterns of stars from the top of the square. I color a 6x6 square of mixed media heavy stock with layers of twisted citron distress oxide, distress ink, and distress spray stain. When I achieve the desired look, this piece is layered beneath the decorative paper. The beautiful layers of twisted citron show through the star die cut openings. I adhere the haunted house piece to the background with distress collage medium and set weights on it until the collage medium is dry, to keep it flat. 
The two bats from the black creepy critters set are added to the starry sky, in addition to a die cut crescent moon face. Once the cover design is complete, The fully dried frightful word is adhered to the house front with collage medium. As I mentioned before, the completed cover piece is set aside while I work on the card interior.
The fancy fold card interiors can be as simple or complex as you desire. Keeping with the Halloween theme, I used some colored Ideaology paper dolls, masquerade die cuts, quote chips, halloween remnant rubs, clippings stickers, and incorporated the remaining pieces from the black creepy critters set among the panels. There are no limits to designing the fancy fold interior. 
One thing to note is that when attaching pieces to the triangular folding panels, only attach a piece that spans both panels onto one of the triangles. This way, when the card is folded closed, the extended pieces will not impede the process and can remain flat. If necessary, you can always test out the design with removable tape to be sure everything functions properly before doing the final gluing. The pictures above show how the paper dolls are only attached on one of the triangular panels. The picture on the right shows how the children were only attached on the base triangle for the quadrant while the gentleman was only attached to the upper triangle.
Here are some pictures of the inside panels. 
These cards can become a bit thick when you add a lot of layers inside. I like to wrap the base with a coordinating ribbon that can be tied together to keep the card closed (for mailing or storage.) I attach this ribbon to the card base cardstock before I add the cover and back panels. The ribbon is completely concealed, except for the lengths to be tied together.
  I hope that you have a wonderful October, filled with creativity.
Thank you so much for stopping by today, 
I truly appreciate it.
~Ann
 xxx


supplies:
DecoArt One step crackle
Distress Archival Ink: black soot
Distress Collage Medium: matte
Distress Crayon: fired brick, gathered twigs
Distress Ink: black soot, twisted citron,
Distress Oxide Ink: fossilized amber, twisted citron
Distress Paint: black soot
Distress Spray Stain: twisted citron
Gypsy Soul Laser Cuts:
Black Creepy Critters SetHalloween Word SetHaunted Houses Set
Tim Holtz Ideaology:
abandoned paper stash, halloween clippings, halloween remnant rubs,
halloween ancestors paper dolls, clippings stickers, crinkle ribbon, halloween quote chips,
creepy eyes, sticker book curiosities, tiny attacher
Tim Holtz / Sizzix Alterations: spooktacular alphabet, masquerade, witchcraft, stacked label,