Showing posts with label Sizzix. Show all posts

Tuesday, November 24, 2020

documenting december

 Hello everyone, I can hardly believe that we are nearing the end of November. When the pandemic hit, it seemed as though all of the months started blurring together, and before I knew it, six months had passed, then seven, etc... I've heard a lot about how people like to do daily journal entires for the month of December, helping them to stay focused on the joys of the season and allowing them to highlight and appreciate some of the important moments. I think this year, more than ever, this will be a valuable exercise. For this reason, I have created a December journal.

Today, I am on the Gypsy Laser Cuts blog sharing the journal I made for "documenting December." I start with a die cut journal base made from the Eileen Hull Sizzix Journal die. I cover the die cut pieces with some of my favorite Tim Holtz holiday papers and use a bunch of Gypsy Soul Laser Cut chipboard pieces as embellishments inside. There are so many different Christmas and holiday chipboard pieces in the GSLC shop to choose from. This post will highlight some that I use in this journal.


On the cover, I add an altoids tin topper 1 piece in each corner. I love how the design of these pieces plays off the paper pattern. For these pieces, I coat one side with Versamark embossing ink and then randomly sprinkle Distress embossing glaze in rustic wilderness onto the ink. The embossing powder melts when heated. To give it a grungy look, I sand off areas of the glaze, allowing the chipboard to show through. If you happen to add to much powder and are not happy with the shine, you can use a piece of steel wool to dull the finish. Its best to only add the embossing to one side of the piece, this will allow you to easily secure it to the cover with craft glue.
Inside the journal, the "signatures" are made from mixed media heavyweight paper and cut to size. Using a heavy weight paper will give me freedom to add different mediums to the pages. I stamp numbers into the corner of each page to correlate to the days of the month. I do not sew the signatures together, leaving them free to be removed. This will allow me the flexibility to journal, paint, stamp or draw onto the page without worrying about dirtying up any other pages. When I complete that day and it is completely dry, I can simply slip it back into place. I add some additional vellum sheets to the signatures for interest.
I use one of these vellum pages to showcase the GSLC believe Santa. After carefully removing the piece from the surround, I paint the chipboard with black soot Distress paint. Once the paint is completely dry, I use a silver leaf metallic paint pen along the outermost edge to highlight the figure and deer in the night sky. I attach the upper portions of some house die cuts along the bottom edge so that Santa can soar above the rooftops.
The Christmas shape set contains so many fun pieces that are perfect for embellishing the journal pages. I use various colors of Distress paint to add details to the pieces. Festive holiday lights stretch across the top of one of the pages. Each painted bulb is glued to the page and then I add the "wire" by drawing a curvy line between the bulbs so that they appear as if they are a string of lights, all connected to each other.
The stockings from the Christmas shape set can be decorated to look any way you chose. I opt for a simple approach by only painting the bottom portions with candied apple Distress paint. A very fine burlap string allows the three stockings to be "hung" across the page. You can also add stamped images or a monogram to really personalize the look.
I prepare a number of extra pieces that will be incorporated as I fill the journal. The smallest trees from the pine tree shape set are some of these pieces. I think it will be fun to add one when documenting the day we select our Christmas tree, as well as when we decorate our tree. These pieces are prepared by painting them with a coat of rustic wilderness Distress ink. If the weather is snowy on the day we pick out the tree, I may add a bit of grit paste to the branches or maybe even sprinkle some blizzard embossing powder onto the tips of the pines. The best part of having prepared pieces is the ease with which they can be added when the time is right. With December being such a busy month, being prepared will allow more time for other things as well as make it easier to create fantastic pages in minutes.
I intentionally leave many of the journal pages unadorned. This allows me the freedom to add notes, artwork, stamps, or even tags where I want. The GSLC small tag set is the perfect size to add into the journal. The set comes with ten (10) small tags. I make up a handful to coordinate with my journal. On one side of the tags, I attach a piece of holiday paper with collage medium. The edges of the paper are trimmed to fit the tag. I punch a hole in the decorative paper at the location of the existing hole in the tag, and insert a 3/16" colored eyelet. The reverse side of each tag is simply inked to allow for the addition of  notes or a picture. These will definitely come in handy when I begin documenting December.
Another piece that I have painted and am keeping handy is the layered frame carlon. This can frame up a neat saying, some ephemera, or maybe even a mini Santa pic! 
Maybe you are inspired to create your own December journal; Gypsy Soul Laser Cuts has a wide variety of pieces that would work perfectly for adding special touches to your pages. I know that I am looking forward to documenting December and being able to appreciate the little things each and every day.
Thank you so much for stopping by the blog today, I truly appreciate it. If you live in the United States, or celebrate Thanksgiving, I wish you and yours a day filled with gratitude and love. I will be back in December with my last Gypsy Soul Laser Cuts project of the year.

Be safe and take care,

Ann

xxx  


Gypsy Soul Laser Cuts used:

Altoids tin topper 1Believe SantaChristmas shape setLayered frame Carlon

Pine tree shape setSmall tag set

other supplies:

Distress paints and Inks

Eileen Hull / Sizzix Travel Journal Die

Tim Holtz Ideaology Christmas Paper Stash

Strathmore Mixed Media paper

Vellum

Distress Collage Medium: matte

Craft glue

Elastic cord 


Tuesday, October 27, 2020

morbid manse


Hello everyone, today I am sharing my October project for the Gypsy Soul Laser Cuts blog. I could not let the month go by without a project befitting the spookiest of holidays. Imagine a foggy, moonless night in Old Salem. Adjacent to the rows of tombstones and monuments stands a historic manse. The door is ajar, why not take a peak... what's inside is absolutely morbid.
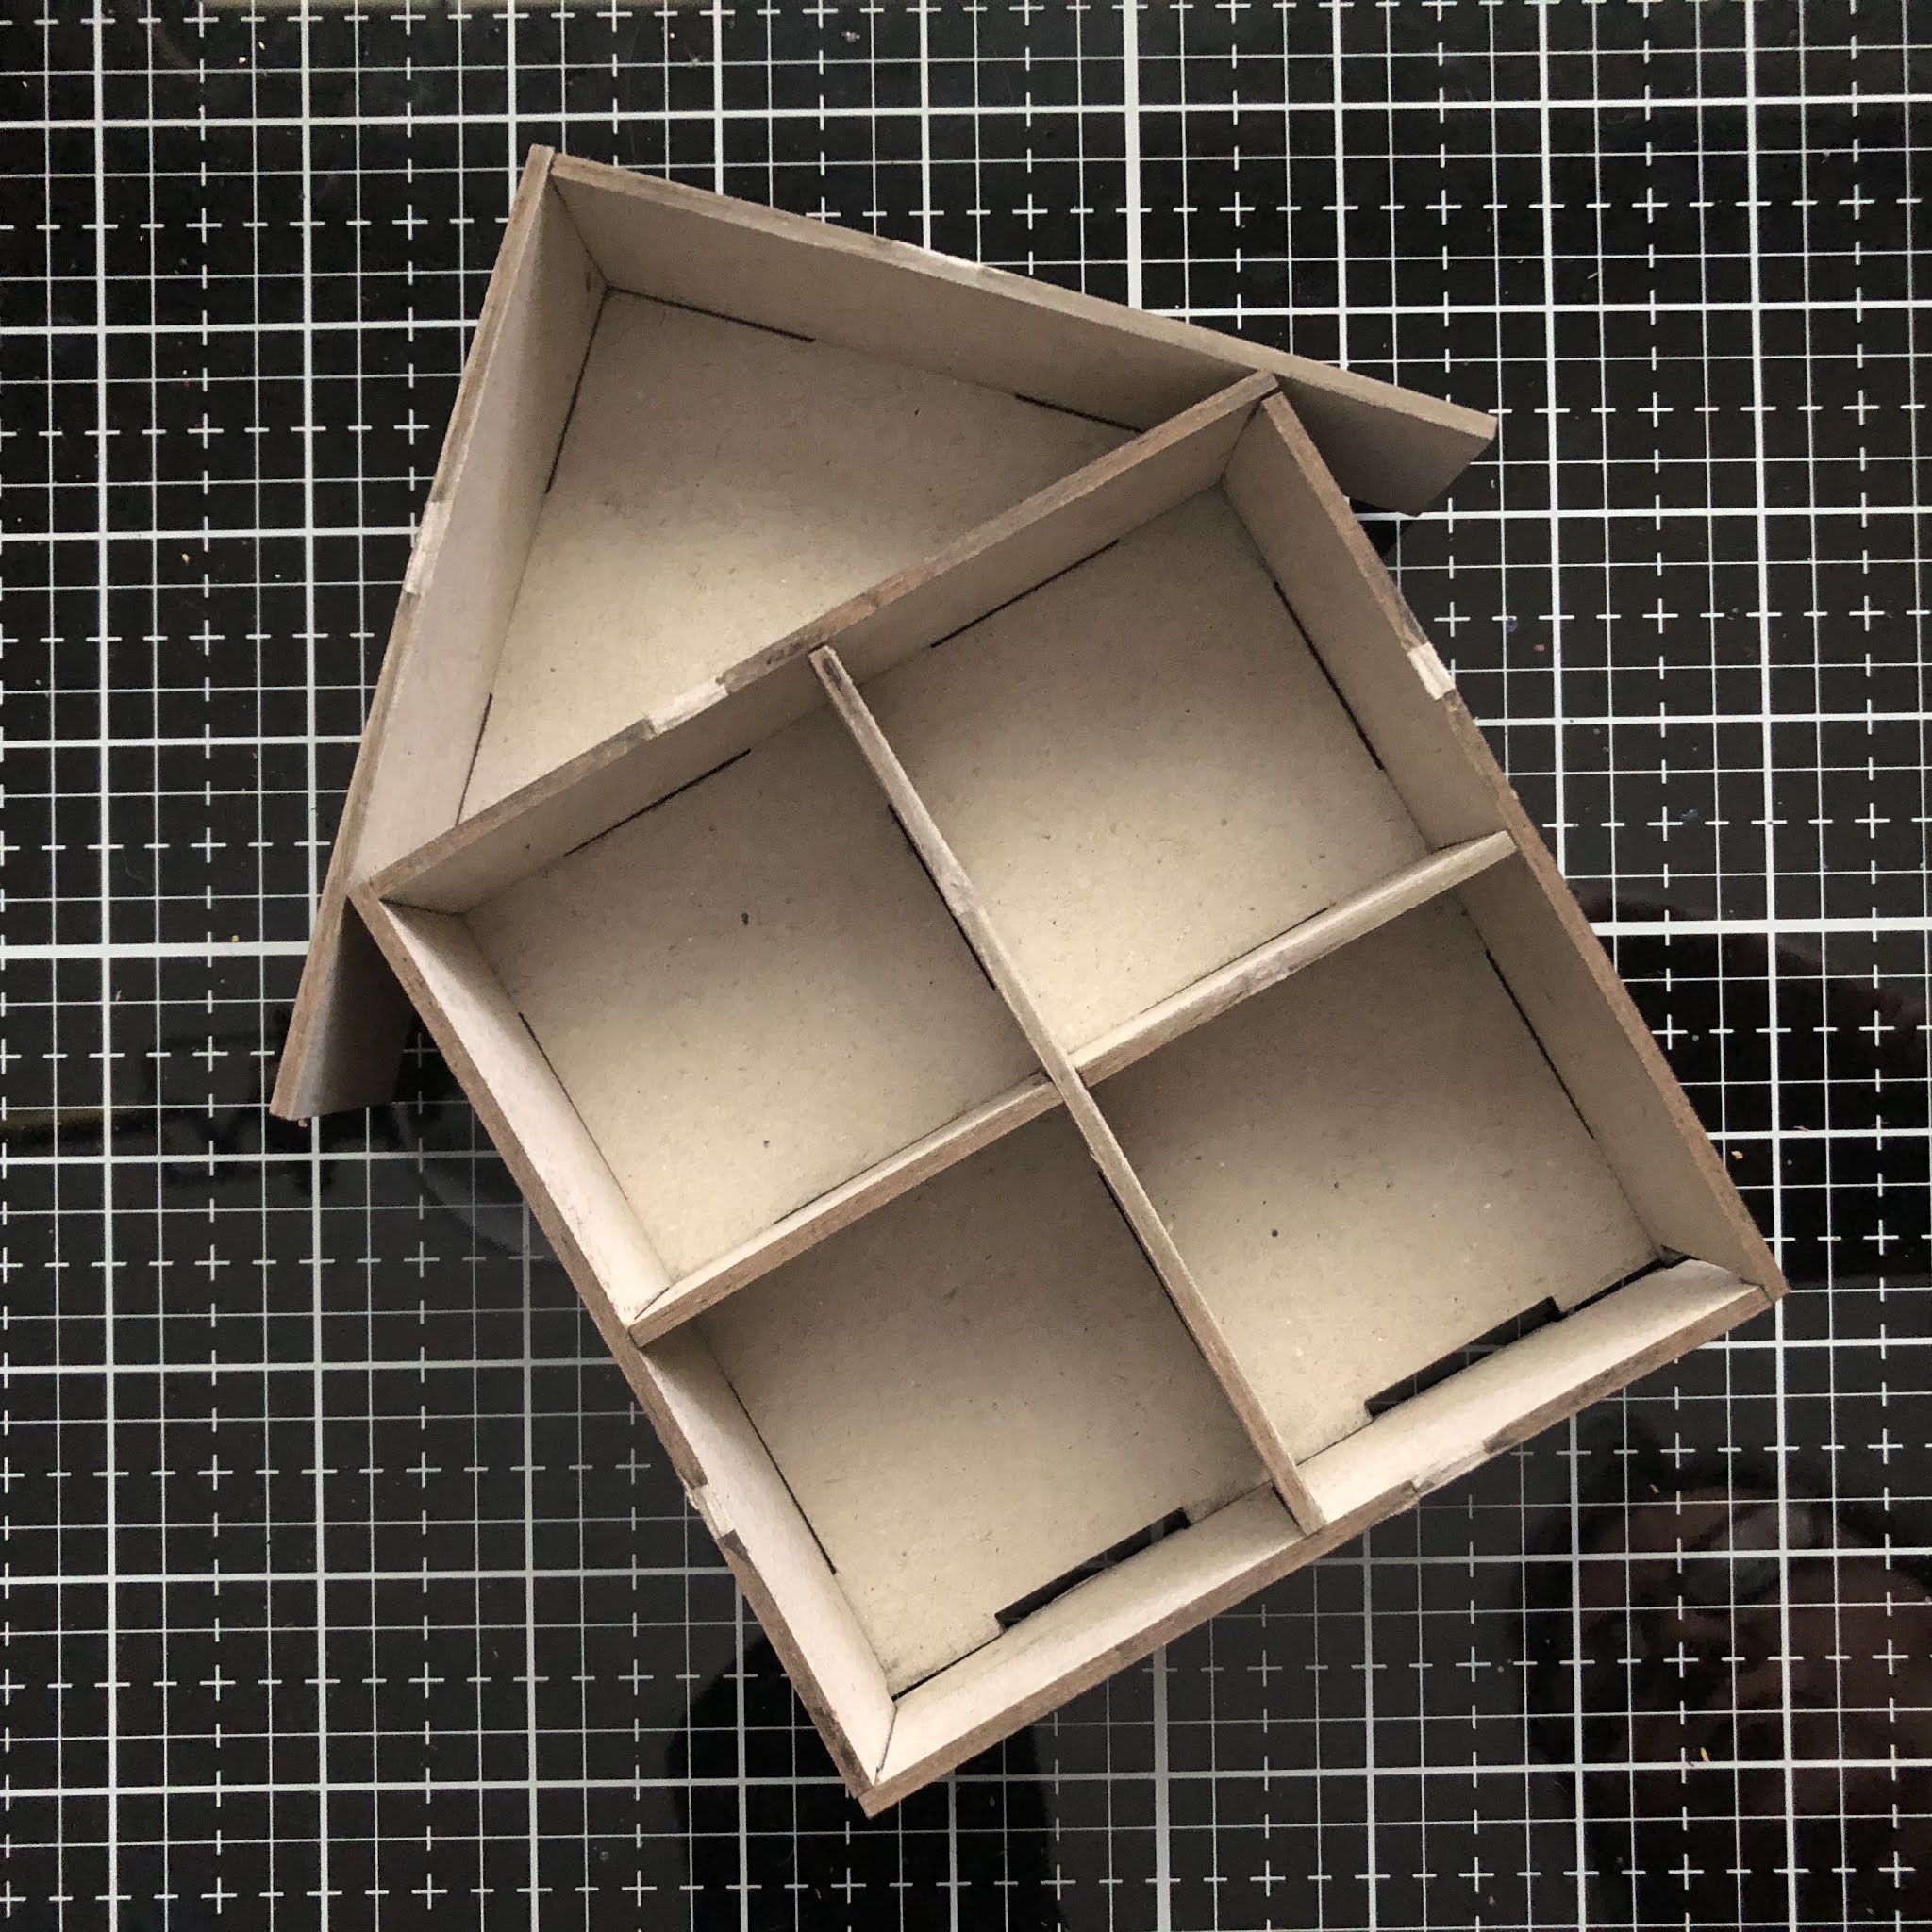
I begin with a Gypsy Soul Last Cuts mini house room box. Using an exacto knife, I cut apart wall, roof and divider pieces. As usual, I do a test fit to understand how all the pieces fit together. Then, using acrylic paint, I add paint along all the edges and at areas where pieces join together. This allows me a bit of play when I am cutting and attaching papers into the sections (if a paper cut is slightly off, the gap does not show). The "attic" area is covered completely with the paint. Since I want it too look like an unfinished attic space, I will not be covering any of these surfaces with paper.
When the paint is dry, I assemble the house. Applying a thin line of glue along the edges and tabs, I then secure the pieces in place. Sometimes it helps to clamp the pieces while drying. When the piece is assembled and the glue is dry, it is time to add the details. I begin with the outside of the house.
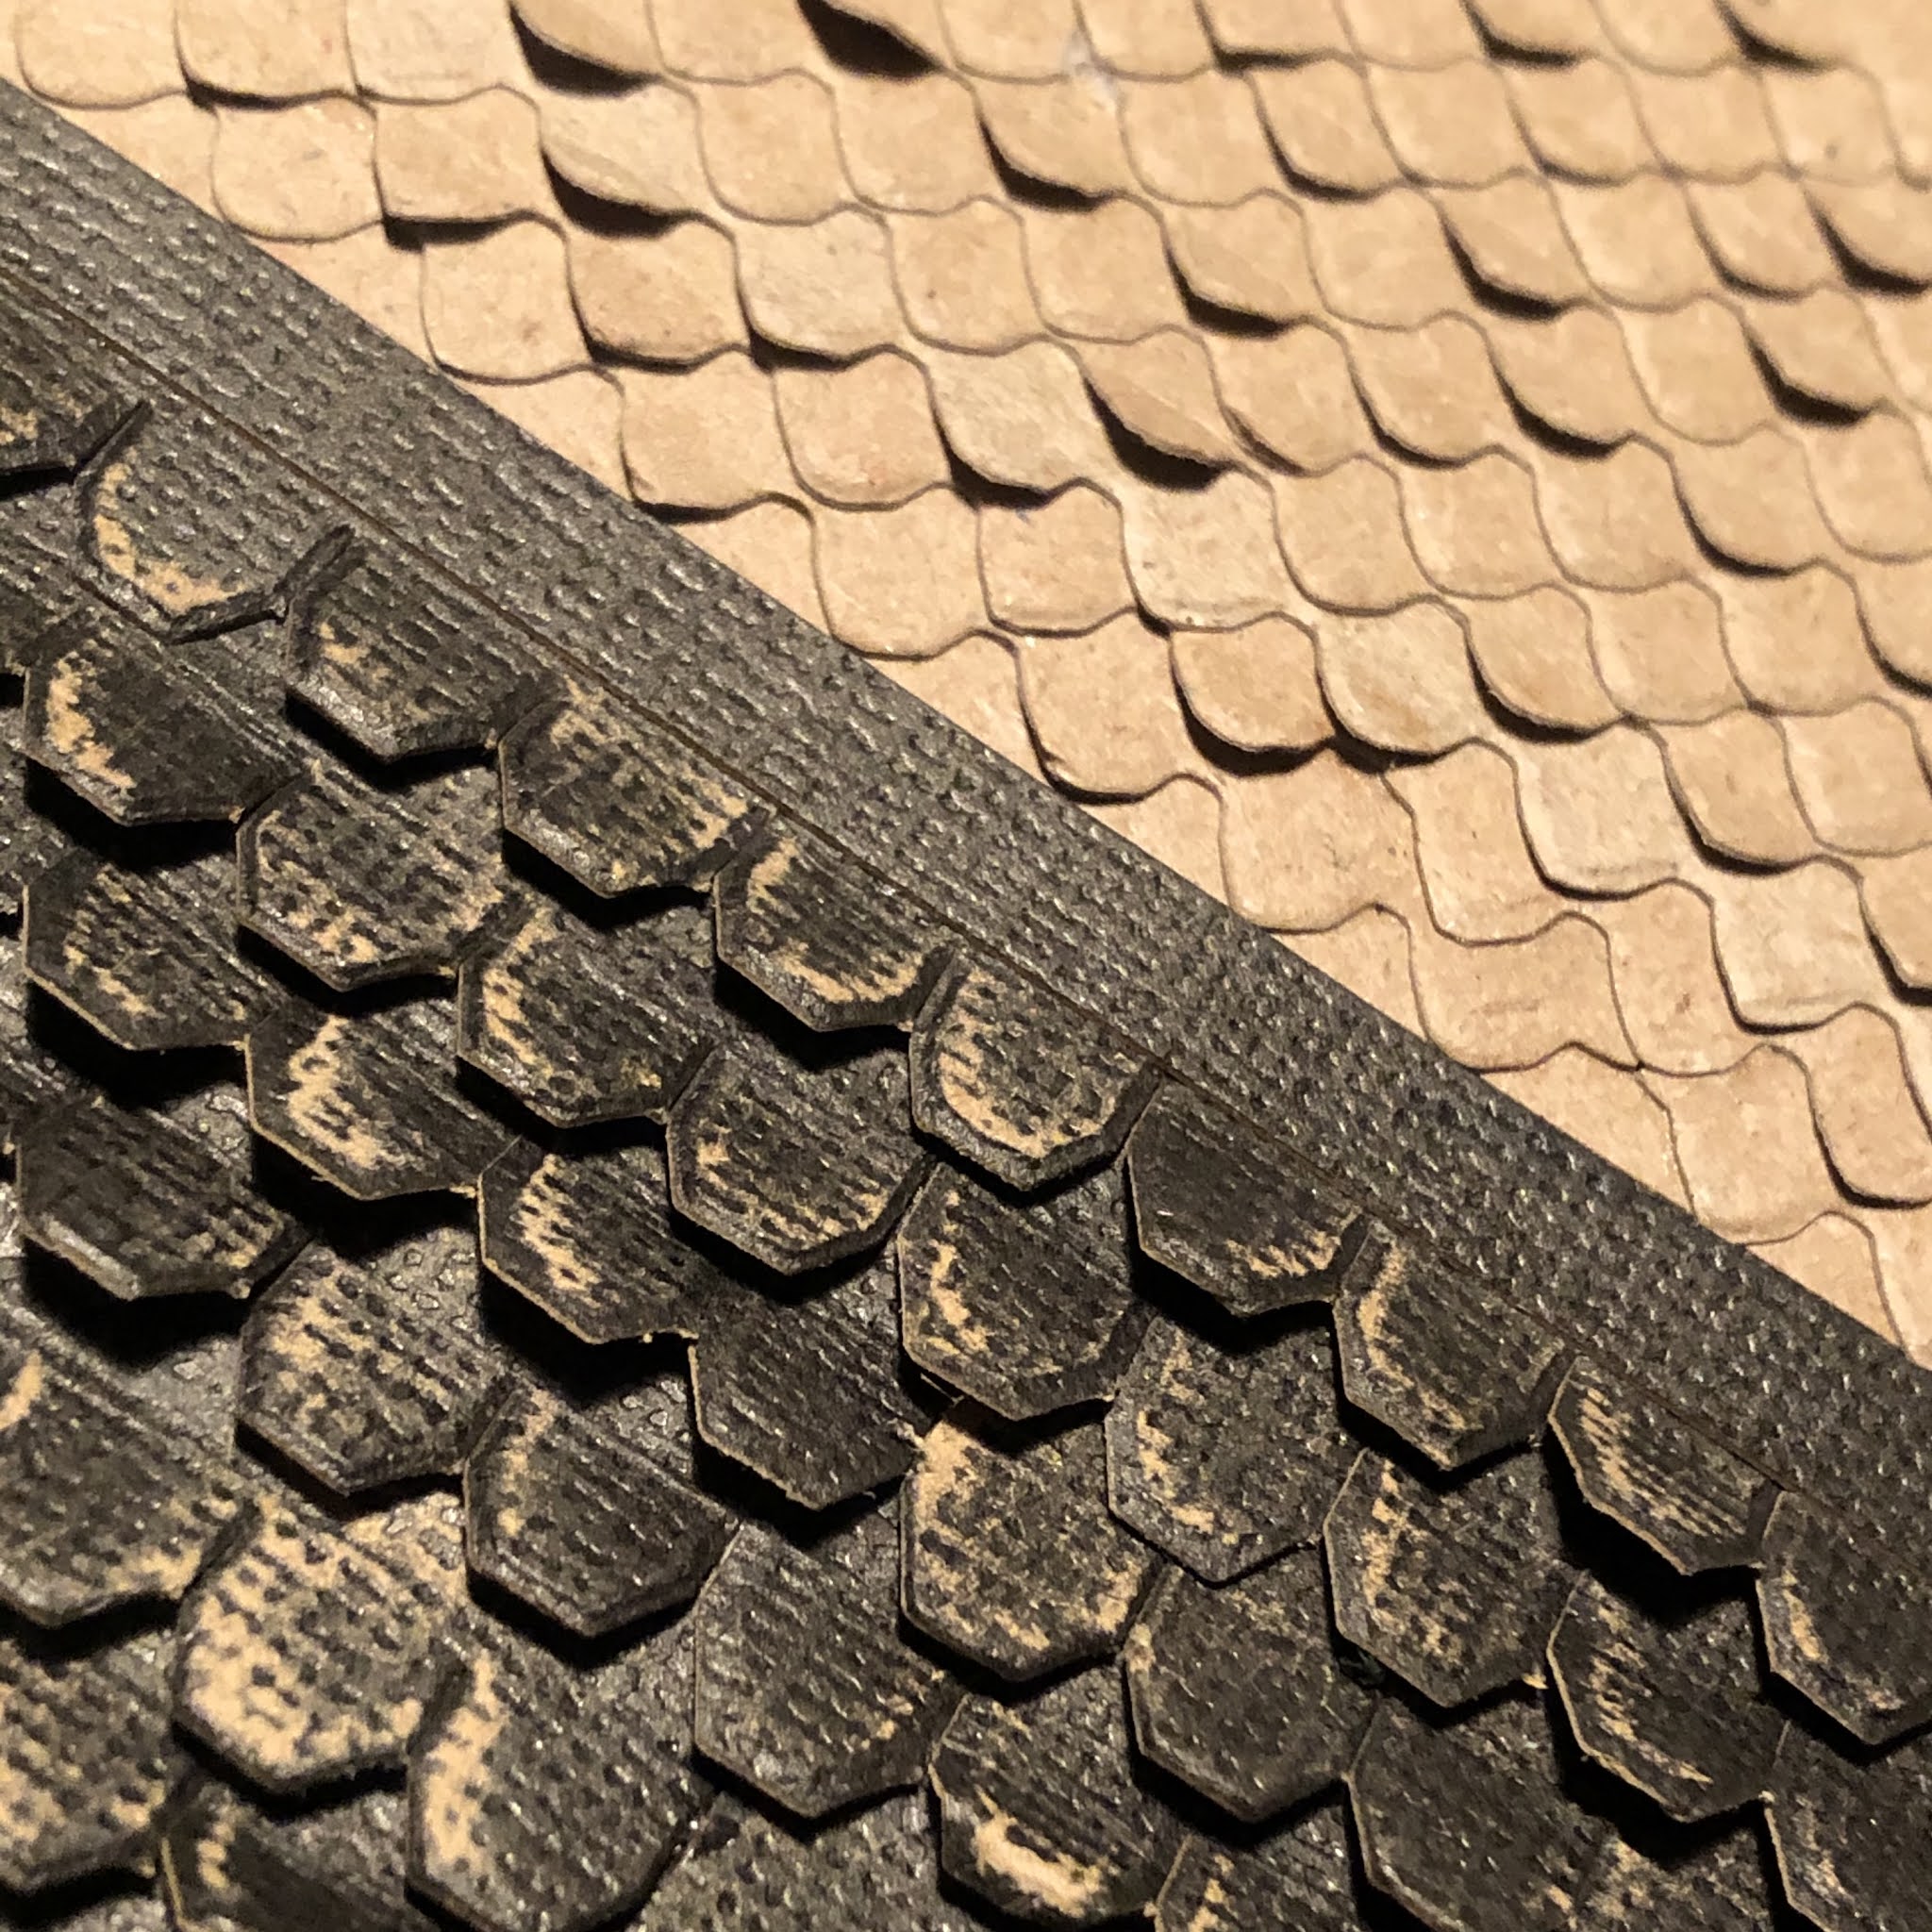
Using a die that cuts different styles of shingles and shakes, I select a style to use for the main exterior clapboards. I cut rows of siding from blackout kraft cardstock, then lightly sand and ink them to create an aged and weathered appearance. I begin adding the die cut pieces to the house, working from the bottom up so that the shingles can overlap and stagger mimicking traditional siding. Work on row at a time all the way around the three sides before moving onto the row above. 
I have always admired the special details that are found on historic houses. I thought it would be fun to add a section of fish scales in the upper gabled area. Before switching patterns, I add a frieze (trim) board across the rear to transition to the new pattern. When the fishscale shingles are all in place, I add trim boards along the angled edges to finish the look. The roof is completed in the same manor as the exterior walls, but using heavyweight kraft paper inked with distress ink.
Now it is time to finish the interior rooms. I select papers that give the look of historic wallpapers and plaster. Each "room" is finished in a different paper. Measure and cut a square for each rear wall. Then, cut a strip of matching paper that will cover both the side walls and the ceiling. When papers are cut for each room, ink all of the edges with a dark brown or black ink. 
To add an element of authenticity, create "cracks" by tearing into the paper and inking the torn area. You can also create the appearance of leaks within the walls by dripping dark ink down the wall sections.
The "wood" floors of each room are made by cutting pieces of woodgrain embossed paper that's been inked and and painted. All of the papers are attached to the surfaces using collage medium.
In keeping with the undertaker theme, I decide to give each room its own function that would be found in a funeral home. Starting with the attic, I adhere small pieces of hay randomly on the floor where a skeleton lies. The only remains of a long forgotten guest from years ago. 
Located on the second floor is a mourning room,  complete with prayer candles. An area to gather and contemplate lost souls. 
Adjacent is a store room for found objects; misplaced parts and pieces.
The selection room can be found on the first floor. Here you can find items for all your funeral needs- from flowers to urns and caskets. 
The undertaker's office completes the tour.
Two tiny eye hooks are screwed into the gable to secure a hanging sign. The undertaker is open for business, established 1876.
I hope you have enjoyed this haunting holiday make, perhaps you are inspired to create one of your own. If you've run out of time, consider making a house for a different holiday. I can imagine a wonderful Christmas inspired elf's workshop, or an easter egg factory. The possibilities are endless with the GSLC mini house room box.
Thanks so much for stopping by today, I truly appreciate it.
Enjoy these hallowed days.
Ann
xxx 
supplies used:

Gypsy Soul Laser Cuts used: mini house room box 

Distress products: collage medium, inks, paint, blackout kraftstock, 

Tim Holtz Sizzix Alterations: village rooftops Bigz die.halloween mixed media (bats), 3D embossing folder lumber

Ideaology & Ideaology halloween products: paper stash, resin pumpkins, skulls, cameo, mini vials, quote chips, clippings stickers, charlotte, ephemera, snippets, industrial trims (discontinued)

misc. halloween plastic skeleton pieces, stretchy skeleton, dried flowers, pine needles, twine, faux spider web, hot glue gun, hay 


Thursday, January 23, 2020

sweet repeat ~ a guest designer post for the funkie junkie boutique challenge

I am truly honored to have this second opportunity to be a guest designer for the Funkie Junkie Boutique challenge. Today I am sharing "sweet repeat" a collection of valentine treat boxes made with some favorite supplies as well as recycled materials.
I was so excited to learn the theme for the current challenge, hosted by Sara Emily. I often find myself holding onto items to give them a second life. There are so many things these days that go to waste, so I try to do my part to utilize scraps and packaging as often as possible. The Repeat Performance Challenge asks us to use at least one thing on our project that we would normally throw out. I had a number of shirt boxes that were ripped open during the holidays, rendering them unfit for future gift boxing. I thought the lightweight cardboard material would make the perfect base for valentine treat boxes. I also utilize recycled plastic packaging to complete the pieces.
Using the new sizzix curio box die, I die cut the box top and base from the shirt box material. I then select some papers from my Tim Holtz abandoned paper stash that I feel will be interesting for a valentine treat but not overly sweet. Each of the box tops have die cut openings at their centers. I die cut larger sizes of the opening shapes from the plastic die packaging to use as windows in the treat boxes. The clear plastic is attached between the box "base" material and the finished paper. Thus allowing the boxes to be filled with candy or any other valentine treat.
With the windows in place, I attach the finished papers to the box cover and while it dries, I attach the  papers to the bottom section of the treat boxes. Two of my boxes are finished in a simple manner with coordinating accent paper. On the third box, I cut a piece of metallic kraft stash to fit and then embossed it using a 3D roses embossing folder. Roses are such a traditional valentine gift, I thought this would be a perfect accent to view through the open window of the box top. When the bottoms are complete, it is time to add some finishing touches to the top portions of the treat boxes.
For the first treat box, I die cut an extended "crochet" piece from cotton rag paper and color it using pumice stone distress ink. I also die cut a few hearts and give them a rusty finish using Seth Apter's chunky rust baked texture embossing powder. The embellishments are added around the oval window with distress collage medium and allowed to dry completely. The chit chat word "adore" is edged in gold and attached at the top left.
The second treat box has a rectangular shape window. Around the bottom most edge of the box top sides, I have added a line of champagne metallic kraft die cut hearts from the falling hearts die. I loved the organic look of this for a bordered edge.On the top, a die cut cherub from coordinating paper holds a larger falling heart. The word "love" is cut from the tiny text die set out of the same metallic kraft. The banner die is included with the curio box die set, the banner piece is cut from the same paper used inside the box, then stamped with tiny peg dies to read "eternal."
The third treat box I created also utilizes paper from the abandoned collection. This box has an arched window, made using a movers and shapers die. The window opening is filled with the clear plastic packaging and around the finished edge, a piece of black Dresden is attached. The base/bottom of this box is covered with blackout kraft paper on the exterior and inside, the edges match the abandoned pattern, while the base that is seen through the window, showcases a 3D embossed design. Using a piece of red metallic kraft stash, I spritzed the piece with water and ran it through the big shot multiple times. With the embossed roses in place, I rub black soot archival ink over the raised portions to accentuate the design and allow for it to be more easily recognizable through the window.
Label letters are used to form the word "amore" and the "XO" on the box top.
These treat boxes are ready to be filled with sweets for very special valentines.
 Hopefully you are able to find time to make something special for your valentine. If you incorporate something that you may normally just toss away, we would love to see you join the Repeat Performance Challenge! You can link your project on the Funkie Junkie challenge blog post here.
Thanks so much for visiting my blog today,
I truly appreciate it.
~Ann
  xxx


supplies:
recycled materials:
shirt boxes, plastic packaging
Distress collage medium: matte
Distress ink:
aged mahogany, black soot, pumice stone
Dresden black trim
Seth Apter Baked Texture: chunky rust
Tim Holtz Ideaology:
abandoned paper stash, blackout kraft paper stash, , chit chat season, label letters, metallic jewels kraft stock paper stash, metallic 3 kraft stock paper stash
Tim Holtz Sizzix:
3D roses, alphanumeric tiny type lower, crochet 2, curio box, falling hearts,
mini love struck, sized arches
VersaMark embossing ink


Thursday, January 9, 2020

love wins ~ a guest designer post for the funkie junkie boutique challenge

Happy new year everyone,
I hope that you enjoyed the holidays.
I am honored to be guest designer for the Funkie Junkie Boutique Blog's current
challenge: tic tac toe. This is truly a fun challenge that Cec Wintynok is hosting
and there is no end to the possibilities; you are sure to want to join in.
To complete the challenge, simply select any vertical, horizontal or diagonal line
from the graphic below and create a project combining all three items from your chosen
 line. Be sure to visit the challenge blog here to see all of the rules, as well as gather
inspiration from the awesome FJB design team.
Let's play tic tac toe!
For my project, I have created a fancy fold card, incorporating heat embossing
as well as ribbon. Love is in the air with Valentine's day right around the corner,
so I thought it would be fun to create a themed project and get a head start on valentines.
To begin, I fold a 12x12 square of cardstock into quadrants, then once diagonally.
Use a bone folder to ensure the fold lines are crisp. Once the creases are set, push the
diagonal creases towards the middle and the paper folds into a 6x6 card that opens to
reveal the full 12x12 expanse. I love that aspect of this style card, there is so much area
 for embellishing. If you would like to see a more detailed blog describing the process
for creating fancy fold cards, click here.

Once the card base is prepared, I decide on the theme.
I die cut a square of white bristol with the organic die, leaving a bit of extended
length to weave a piece of ribbon. This ribbon is long enough to wrap the card
and tie at the side, keeping it closed. Using distress inks and distress oxide inks,
I color a length of crinkle ribbon to match my card, as it is drying I spray the
ribbon with a small amount of distress mica spray in aged brass to give a
bit of shimmer in the light. The ribbon is set aside to dry.
Next, I heat emboss a wildflower stem die cut with charred gold embossing powder.
 I coat the die cut piece with VersaMark embossing ink, sprinkling the powder
onto the ink and then set it with my heat gun.
When the embossing has cooled, I layer the piece onto three more (non-embossed)
identical die cuts and secure together.
This gives the wildflower stem dimension when it is attached to the card front,
distinguishing it further from the intricate background it sits atop.
I secure a die cut "love" sentiment to the ribbon.
With the card front complete, the inside presents so many opportunities for
personalization. Staying with my valentine theme, I add special marbled papers
 to the triangular spaces, and then begin laying out the composition.
I use heat embossed love struck cherubs, hearts and stacked words.
I leave spaces for personal love notes
and in the upper quadrant I create a frame with embossed chipboard
that a special picture can be slipped into to personalize the card even further.
I think this will be a wonderful valentine to present to someone special.
Thank you so much for taking the time to stop by my blog.
I hope that you are inspired to create some handmade valentines and
perhaps join in the fun at the Funkie Junkie Boutique challenge.
Wishing you all a new year filled with happiness and love.
~Ann
xxx


supplies used:
bone folder
bristol
cardstock 12x12 sheet
Distress Collage Medium: matte
Distress ink
Distress Oxide ink
Distress Mica Spray
Emerald Creek Craft Supplies embossing powder: charred gold
Gypsy Soul Laser Cuts: chevron frames
Sookwang double sided adhesive
Tim Holtz Ideaology: crinkle ribbon, kraftstock,
Tim Holtz Sizzix Alterations dies:
handwritten love, organic, shape strips, stacked words: valentines, wildflower stems #1
VersaMark embossing ink