
in the dead of night, souls come to life.
they dance and play, and haunt away;
until the dawn, when night night is gone.

It's that time of year when we begin to see all the wonderful Halloween and seasonal creations that designers are sharing. I thought it would be fun to incorporate some of my favorite Gypsy Soul Laser Cut seasonal embellishments in a spirited display box.
 I start with a chipboard trinket box die cut from Eileen Hull/Sizzix. Instead of using the latch mechanism that is cut out along with the box pieces, I decide to use small hinges and a clasp to secure the cover panel. This will ensure that the box remains closed when it is in the upright position. I paint all of the exposed box edges with black soot distress paint and allow them to dry before I begin the box assembly. The box is covered with some halloween papers from my stash. The front and back covers use a vintage Halloween candies print paper, while the main compartment is kept simple to showcase the focal piece. Using a small black and white check paper as a base, I stamp with the script stamp from the entomology stamp set. Once the ink has dried, all of the papers are edged with black soot distress ink. The front cover of the box features a flying bat from the Gypsy Soul Laser Cuts creepy critters set.


The sheet contains eight different creatures, including cats, rats and ravens, perfect for all your spooky creations. I know I will be using all these creatures up in my Halloween makes! I envision the flying bat with swooping wings creating a wonderful frame above the oval opening on the front of the trinket box. I remove the bat piece from the sheet and coat it with embossing ink. The embossing ink is covered with rocky road baked texture and heat set, creating an eye-catching textural effect. Small black rhinestone gems are adhered around the oval opening.

I love the look of frozen charlottes and have a stash of various sizes. Adding wings to them can instantly change the look from doll to winged soul, whether it be beautiful or haunting. The main focal point of "in the dead of night" is one of these charlottes featuring a pair of wings from the Gypsy Soul Laser Cuts bat wings miniatures set.
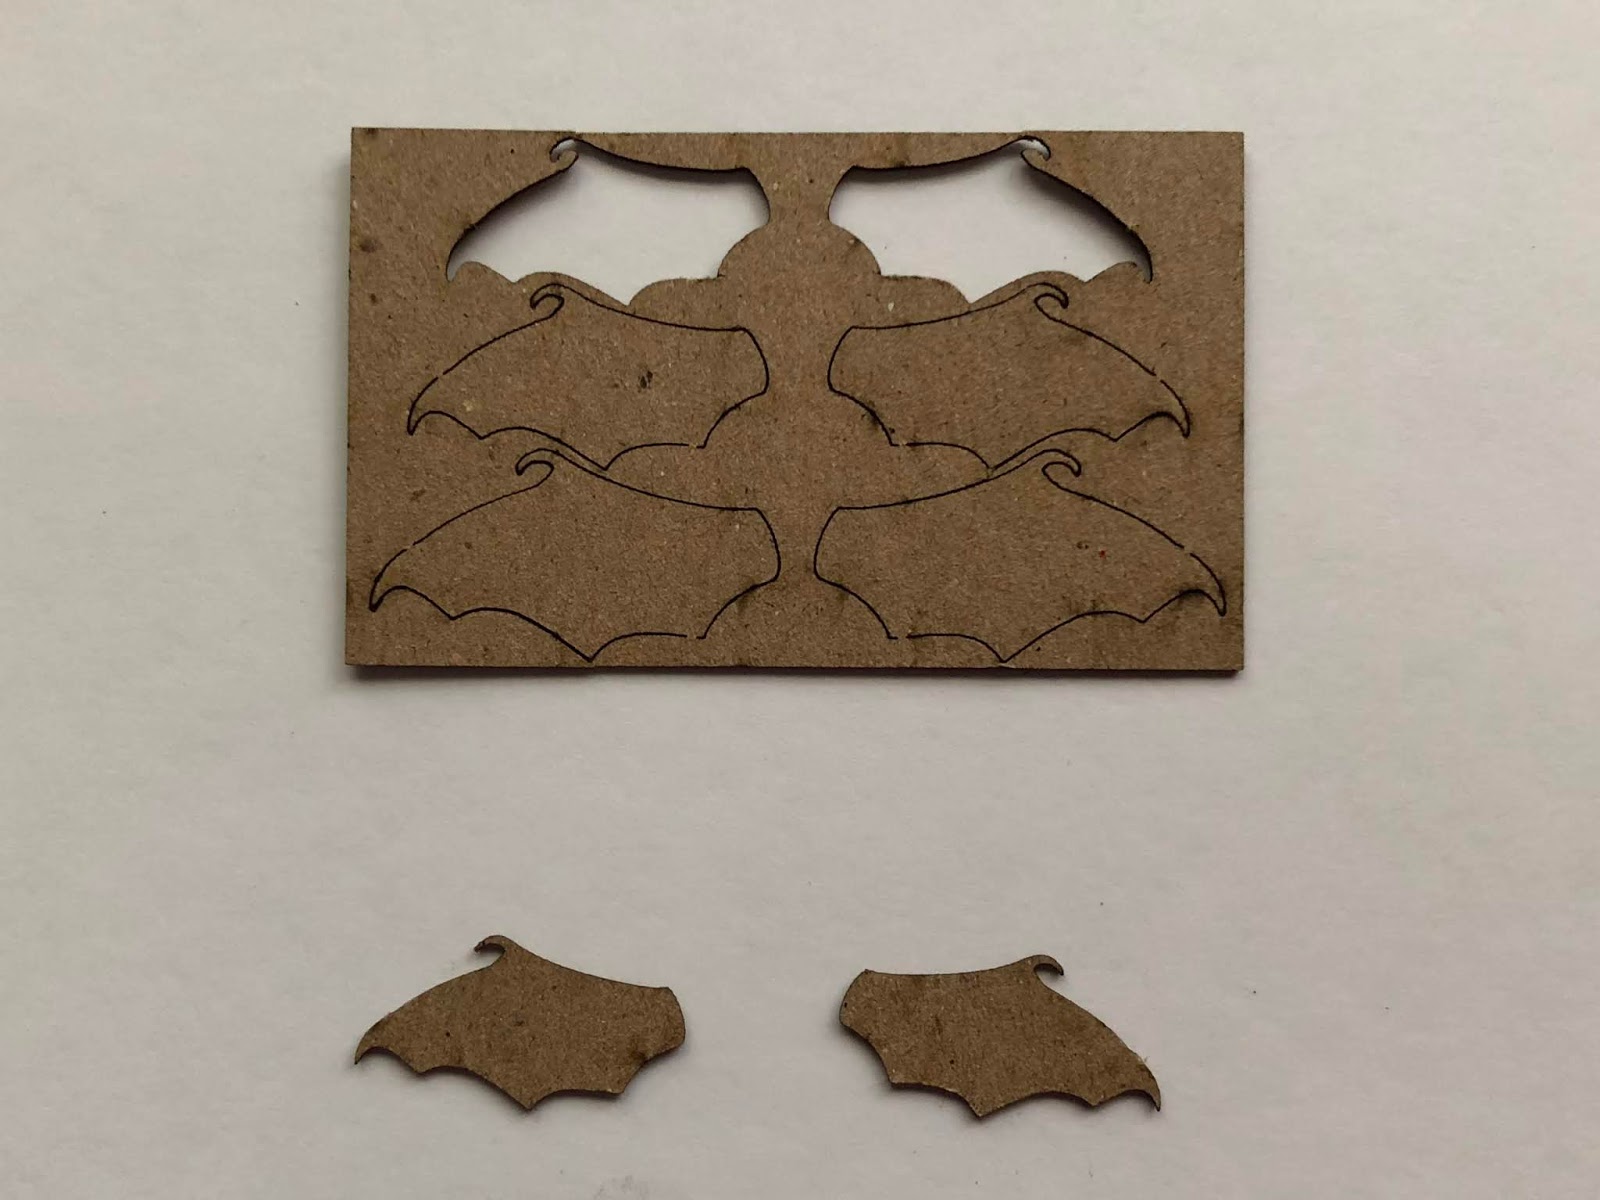
These wings are exactly as they are labeled, miniatures. The set contains three pairs of wings, graduated in size. My project features the smallest pair. I carefully remove the wings by using an exacto or sharp craft knife to cut the spots where the wings are attached to the sheet. These tabs are mainly to keep all the pieces intact during shipping. Once the wings are removed, I coat the front side of each wing with embossing ink and sprinkle with rocky road baked texture embossing powder. The powder is heat set to create a wonderful finish and set aside to cool. Once cool, the wings are adhered to the charlotte's back and some copper wire is wound around the body creating a harness.


This winged soul needs a special backdrop to shine. I select a frame from the delicate frames and ornaments shape set that seems to be made to fit my box opening, as well as the winged charlotte.
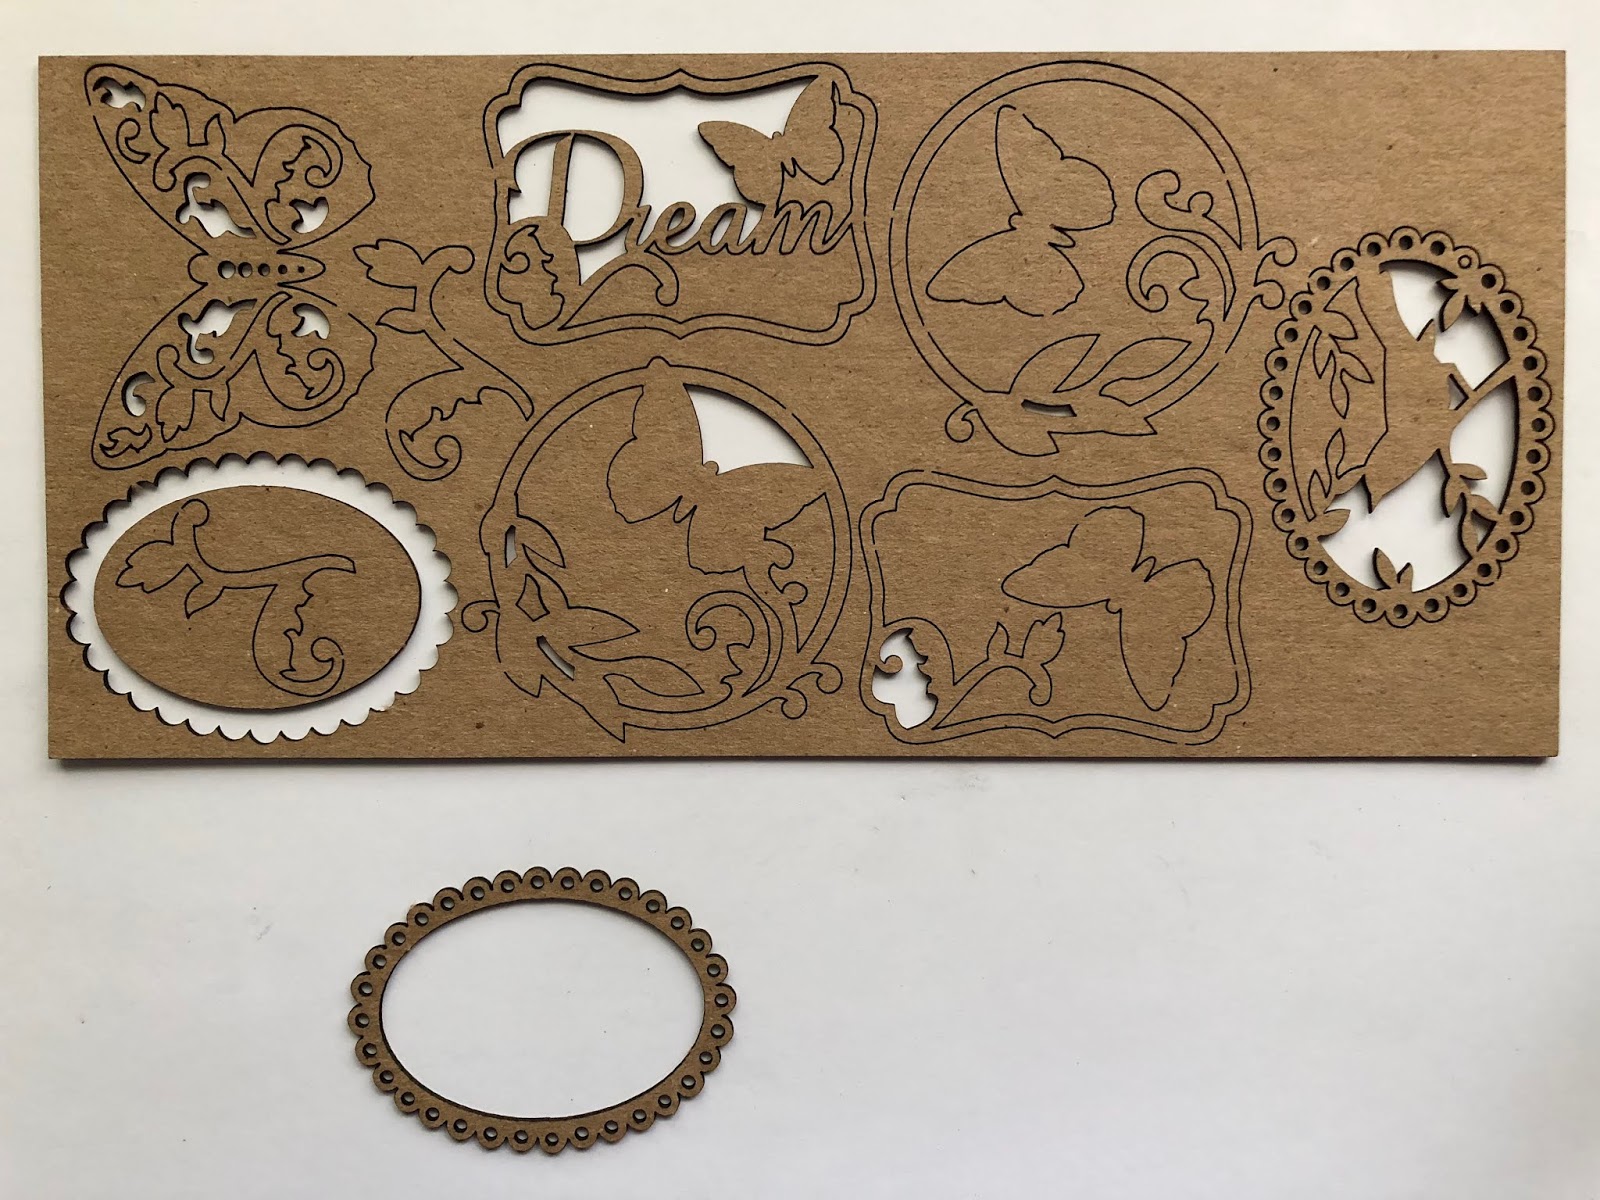
This is another awesome set from Gypsy Soul Laser Cuts, it contains thirteen different pieces with wonderful detail. The oval frame I am using contains an open scallop edge. I use chunky rust baked texture to create an interesting finish on the frame, that coordinates with the oranges in the paper design as well as gives the piece a very realistic rusty look. I adhere a piece of coordinating paper behind the oval to complete the backdrop.

When I begin to assemble the piece, I decide that it will add interest if I include some additional small bat die cuts in flight within the box. Using thin wire with the die cuts attached at one end, I wind a few around the frame in various spots. The wires are wrapped and twisted to give the appearance of taking flight.

This piece will be attached to the inside of the box so that it is centered within the oval opening. I paint a wooden spindle with black soot distress paint and drill a hole in the center to accommodate a screw. A coordinating hole is drilled into the bottom of the trinket box for the screw to pass through and secure into the spindle.

A quote chip is distressed and areas are coated with chunky rust baked texture. This title piece is adhered to the bottom of the front cover.


I am really excited to begin decorating for the Halloween holiday, and I know just where I would like to display this one.

If you are creative and like to make your own decorations, or perhaps have been inspired to create a decor piece, I highly recommend trying out some of the seasonal sets available in the Gypsy Soul Laser Cuts Shop, the possibilities are endless.
I hope you enjoy the remainder of September, fall is definitely in the air.
Thank you so much for stopping by today.
~Ann
Supplies used:
4mm back rhinestone gems
copper wire
distress collage medium
distress inks: black soot
distress paint: black soot
Eileen Hull / Sizzix: trinket box die
Emerald Creek / Seth Apter baked textures: chunky rust, rocky road
frozen charlotte (cast resin)
Gypsy Soul Laser Cuts:
Tim Holtz ideaology: quote chips,
Tim Holtz / Sizzix: mixed media halloween (bats)
Tim Holtz / Stampers Anonymous: entomology stamp set
wooden spindle


10 comments:
Absolutely wonderful art Ann! You have inspired me! I have finally decided what I will do with that oval piece. I am decorating 14 of these trinket boxes for party favors since yesterday! Thank you! HUGS!♡
Wow, so imaginative and detailed and beautifully made! Love the spindle and especially the winged Charlotte
Ann, your creation is fabulous, I love the embossed bat, the frozen Charlotte looks amazing with her wings and I just love the papers and other embellishments you used! Spooky and fabulous! xx
Thanks so much Jenn, I am so happy that seeing this has inspired you to use that oval piece, and I look forward to seeing your projects! thanks so much for stopping by! hugs~Ann xx
Thanks Linda, those charlottes are really great to work with. It means a lot to me that you stopped by, thank you! ~Ann xx
Thank you Anne, I loved creating this piece, and those papers were some that have been in my stash for a while waiting for the perfect project! Thanks for visiting the blog to check it out, that means so much. ~Ann xx
Such fun! I LOVE the black and white buffalo check, and love her wings! An awesome Halloween decor piece.
Bwaaaaa hahaahaaaaa
Wow Ann! i know I commented on FB that this was neat, but to see the tutorial and the close-ups-! Girlfriend you knocked it out! What a cool design and display! I just love Char's batty wings and her little "friends" flying about her! Well done you crazy creepy crafter! heeheee Sorry just had to say the three c's! heehee
Hoping all is well in your world-sending out lots of hugs
Jackie xo
ps...thanks so much for sharing- I love how you put this together!
Jackie, my friend, so many thanks! I love making creepy spooky things around halloween and I am thrilled you like this batty girl! Thank you so much for stopping by and leaving love, it means ever so much to me! ~Ann xxx
Thank you Anita, those wings were hard to part with, but I knew it was for a good cause! Thank you so much for stopping by, it means a lot to me that you visit and leave your kind words! Take care. ~Ann xxx
Post a Comment