
It seems that December has passed so quickly, I can hardly believe this will be last my post in the designer spotlight for Simon Says Stamp's Monday Challenge. What an honor to have my creations showcased alongside some of my favorite designers. It has been such a blessing and I am extremely grateful to Simon Says Stamp for this wonderful opportunity; as well as all of my visitors, for your lovely comments and kind words, they truly mean the world to me.

I hope that you are excited about this week's challenge "party time"
I am excited to share my pop-up New Year's card with you today. I just love making different interactive cards; they really are a lot of fun to make as well as to receive.
When I think of New Years Eve celebrations, I think of silver and black, the NYC crystal ball drop, fireworks around the world, and everything glitz and glam, ringing in a new year full of potential. I decided to use this as inspiration for my project this week.


I start with a 6"x12" piece of heavyweight black cardstock for the base, everything is built up from there. I create the card front as its own entity and attach it after it is completed, this way if I make any mistakes, I am not having to re-do the entire card, only the section I am working on. The card front is a layering of silver metallic kraft beneath a piece of craft cardstock that has been diecut in opposite corners using the harlequin mixed media die. The topmost layer is heavyweight black card stock that contains the same cutouts as the kraft layer, however, they are slightly shifted outward from the center. This allows a slim edge of the kraft layer to be exposed, and to add interest.
I used the center diagonal that the cutouts formed to attach the 2019 numbers. I give the numbers depth by cutting 4 times with black and the top layer metallic kraft. All of these layers are glued together and then the thick number is adhered in place.

The interior of the card features a glittery sky that shines behind the cityscape. This background is created by applying embossing ink through the speckles stencil, then sprinkling the design with sticky embossing powder and heating with a heat tool. The heat warms the powder creating a sticky substance. I sprinkle the sticky areas with a (super fine) silver glitter while the embossing is warm. When I have coated all of the areas with glitter, I re-heat with my heat gun to ensure that the glitter embeds itself and then set this piece aside to cool. When cool, I brush off any excess glitter with a dry paint brush.

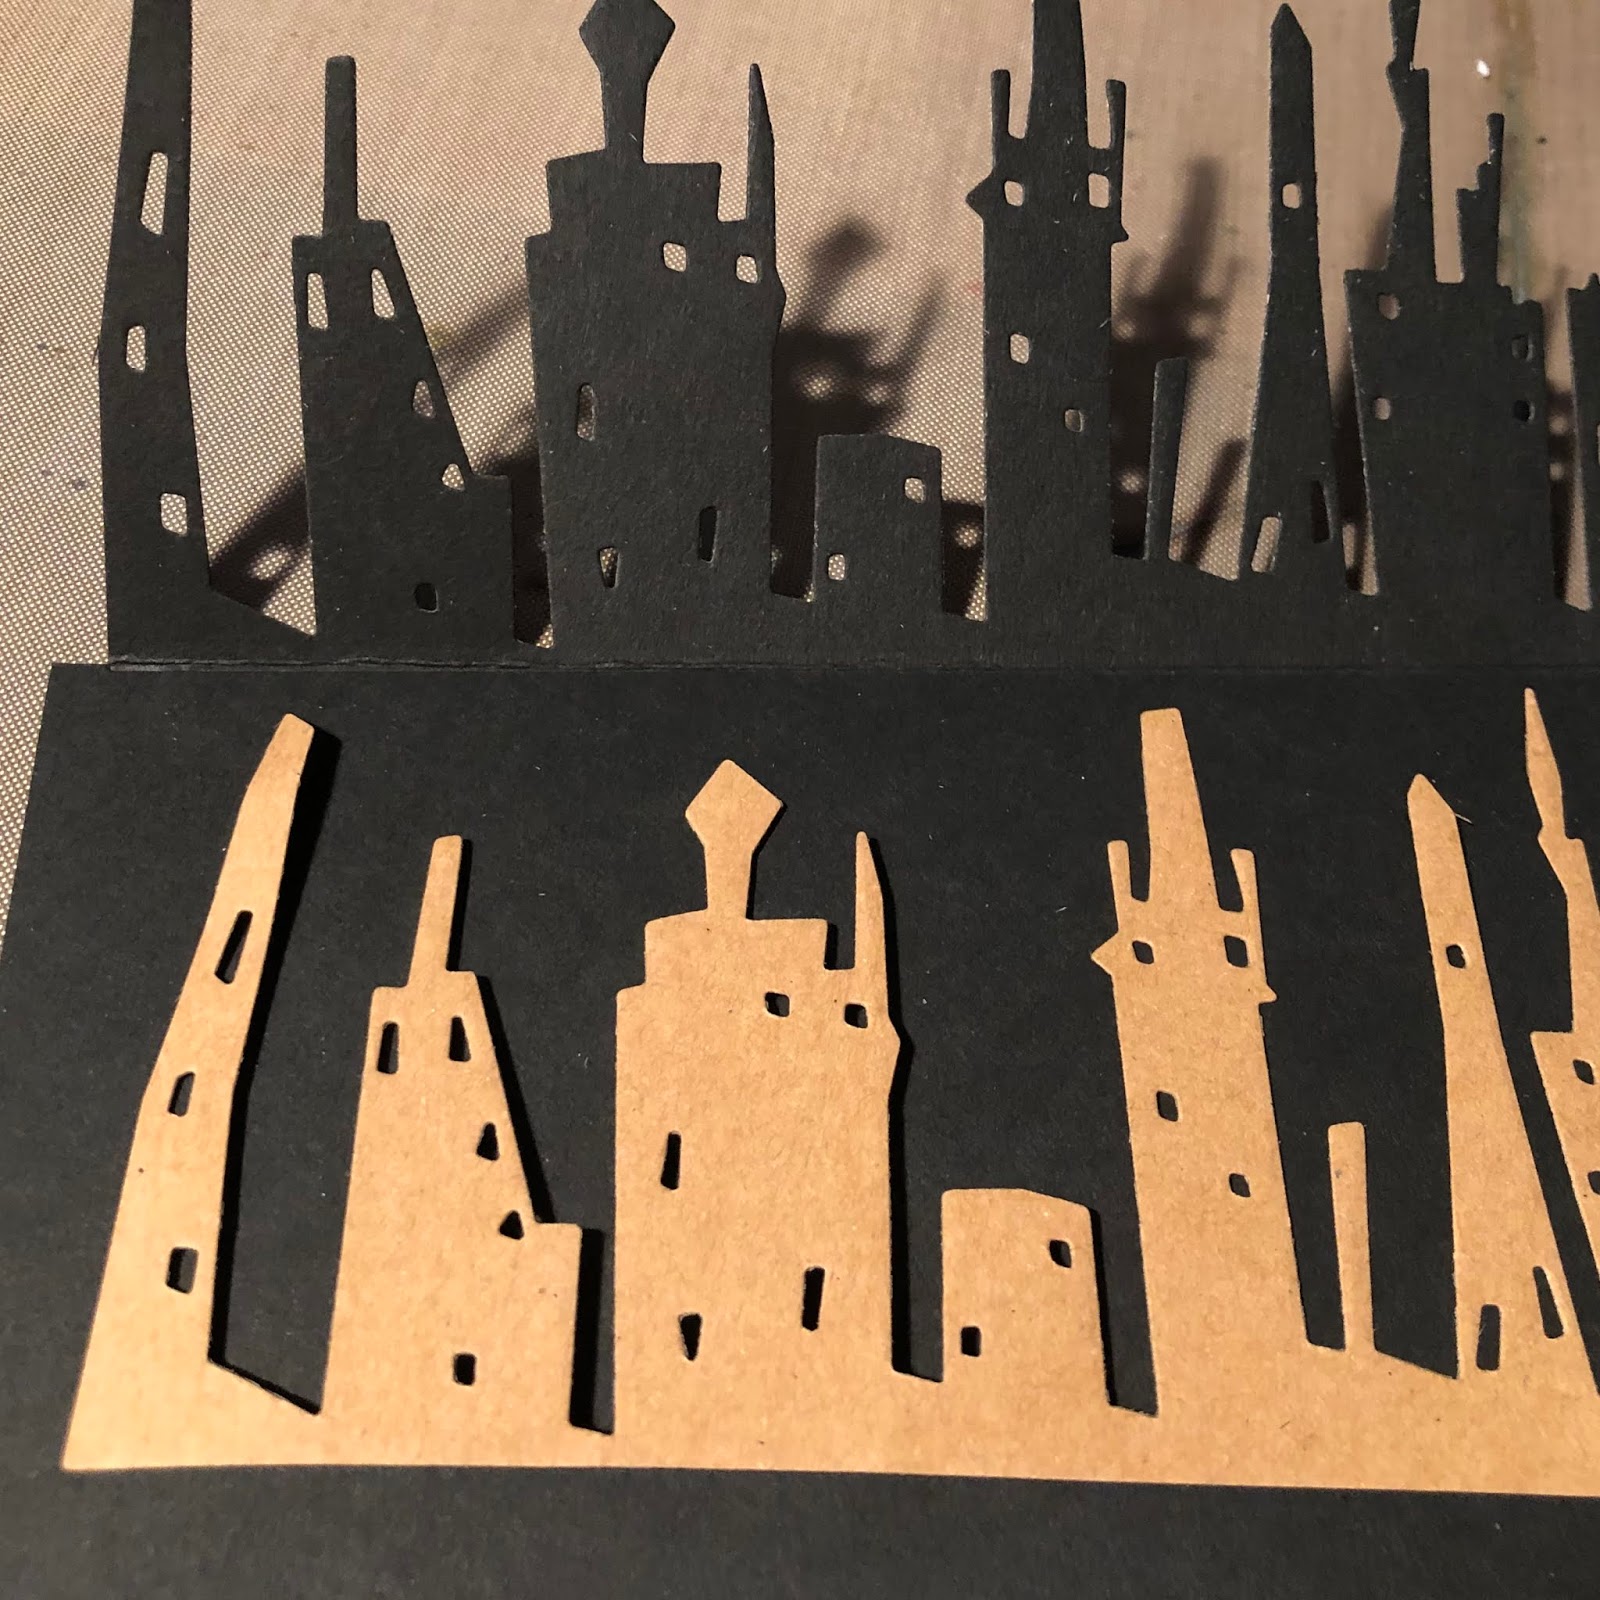
Next, I create each of the skyline pieces that will stand prominently in front of the sparkly sky. [disclaimer: I have seen many ways to make pop up cards, this is my first. Some of the methods I use may be able to be improved, especially with more knowledge and experience. My mechanisms work, however, there may be different ways to achieve the same outcome.] Using a sheet of black cardstock 6"w x 10"l I score at 5-3/4"l. I place the cityscape die along the score line. Using the dimensional plate, I locate the non-cutting seam at the location of the crease. This will ensure that the bottom edge of the die will not cut through the paper. I repeat the process with the second cityscape die however, this base is scored at 5-3/8" so that when placed on the card base, the two rows of buildings will be situated with a gap in between.
*I have staggered the die and dimensional cutting plate to demonstrate the layering along the scoreline, when die cutting these pieces everything is layered directly on top of each other.*

When all the glue has dried, these pieces are attached to the card base. Between the rear skyline and the sparkling sky I scored small strips of paper to be situated in the gap. These strips are attached to the building back then a scored flat 1/4" section that bridges the gap, then attached to the background panel. A similar mechanism ties the front row of buildings to the back row, this time the scores occur at 3/8" to create the flat area between the buildings. These strips of paper are what tie the card together and force the buildings to "stand upright" when the card is in the open position.

The card sentiment is created with alphanumeric dies. I cut two pieces of cardstock (one black and one kraft) to the dimensions of the flat base area (in front of the cityscape buildings.) I align the letters to form the words MAY IT SHINE using a straight edge; and when the placement is correct, I attach a piece of post-it tape over the dies to keep them in place when passing through the die cutting machine. I cut one row at a time. When all three rows are complete, I trim the left edge of the kraft paper piece so that I can slide it to create a shadow line. A piece of metallic kraft is located beneath the diecut layers and this entire composition is adhered to the card base.

The card folds (relatively) flat for mailing and when opened, the buildings stand erect amidst a sky shining with possibility.


May your holidays be merry and bright and the new year filled with hope.
~Ann
xxx

I hope that you have enjoyed seeing how my pop-up card was created. Perhaps you are inspired to make a pop-up card of your own. We would love to have you create something for this week's "party time" theme on the Simon Says Stamp Monday Challenge. This challenge runs for two weeks so there is plenty of time to get creative. One lucky winner will receive a gift voucher to the Simon Says Stamp store!

Thanks again for visiting my blog today. I love reading your comments or answering questions, it's always a treat when you share your thoughts with me. I have included a list below with all of the supplies I used to create my card. Any of the products that are available from Simon Says Stamp are listed with links.

Supplies used:
black cardstock heavyweight
kraft paper
Ranger: sticky embossing powder
superfine silver glitter
Sizzix dimensional cutting pad
Tim Holtz Ideaology: paper stash metallic kraft
Tim Holtz / Sizzix alterations dies:
Tim Holtz / Stampers Anonymous: speckles stencil
Versamark embossing ink


7 comments:
Just beautiful! Such glamour and great retro vibe! Have a wonderful Christmas and a Happy 2019!
Oh WOW!! what a fabulous card to ring in the New Year! absolutely perfect!! I love the silver and black combo and the pop up cityscape is brilliant!! :-)
We have thoroughly enjoyed having you along with us and really appreciate that you joined us at such a busy time of year too! :-)
Merry Christmas to you and your family and hope 2019 is a great one for you :-)
luv
Lols x x x
What a stunning pop-up card, Ann! It was wonderful to have you as our GD this month! Happy Holidays and a wonderful New Year! Hugs, Sandra
Ann, this is such a gorgeous pop up card! We've loved having you with us this month as our guest DT! Happy New Year! Maura xxx
Ann, this is a party in a card! I love your pop up city, the glistening sky and your incredibly prepared sentiment! Every detail is sensational and really shouts CELEBRATION! I especially love detail of the reflection of the metallic skyline on the bottom sentiment panel. You are a creative genius! Thank you for all of your inspiration throughout 2018! I'm looking forward to enjoying more in this New Year! May you have abundant joy and blessings in 2019!
Ann, this is absolutely gorgeous! I love the metallic accents and the layered dimensional city is stunning! Thanks so much for being our guest!
*mwah*
Steph
Simon Says Stamp!
Such a beautiful card Ann!! Love the way you added the metallic details, it really make a difference! So elegant!
Post a Comment