Monday, July 22, 2019

wish flag collaboration for StencilGirl

I love joining Tina Walker's collaborations for StencilGirl®. I have been fortunate to participate in a few, the most recent one being Wish Flags. We were asked to "create a wish flag(s) using StencilGirl® stencils + anything else you may have. They can be any size, shape, number, color, etc. but I ask that only SG stencils be used. All other mediums and products can be used. Your choice!"
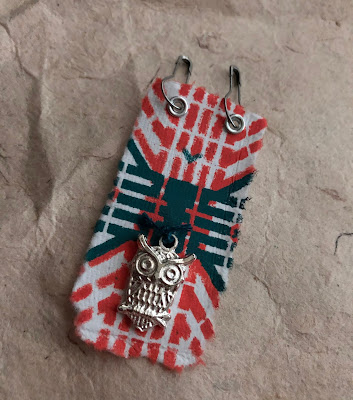
For this endeavor, I have created miniature wish flags. Pieces that can be worn or easily transported wherever your adventures take you.
My first inclination for this project was to create something flowy, using old sheeting material and hand dyeing it; then using bleach to remove color with stencils as a guide... A combination of uncooperative weather as well as some artful inspiration altered my course. As I scoured the internet searching for a better understanding of prayer/wish flag origins and meaning, I stumbled upon an artist that creates mini prayer flag pins. I knew immediately this would be the direction my flags would follow. 
I was so excited when StencilGirl® introduced their ATC Mixup line of stencils. The scale is perfect for working small. At that time I was using a small sized art journal and the stencils (when cut down into 9 separate pieces) were easily tucked into the cover for convenience. StencilGirl® has a number of the ATC Mixup stencils in their collection from various artists. For my flags, I used June Pfaff Daley and Seth Apter's ATC Mixup stencils. Once I began creating, I could not resist trying a few larger stencils on my small flag pieces. These turned out very interesting as well. It always amazes me how a section of a whole can give an entirely different look!
I began with handmade papers torn into different shapes, most being approximately ATC (artist trading card) size; however, some were then torn further into small strips and one piece was a large remnant, leftover from when I had torn the other pieces. Using a brayer I added a light layer of Paper Artsy paint, and allowed it to dry. The ensuing steps were just random creativity using the stencils with paints and sponges. I had so much fun layering different colors and designs. 
 (Art Deco Medallion S454)
When I was satisfied with the results, I began gathering a few elements from my stash to incorporate. Each wish flag is unique and the elements added all varied for that reason. I still have a few more stenciled papers that I look forward to working on in the future. I have included a list of the StencilGirl® stencils I used at the with links to the StencilGirl® store at bottom of this post for your reference and have noted which ones were used on each flag under their respective pictures.
Tina Walker has a column on the StencilGirl® Blog that is always inspiring. Today she is sharing all about the WishFlag Collaboration, and some of the flags from each of the designers that participated. It is sure to be an amazing post. Click HERE to check it out if you have not already, it is definitely worth the time!
Thanks so much for stopping by today. 
Maybe you have been inspired to create your own wish flag, 
or even just to break out your stencils and create some art!
~Ann
  xxx 

Wednesday, July 17, 2019

fright night fancies

With all the recent holiday releases from some of my favorite companies, I was inspired to make a Halloween project. I know it is still July; but as a good friend said to me, "Halloween's only three months away!" I have also noticed that many of the local craft stores are starting to put out the Halloween decor, so perhaps the timing is just right. Wether you would like to give them away as favors or simply add to your decor, these fright night fancies are frightfully fun!
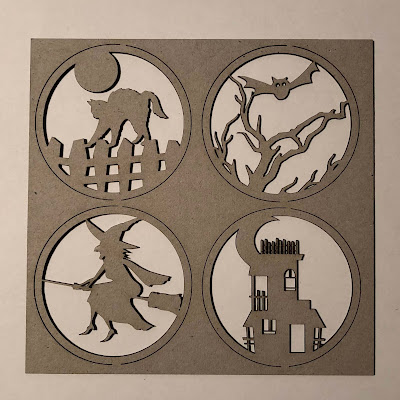
Gypsy Soul Laser Cuts has introduced a line of artist trading coin covers in various styles. They range from Alice in Wonderland to seasonal, including holiday sets. I look forward to using some of these in a traditional manner, but I thought it would be fun to use them as focal points for rosettes and attach them to sticks, creating wands. I begin with GSLC trading coin covers Halloween. The set includes four different designs.
I paint the witch coin cover with black soot paint on both sides and allow to dry. Once dry, I add a layer of glue to the central design and coat it with distress glitter. The designs have some intricate parts, so be sure to use a fine glitter so that the beautiful details can be seen.
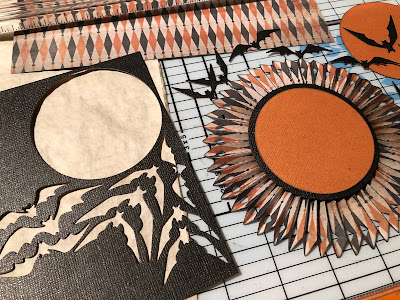
Using a paper rosette cutting die, I cut multiple pieces from the Halloween Kraft Stash paper pad. The edges are inked with black soot distress ink and the die cut strips are glued end to end creating a circle. (tip: be sure that when gluing the strips, you keep the all decorative edges along the same side.) I then die cut a circle for the center that is larger than the trading coin cover. This piece will cover the open area within the rosette, as well as provide a base for the trading coin cover. A line of glue just along the outside edge of the back of the circle allows it to adhere to the rosette when "flattened."
Before attaching the glittered trading coin cover, I flip the rosette over and finish the reverse side. This step is much easier, and a lot neater, when completed before the glittered piece is attached to the front. I attach a wooden skewer stick to the rosette with tacky glue. (tip: be sure that the stick extends to the top of the rosette ring, this gives it more stability.) I have also added some die cut bats on thin wire to my piece, the wires slip through the gaps that the folds of the rosette create, and are attached with collage medium to the back side of the circle. When the adhesive has dried, the back of the rosette is closed up with another circle die cut. I used a patterned paper for this to add interest to the back side.
The wand is flipped back over and the finished trading coin cover is attached with collage medium. Decorative trimmings can be tied around the stick at the base of the rosette.
Each of the rosettes are created in a similar way, simply adjusting the size, or number of layers.
The cat on a fence trading coin cover is finished with a combination of paints, embossing powder, and glitter. I always love painting faux wood, and think it looks perfect on the fence portion. What Halloween piece would not be complete without a black cat? I added a dot of gold to simulate the glow of the cat's eye. The moon is coated with embossing ink then covered with ancient amber embossing powder and heat set. The trading coin cover is attached to a kraft stash circle that has been inked with black soot distress ink to simulate a midnight sky.
The largest rosette creates a perfect backdrop for the bat and tree trading coin cover. Using distress paints in shades of brown, I paint the tree limbs to look dimensional. The bat is painted with black soot paint and then covered with a thick layer of glossy accents and allowed to dry. Gold paint lines the interior rims of the bat eye openings. The trading coin cover is adhered atop two layers of Kraft paper stash and finally attached to the center of the rosette. Halloween trimmings are tied around the skewer at the base of the rosette.
The fourth trading coin cover is used to embellish a small round die cut box that contains candies. I die cut the box and cover it with Halloween patterned papers. This trading coin cover is finished using embossing powders. The piece is first painted with black soot paint, then each interior element is coated with embossing ink and covered with embossing powder, and heat set. I love the glow of the moon over the haunted house silhouette. Once it has cooled, the coin cover is attached to a circle of orange kraft stash paper that has been inked to simulate a spooky sky. Miniature bat die cuts are attached randomly within the coin circle. Additional bat die cuts are attached around the box sides, unifying the design.
 Gypsy Soul Laser Cuts also makes incredible, chunky artist trading coins. They are sold in sets of three. I have used them for another project that you can find here. The artist trading coins would also be perfect for layering beneath the trading coin covers.
I really enjoyed creating these fright night fancies, I hope that you may consider alternate ways to use the Gypsy Soul Laser Cuts trading coin covers. They are the perfect size to add to just about any project, or even use on their own.
Thanks so much for taking the time to stop by, I truly appreciate it.
~Ann
 xxx
 
I am entering this project in:
 Simon Says Stamp Monday Challenge: Animal Magic
(Cat and Bats)


Gypsy Soul Laser Cuts:
Trading Coin Covers Halloween

other supplies :
Distress Collage Medium: matte
Distress Glitter: black soot
Distress Ink: black soot
Distress Paint:
black soot, ground expresso, vintage photo, walnut stain,
Eileen Hull / Sizzix Scoreboards Die: bigz xl cookie box
Seth Apter / Emerald Creek Baked Texture Embossing Powder:
 ancient amber. eclipse
Glossy Accents
Tim Holtz Ideaology:
Paper Stash Classic Kraft, Kraft Stash Halloween, Paper Stash Halloween, Trimmings Halloween
Tim Holtz / Sizzix Alterations Dies:
bat crazy, mixed media halloween, rosette set
Wire: 32 gauge
Wooden Skewers
Xyron Creative Station Lite

Thursday, July 11, 2019

rhinestone cowboy

Hi everyone, the July Emerald Creek Dares Challenge is inspired by the song Rhinestone Cowboy. This month kicks off rodeo season in Calgary and the team at Emerald Creek is hoping you bring the western bling, paisley, country, anything!
I have created three cards to celebrate the rodeo and showcase one of my favorite Emerald Creek embossing powders, oil rubbed bronze. All of the backgrounds were created using distress oxide inks blended to create the look of gorgeous summer sunsets.
I used color palettes recommended by Kristina Werner Design.
The first card is fairly simple. When thinking about rodeo cowboys, I know that the season usually means traveling from venue to venue competing and showing off their skills. This seems perfectly suited to the "not all who wander are lost" chipboard compass piece from my stash. I started with a blended distress oxide background using chipped sapphire, peacock feathers and carved pumpkin inks. Once the background is complete, I coat the chipboard laser cut piece with embossing ink and cover it with a layer of oil rubbed bronze embossing powder. The powder is heat set and allowed to cool. I repeat the embossing process a second time to give an even coverage. When the embossing has cooled completely, I attach the piece to the card front.
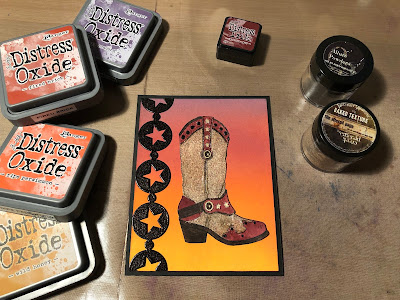
The second card I have made uses a printable image of a fancy cowboy boot. I create another blended distress oxide background, this time using dusty concord, fired brick, ripe persimmon, and wild honey. A star in circle laser cut border piece is embossed with oil rubbed bronze embossing powder and is attached along the left side of the card front. Next, I print the boot image onto a piece of heavyweight card stock and then fussy cut it out. Using a VersaMark marker, I color one of the main interior sections of the boot and then coat that section with ancient amber baked texture embossing powder. I heat set the powder and then repeat the process for the other portions of the boot that are this color.
I color the trim and sole of the boot with marker, and then, using a water brush, I color the other areas of the boot with aged mahogany distress ink. The studs are embossed with oil rubbed bronze. When the boot is complete, it is attached to the card front with double sided adhesive tape.
The third and final card uses an Emerald Creek Horse Head stamp. I begin by creating a blended distress oxide background with blueprint sketch, wilted violet, picked raspberry, and squeezed lemonade. While I have the inks out, I stamp the horse head using the same colors, layering them as I did for the background. I use my heat tool to dry the stamped images and then cut them out with scissors. The horse head stamp is approximately one inch (1") square. I want the horse heads to mimic the background but also stand out. To achieve this, I cut nine, 1-1/4" squares. I emboss the edges of the squares with oil rubbed bronze, leaving the central area blank. The horse head squares are attached to the embossed edge squares using foam tape. Leaving the central area void of embossing makes it easier for the foam squares to adhere to the card stock. The layered squares are attached to the background in a grid pattern.
I hope that my trio of cards has inspired you to create something and join us in this month's challenge. We would love to see your rhinestone cowboy shine; enter the challenge if you dare!
 You can find all the details to link your project here.
As always, thank you so much for taking the time to stop by,
 I truly appreciate it!
~Ann
  xxx


Emerald Creek supplies used:
oil rubbed bronze embossing powder
ancient amber embossing powder
horse head art stamp

other supplies used:
Distress Ink: aged mahogany
Distress Oxide inks:
chipped sapphire, peacock feathers, carved pumpkin, dusty concord, fired brick, ripe persimmon, and wild honey, blueprint sketch, wilted violet, picked raspberry, squeezed lemonade
Gypsy Soul Laser Cuts chipboard pieces:
Banner Border StripsWander Title
Sookwang double sided adhesive
VersaMark embossing ink
VersaMark embossing marker
Wagner Studio Precision heat tool

Wednesday, July 3, 2019

yankee doodle daisy

The fourth of July is such an important day for this country. We gather together to celebrate the United States of America's independence as a nation. Today I am on the Gypsy Soul Laser Cuts Blog sharing a patriotic piece that I created for the holiday. I love the Blue Daisy Character Constructions stamps from Catherine Moore. They have a wonderful American vibe that works so well with red, white and blue. Transforming them into my patriotic art doll nicho girls was so much fun!
I begin with two Gypsy Soul Laser Cuts art doll nichos. Each arrives in three pieces, the body, the niche (which requires a simple assembly), and a circle head piece. Whenever I create a project, I like to ensure that both the front and back are finished. For this project the backs of the art doll nichos will be painted black. The first step is to crease and fold the tabs of the niche, then add a dab of glue on each flap and secure to create the 3D form. I paint the back sides of the body forms, heads, and assembled niches with black paint and set aside to dry.
While the paint is drying, I select the stamps to use for the girl's clothing. The art doll body is slightly wider than the dress stamp I will be using. To accommodate the extra width, I stamp a blank piece of cardstock, cut out the image, and then slice it down the middle. I use these two sides to determine the extra width I will need to fit, then use this as a template for the dresses.
I trace my template onto the patterned paper and fussy cut the dress. When the extra-wide dress is cut out, I ink up one half of the stamp and cover the opposite side of the dress with a mask, then stamp the left side of the patterned dress. I allow the ink to dry and then repeat the process on the right side of the dress. The middle collar section is stamped by masking each edge and only inking the horizontal trim section of the stamp.
When the dress stamping is complete, I add trims and embellishments with glue, then set aside to dry. I cut coordinating patterned papers to fit inside the niche. These papers are adhered with Scor-tape.
The next step is stamping and coloring the dolls heads, arms and legs. I use a variety of markers, including Copics, Distress, Sharpies, and Gelly Roll pens. I then add a red rhinestone brad from  Emerald Creek to each girl's hat. Before attaching all of the pieces together, I want to complete the niche interiors. It is much easier to work this compartment before it has been secured to the body.
I die cut a mini paper rosette for each niche with coordinating papers. Each rosette is hung from a piece of craft thread. I poke a hole into the top flat portion of the niche, pass the thread through the hole, and tie a knot on the outside. Small die cut stars are scattered and glued to the niche walls and back. Once each niche is complete, it is attached to the back side of the body form. The appendages and clothing are then attached to the front of the body. The stamped and colored head is attached to the circular chipboard head piece and then attached to the front side of the neck portion of the body.
Each Daisy is waving a flag and holding the end of a banner strung between them which reads INDEPENDENCE to commemorate the fourth of July holiday.
 I have so may ideas for these art doll nichos. They can be used with doll stamps, as I have, with collage papers and paper cuts; or even with images found in magazines.
If you like to play with dolls, the art doll nicho is a great base to start with.
Thank you so much for stopping by, I really appreciate it.
 Wishing you a happy Independence Day.
God Bless America
~Ann
xxx


supplies used:
Catherine Moore Character Constructions Doll stamps:
Blue Daisy 4, Blue Daisy 5, Blue Daisy 6, French Laundry 14
Copic markers
Decorative papers: Anna Griffin, Bazzill, The Paper Studio
Distress Collage Medium: matte
Distress Markers
Dresden trim
Emerald Creek Craft Supplies: silver red rhinestone brads
Gina K amalgam ink: black
Gelly Roll pens
Gypsy Soul Laser Cuts: Art Doll Nicho
Tim Holtz Ideaology:
paper string airmail, trimmings lace,
Tim Holtz / Sizzix Alterations: label letters thinlits, mini paper rosettes strip die
Tim Holtz / Stampers Anonymous stamps: crazy things (flag)
Trimmings