Wednesday, September 19, 2018

in the dead of night


in the dead of night, souls come to life. 
they dance and play, and haunt away; 
until the dawn, when night night is gone.

It's that time of year when we begin to see all the wonderful Halloween and seasonal creations that designers are sharing. I thought it would be fun to incorporate some of my favorite Gypsy Soul Laser Cut seasonal embellishments in a spirited display box.
I start with a chipboard trinket box die cut from Eileen Hull/Sizzix. Instead of using the latch mechanism that is cut out along with the box pieces, I decide to use small hinges and a clasp to secure the cover panel. This will ensure that the box remains closed when it is in the upright position. I paint all of the exposed box edges with black soot distress paint and allow them to dry before I begin the box assembly. The box is covered with some halloween papers from my stash. The front and back covers use a vintage Halloween candies print paper, while the main compartment is kept simple to showcase the focal piece. Using a small black and white check paper as a base, I stamp with the script stamp from the entomology stamp set. Once the ink has dried, all of the papers are edged with black soot distress ink. The front cover of the box features a flying bat from the Gypsy Soul Laser Cuts creepy critters set.
The sheet contains eight different creatures, including cats, rats and ravens, perfect for all your spooky creations. I know I will be using all these creatures up in my Halloween makes! I envision the flying bat with swooping wings creating a wonderful frame above the oval opening on the front of the trinket box.  I remove the bat piece from the sheet and coat it with embossing ink. The embossing ink is covered with rocky road baked texture and heat set, creating an eye-catching textural effect. Small black rhinestone gems are adhered around the oval opening.
I love the look of frozen charlottes and have a stash of various sizes. Adding wings to them can instantly change the look from doll to winged soul, whether it be beautiful or haunting. The main focal point of "in the dead of night" is one of these charlottes featuring a pair of wings from the Gypsy Soul Laser Cuts bat wings miniatures set. 
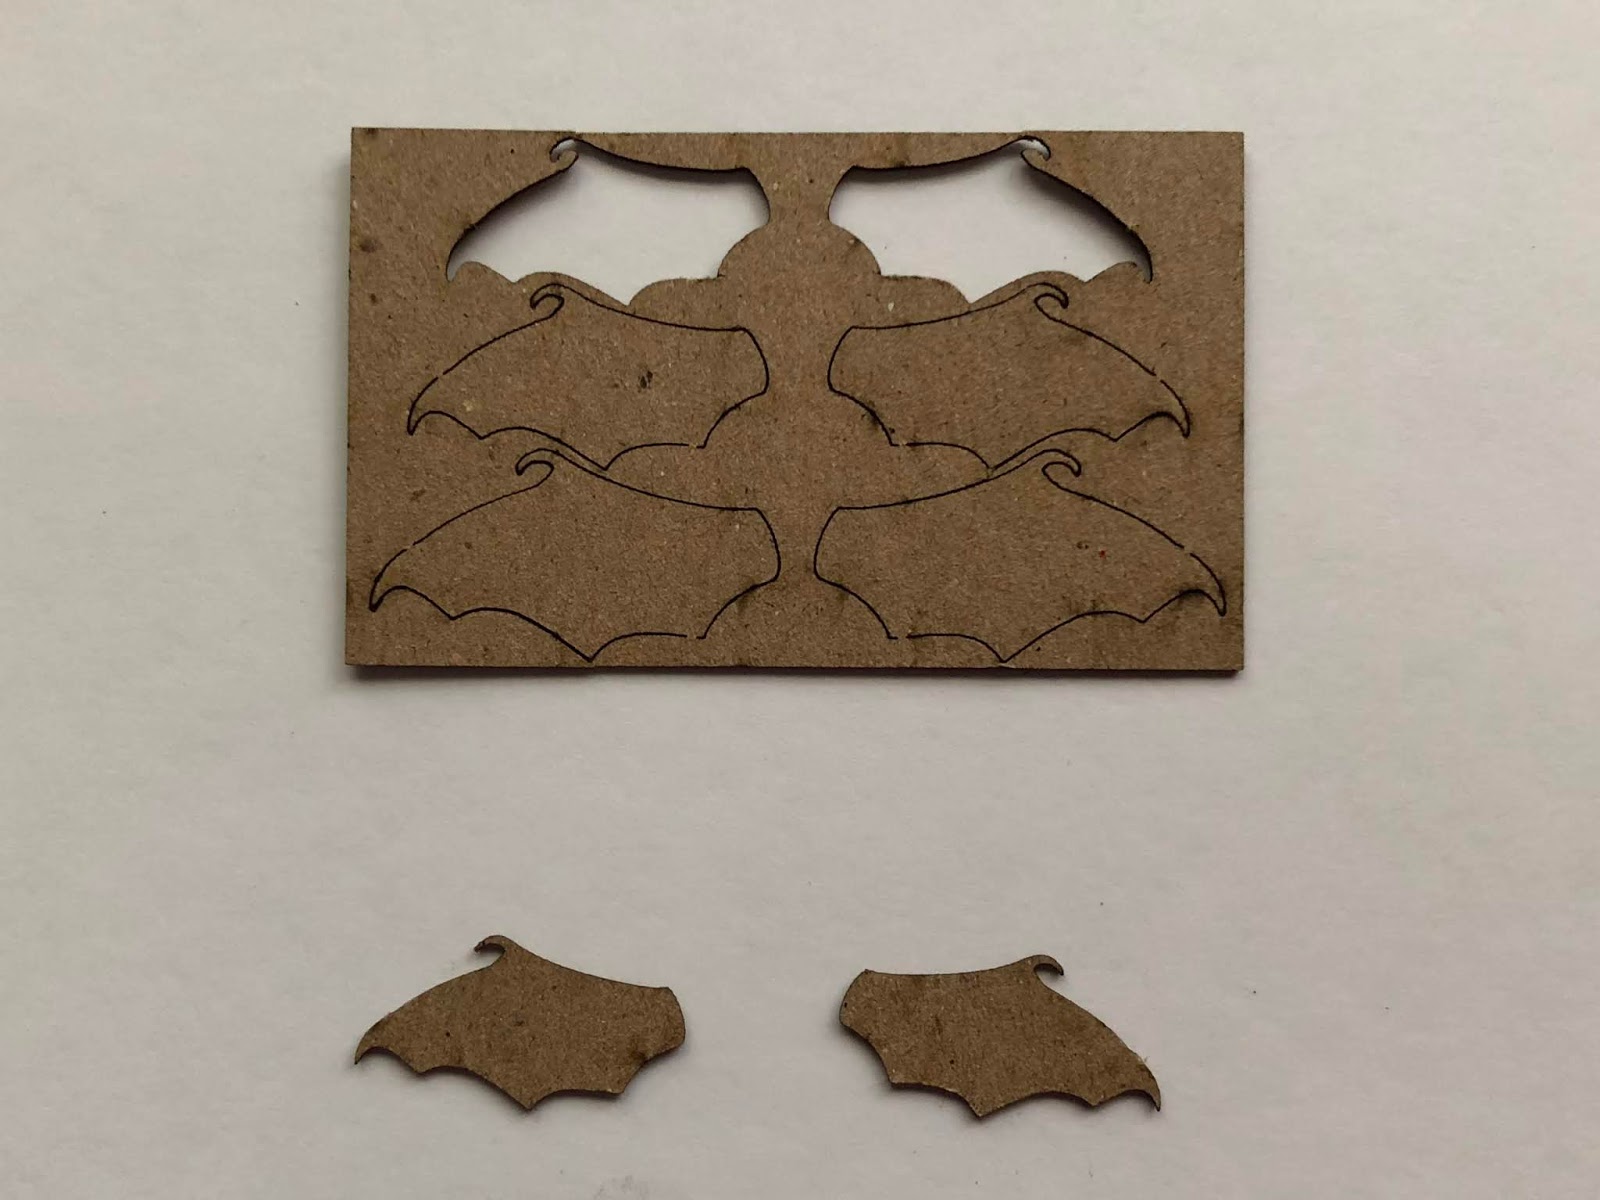
These wings are exactly as they are labeled, miniatures. The set contains three pairs of wings, graduated in size. My project features the smallest pair. I carefully remove the wings by using an exacto or sharp craft knife to cut the spots where the wings are attached to the sheet. These tabs are mainly to keep all the pieces intact during shipping. Once the wings are removed, I coat the front side of each wing with embossing ink and sprinkle with rocky road baked texture embossing powder. The powder is heat set to create a wonderful finish and set aside to cool. Once cool, the wings are adhered to the charlotte's back and some copper wire is wound around the body creating a harness.
This winged soul needs a special backdrop to shine. I select a frame from the delicate frames and ornaments shape set that seems to be made to fit my box opening, as well as the winged charlotte.
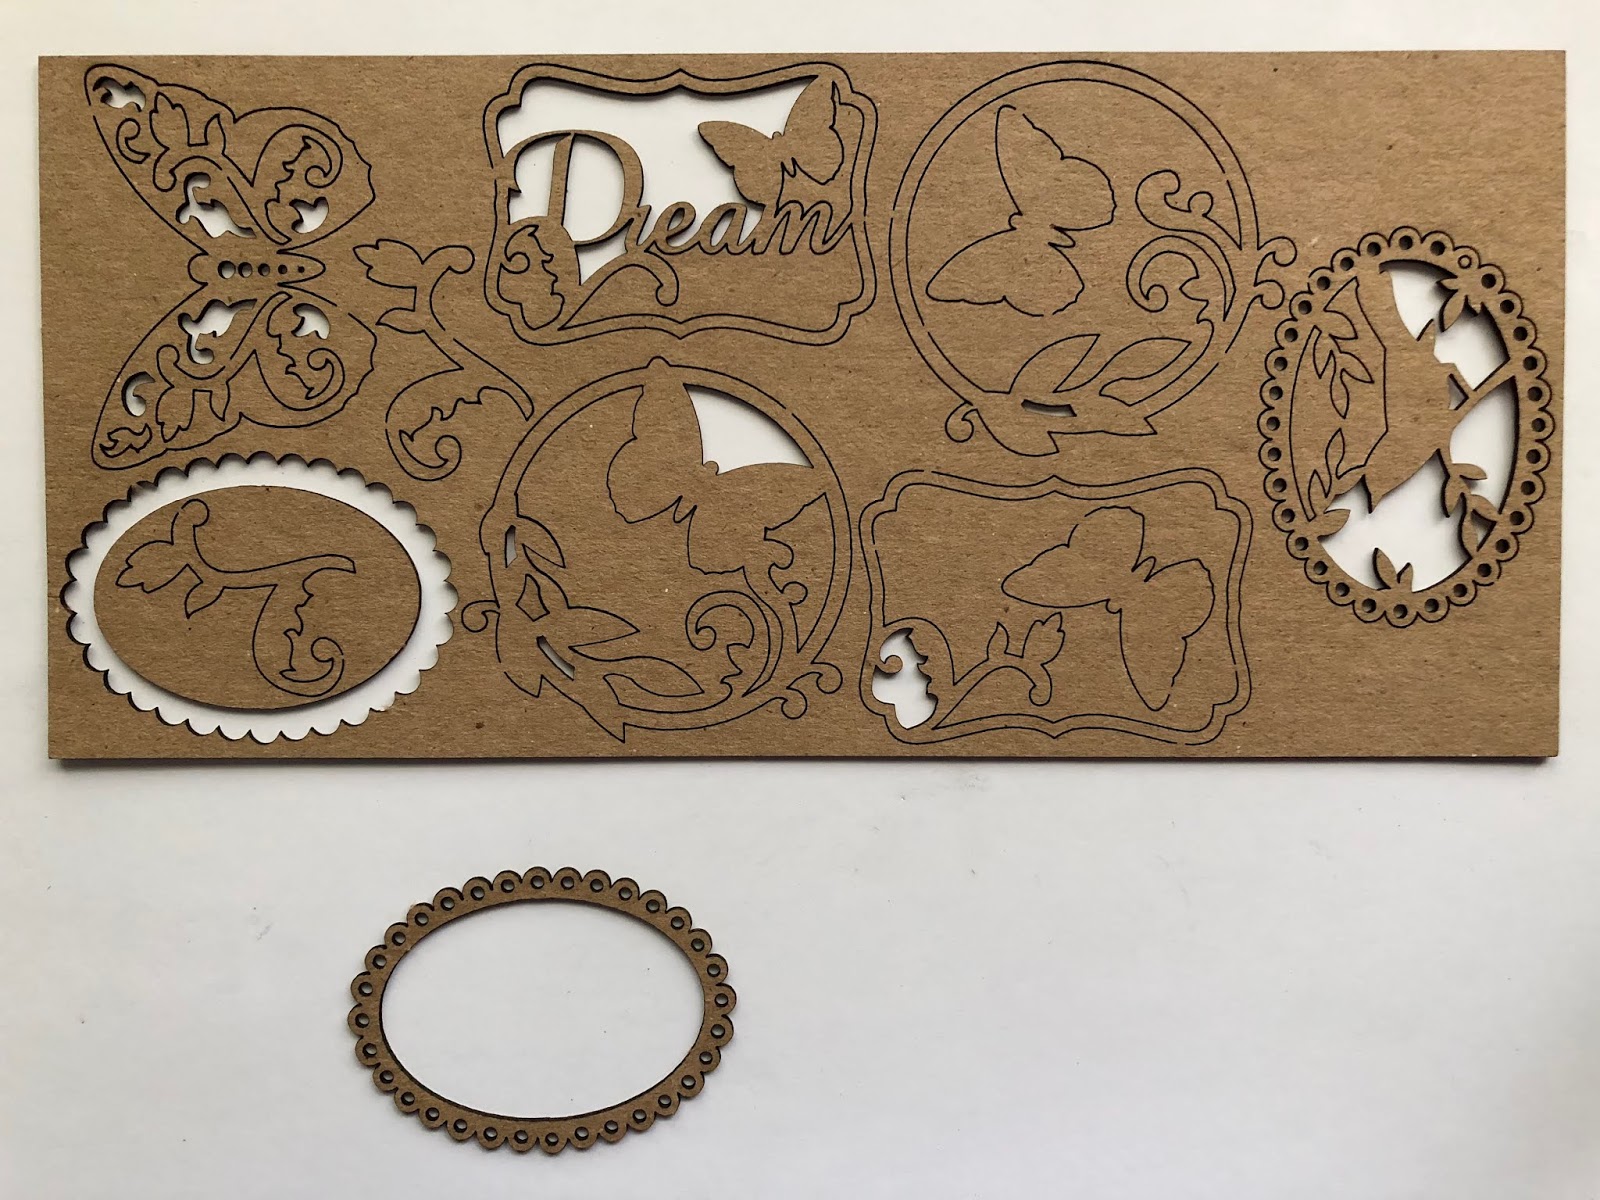
This is another awesome set from Gypsy Soul Laser Cuts, it contains thirteen different pieces with wonderful detail. The oval frame I am using contains an open scallop edge. I use chunky rust baked texture to create an interesting finish on the frame, that coordinates with the oranges in the paper design as well as gives the piece a very realistic rusty look. I adhere a piece of coordinating paper behind the oval to complete the backdrop.
When I begin to assemble the piece, I decide that it will add interest if I include some additional small bat die cuts in flight within the box. Using thin wire with the die cuts attached at one end, I wind a few around the frame in various spots. The wires are wrapped and twisted to give the appearance of taking flight. 
This piece will be attached to the inside of the box so that it is centered within the oval opening. I paint a wooden spindle with black soot distress paint and drill a hole in the center to accommodate a screw. A coordinating hole is drilled into the bottom of the trinket box for the screw to pass through and secure into the spindle.
A quote chip is distressed and areas are coated with chunky rust baked texture. This title piece is adhered to the bottom of the front cover. 
I am really excited to begin decorating for the Halloween holiday, and I know just where I would like to display this one. 
If you are creative and like to make your own decorations, or perhaps have been inspired to create a decor piece, I highly recommend trying out some of the seasonal sets available in the Gypsy Soul Laser Cuts Shop, the possibilities are endless. 
I hope you enjoy the remainder of September, fall is definitely in the air. 
Thank you so much for stopping by today.
~Ann


Supplies used:
4mm back rhinestone gems
copper wire
distress collage medium
distress inks: black soot
distress paint: black soot
Eileen Hull / Sizzix: trinket box die
Emerald Creek / Seth Apter baked textures: chunky rust, rocky road
frozen charlotte (cast resin)
Gypsy Soul Laser Cuts:
Tim Holtz ideaology: quote chips,
Tim Holtz / Sizzix: mixed media halloween (bats) 
Tim Holtz / Stampers Anonymous: entomology stamp set
wooden spindle 


Wednesday, September 5, 2018

affirmation accordion

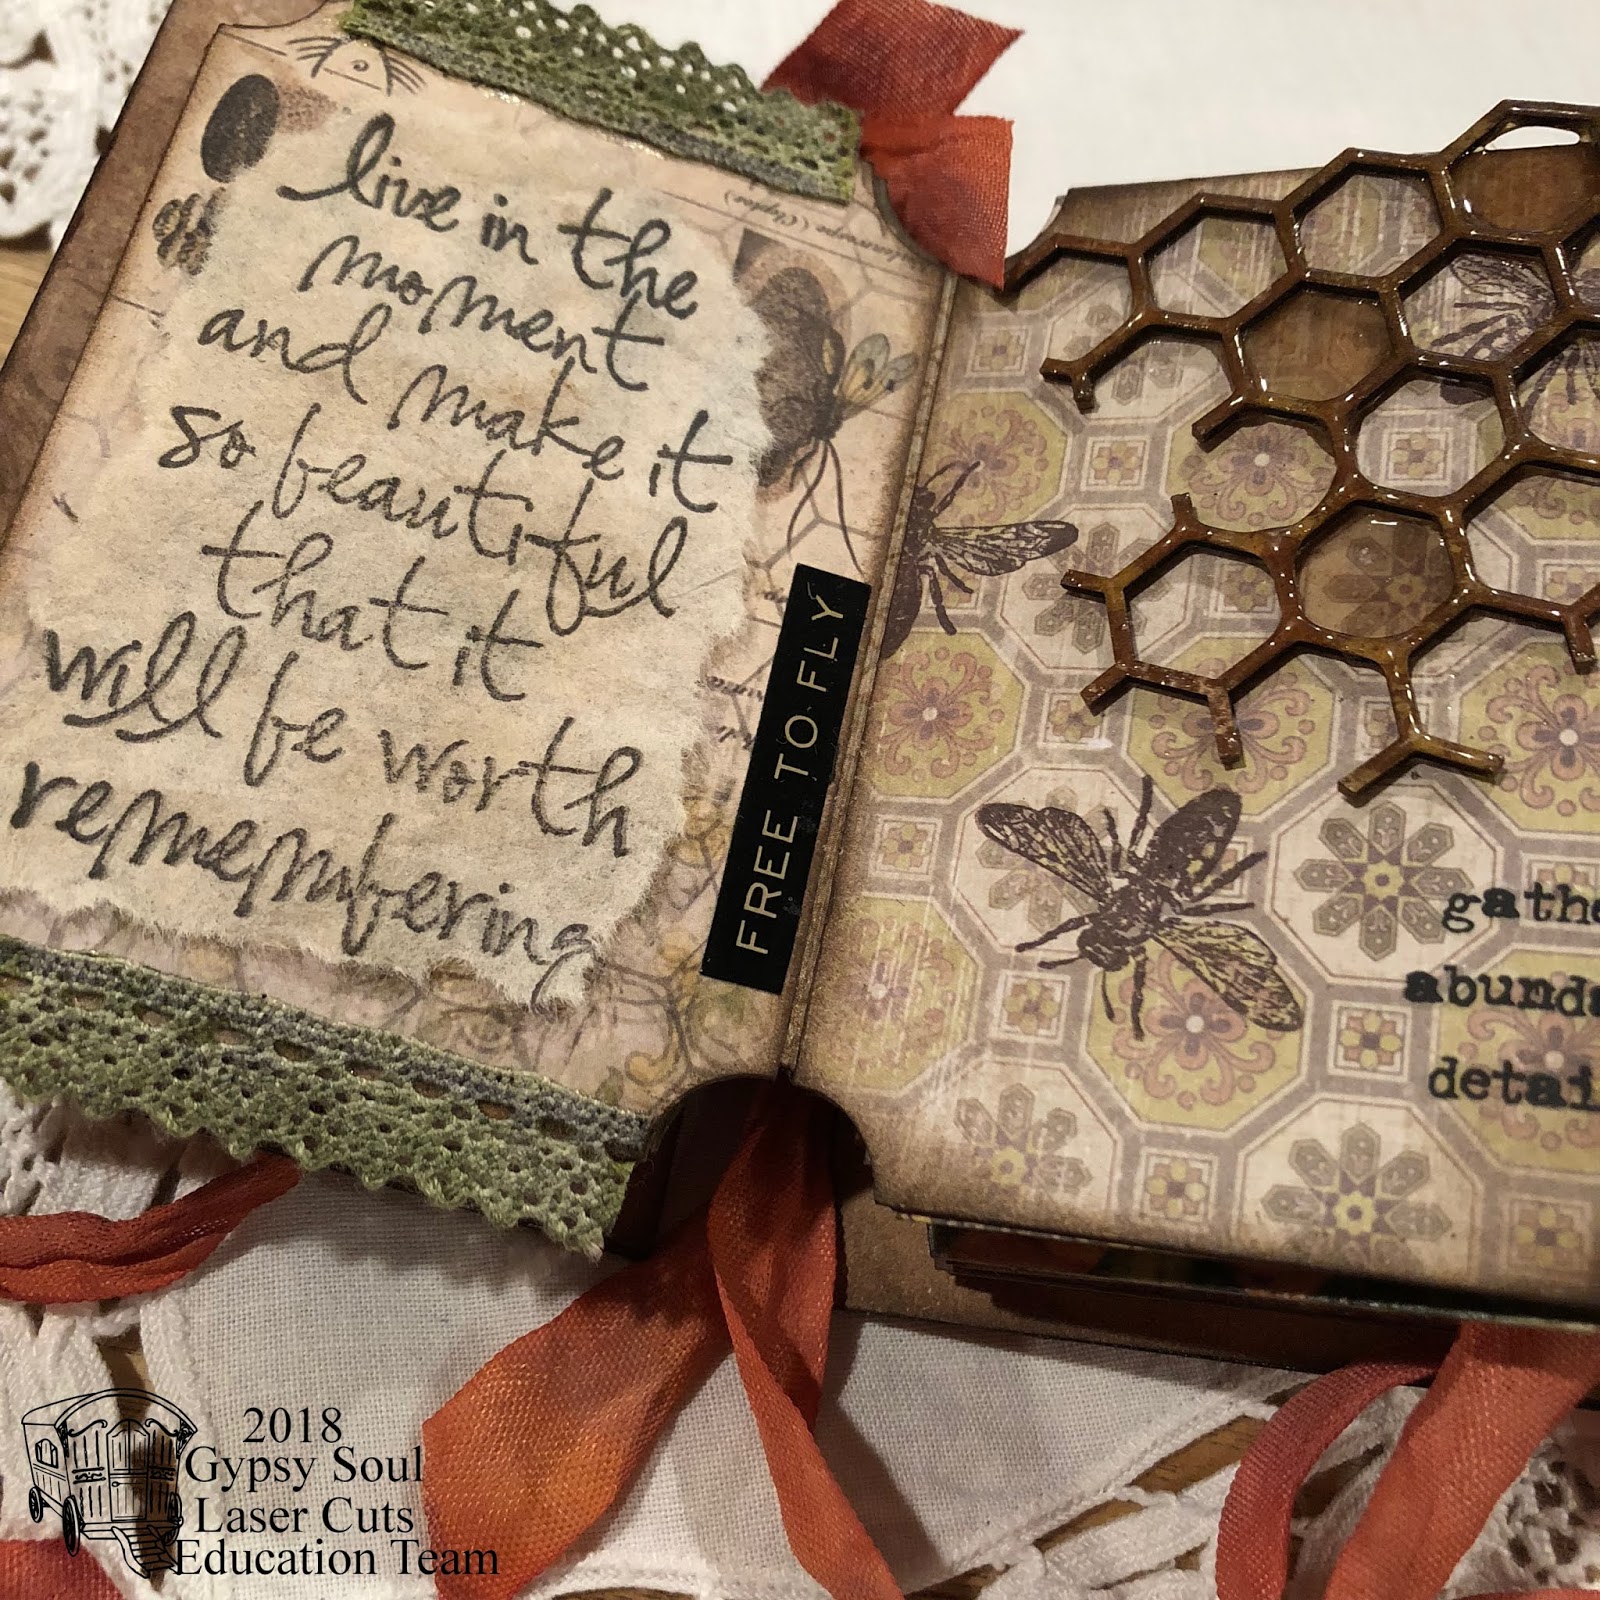
Life is full of ups and downs and twists and turns; oftentimes, the unknown can lead to doubts and questioning. For my project today, I created a small affirmation accordion journal. Something little that can make a big impact in turning your thoughts around, just by opening it. A friend of mine had sent me a stamped saying a while back that really struck a chord with me. I have had it on the corner of my work table so that I could see it every time I went in to create. It is amazing how such a small reminder can make a difference. This was the inspiration behind my affirmation accordion.
Sometimes journals can be oversized and intimidating, I thought for this piece I would work with Gypsy Soul laser Cuts ATC sized ticket journals. These are a lot of fun to work with and their size is perfect to pop into a pocket or bag and carry with you. I begin with two sets of the ATC ticket journal, knowing that I will be adhering the first and last "tickets" onto my own covers, I want the inside to have more interior pages than the one piece will provide. Each piece contains a strip of five tickets.
To create the cover and back panel that the "tickets" will be attached to, I measure the size of the ticket journal when it is folded up, then add 1/8" all around so that the ticket journal will nestle snugly inside. The exposed side of each of the these cover pieces is faced with faux wood that I created using a 3D embossing folder. I love how it looks like real wood, yet is actually paper that has been embossed, painted and inked. On the interior faces of these pieces, I cut patterned paper to fit and ink around the edges. The first and last "ticket" will be attached onto these papers so I chose something that is appropriate for a background, yet adds interest.
My accordion will be secured by means of a ribbon that wraps around the outside and ties. This ribbon is kept in place by being thread through two eyelet holes in the back cover. The eyelets are set and piece of ribbon is pulled through before I adhere the last ticket to the back cover. When attaching this piece, I make sure to only adhere around the edges so that the ribbon is allowed to move freely.
Once I have prepared the covers, I set about creating the pages that will form the inside. The seasons are changing, the weather may be warm, but fall is in the air. I love the beautiful colors that nature presents to us in this time of change and decide to use this as inspiration for my color choices. I choose some favorite papers from my stash in coordinating patterns, as well as some collage tissue, solid pieces and possible embellishments. The papers are cut to fit each ticket face. This step requires a bit of planning as I want each page to work well with the one it is adjacent to, yet retain its own individual presence with in the accordion. It helps to visualize the interaction of sides by folding the accordion during this planning stage.
When considering interior pages, I decide to incorporate some pieces from the Gypsy Soul Laser Cuts honeycomb and bees small set. I think the pieces will complement the paper patterns really well. I cut some areas of the honeycomb apart to fit how I envision them on the tickets. Each of the pieces is coated with vintage beeswax embossing powder. My accordion uses one and a half GSLC ticket journal pieces, the remaining tickets can be set aside for another project. The tickets that will be secured to the covers are coated in gesso, allowed to dry and then collaged with vintage collage medium and floral collage tissue. I also create a couple extra tickets in this same manner to be used throughout.

Before adhering any of the paper pieces, I attach strips of linen binding tape to each external (mountain) fold. This will reinforce the folded edge, which will help prevent tearing. The strips are inked with distress ink so they blend into the design. All of the internal (valley) folds are covered with pieces of coordinating design tape. Since these are the inside edges of the reinforced folds, it is really more for decorative purpose. Most often when I begin to assemble the pieces, I tend to re-arrange a bit, since I have some extra pieces, it is easy to make adjustments to backgrounds. I attach the papers to the ticket bases with double sided adhesive tape. Some of the collage pieces are attached with collage medium. The front cover is attached along with all of the interior pieces; I wait to attach the back cover until the inside pages are complete. This way the ribbon does not get in the way or covered with glue. I color the seam binding ribbon with distress oxide inks to coordinate.
The final step in creating the accordion is embellishing each of the pages. I apologize for the lack of process photos during the assembly, I seem to have gotten caught up in the arrangement of pieces.
 Following are close ups of the finished pages with some description for materials:
The cover contains a quote token that has been colored with alcohol inks and edged with burnt copper leaves embossing powder. Distress crayon is rubbed into the text impressions.
The collage paper covered ticket is attached to the inside of the cover and a few metallic quote stickers are added. The adjacent page is a layering of die cut papers, the central portion cut from worn wallpaper and adorned with a few simple stitches and a rub-on "wish".
Next are a couple of my favorite pages, the inspirational piece (the stamped sentiment on a tea bag) is flanked by two lengths of inked lace trim and another metallic quote sticker. The honeycomb piece is coated with vintage beeswax embossing powder and attached to the stamped paper background. Some of the cells are filled with beeswax embossing powder and melted, remnant rub words complete this page.
Flowers are die cut from text pages and colored with distress ink, then coated with vintage beeswax embossing powder. These are tied together into a bouquet with craft thread and attached to the center of the framed ticket. On the right, a reminder to be true to yourself. It is not always easy to rise above the general flow, but it is what makes each of us important as individuals. The background paper is inked and stenciled. Golden highlights are added around the quote stickers. A hinged ticket reveals the words "be true."
Always seek wisdom, it helps us to learn and grow. The word SEEK is die cut from the base paper revealing colored paper below. Another piece of beeswax-embossed honeycomb contains open cells which include positive thoughts. The embossed bee is from the GSLC set. Another collage paper covered ticket is attached inside the back cover and contains one of my favorite sayings.
Turning the accordion over to reveal the back sides of the interior pages:
A single stem from the bouquet is attached to the ticket with the words "listen to your heart."
A framed piece of worn wallpaper displays a shadowed "love" die cut and a small ticket with a mirrored heart and clippings sticker. When we let our hearts guide us, we are destined for good.
One of the additional collage paper covered tickets is located in the center of the accordion, with a metallic quote sticker. Some craft thread with glass beads creates a page holder.  A collage frame leaves some open space to include future thoughts.
Four brads secure the band which holds tickets made of the various papers used to create the pages. These will be used to include positive thoughts and memorable sayings or events. The last ticket page is simply a beautiful layered composition.
I really enjoyed creating this affirmation accordion with the Gypsy Soul Laser Cuts ATC ticket journal pieces. I hope that you are inspired to create something beautiful. Thank you so much for taking the time to visit today. 
A little kindness can make a world of difference.
~Ann 

I am entering this project in:

(my inspiration piece is a stamped image and I have stamped bees throughout the accordion)


Supplies used:
Gypsy Soul Laser Cuts: ATC ticket journalhoneycomb and bees small
Distress collage medium: matte, vintage
Distress ink: black soot, peeled paint, walnut stain, worn lipstick
Distress Oxide ink: aged mahogany, tattered rose, wild honey, worn lipstick
Emerald Creek allure embossing powder: burnt copper leaves
Seth Apter/Emerald Creek vintage beeswax baked texture embossing powder
Tim Holtz Eclectic Elements craft thread
Tim Holtz Ideaology:
clippings stickers, collage paper - floral, crinkle ribbon, fasteners, lace, quotations metallic stickers,
 quote token, remnant rubs,
Tim Holtz/Sizzix 3D Texture Fade: lumber
Tim Holtz/Sizzix Movers and Shapers: ticket
Tim Holtz/Sizzix Thinlits:
celebration words, flower jar, gift tags, stacked label, traveler words
Tim Holtz/Stampers Anonymous mini stencil THMS075

Monday, August 27, 2018

MUSE of the deep - Relics & Artifacts MUSE guest ambassador post

Hi everyone, today I am honored to share with you that I have a guest ambassador post
on the Relics & Artifacts MUSE. I have always been awed by the beauty and incredible detail of Sandra Everton's pieces, and when I see the amazing artwork her deign ambassadors create with them, I am transported into the most magical of places. I hope that I am able to capture your imagination with my "MUSE of the deep." I am eager to share many more details and my step by step on the Relics & Artifacts Muse, you can access it by clicking here.


I am ever so grateful for the confidence that Relics & Artifacts had in me, allowing me this opportunity to create as a guest ambassador. This is the realization of a long time dream; it will most definitely always be a cherished experience.
Thank you for stopping by, I hope that you are able to hop over to R&A to catch all the details.
~Ann

List of supplies:

Sandra Evertson Relics & Artifacts: Coquille

alcohol ink: denim, mermaid, sailboat blue, stream
anita's all purpose pearl metallic craft paint
blank page muse stamps: vintage wavy banner line art rubber stamp
catherine moore character constructions stamp: she sells seashells #7
decocolor premium metallic oil paint marker: gold
distress ink: antique linen, crushed olive, faded jeans,
forest moss, gathered twigs, mowed lawn,  peeled paint
distress oxide ink: peeled paint, forest moss
distress paint: weathered wood
dciv mercury glass metallic foil cardstock
emerald creek/seth apter baked texture: dirty sand
gansai tambi watercolors: starry colors
mona lisa gold leaf
sizzix/tim holtz alterations: funky florals 1 & 3, garden greens
sizzix/tim holtz 3d impresslits: provincial mini
tattered angels verdigris glimmer mist
tim holtz ideaology: baubles, paper stash metallic kraft, vignette box
yupo paper     

Wednesday, August 15, 2018

sunken treasure

As as the summer days grow shorter and preparations begin for the return to school, I often find myself contemplating the ocean. Maybe its the ebb and flow of the currents or perhaps just the peaceful lull it can induce. Regardless of the reason, whenever my thoughts drift to this wondrous aspect of nature, I often times envision the great depths where ships have gone to lie and sunken treasures abound. This is my inspiration for today's piece. 
I begin with the Gypsy Soul Laser Cuts treasure chest. This heavyweight chipboard piece arrives flat in 16 pieces. I always find it easiest to arrange all the pieces as if I would be assembling it. This allows me to easily identify what areas will be exposed and which will be concealed, it also allows me to generate ideas on which finishes might work best.
I want the treasure chest to be finished on both the inside as well as the outside. I plan to finish the inner sides of the pieces before it is assembled, this is most easily completed using paints. I paint the inner sides of all the pieces that will be exposed with distress paint creating a look that will closely mimic the exterior finish I am planning to use. 
Next, I assemble the pieces to form the basic body of the treasure chest. Using a multi purpose adhesive, I glue along the edges and insert the tabs. This piece is fairly simple to put together, each piece has interlocking components and when constructed, it forms a rectangular box. The lid has an additional rim that is attached on the inside. I am undecided on how I will finish the external strapping slats, so these are painted along with the interiors and then set aside for later.
The exterior of the treasure chest is covered with embossed wood grain paper that has been painted to look like real wood. I am awed by the incredibly realistic look of this new 3D folder. In order to achieve a finish that might appear on an old sunken chest, I emboss pieces of watercolor paper and color them with vintage photo spray stain and a bit of water (to move the stain around) then allow to air dry. Once dry, I coat the pieces with vintage collage medium. When this has completely dried, I paint a layer of walnut stain distress paint on the pieces and wipe mostly off with a damp cloth. This layer is dried with a heat gun. I color areas with black soot distress crayon and rub around with a wet finger to get the pigment into the crevices. I am really pleased with the result.
These "wood" papers are cut to fit each exterior side of the treasure chest. I adhere them with collage medium in matte vintage finish. I also cover the top of the lid with this paper. After covering the sides, I realize that the embossed paper is fairly thick and affects the wood strapping pieces. I decide to modify the chest a bit. I cut the bottom strap in half lengthwise and apply the exterior finish paper. This wraps the chest on the front and both sides. The top strap is also only used on the from and sides. I use the remaining pieces as blocking inside the chest when I attach my hinges.
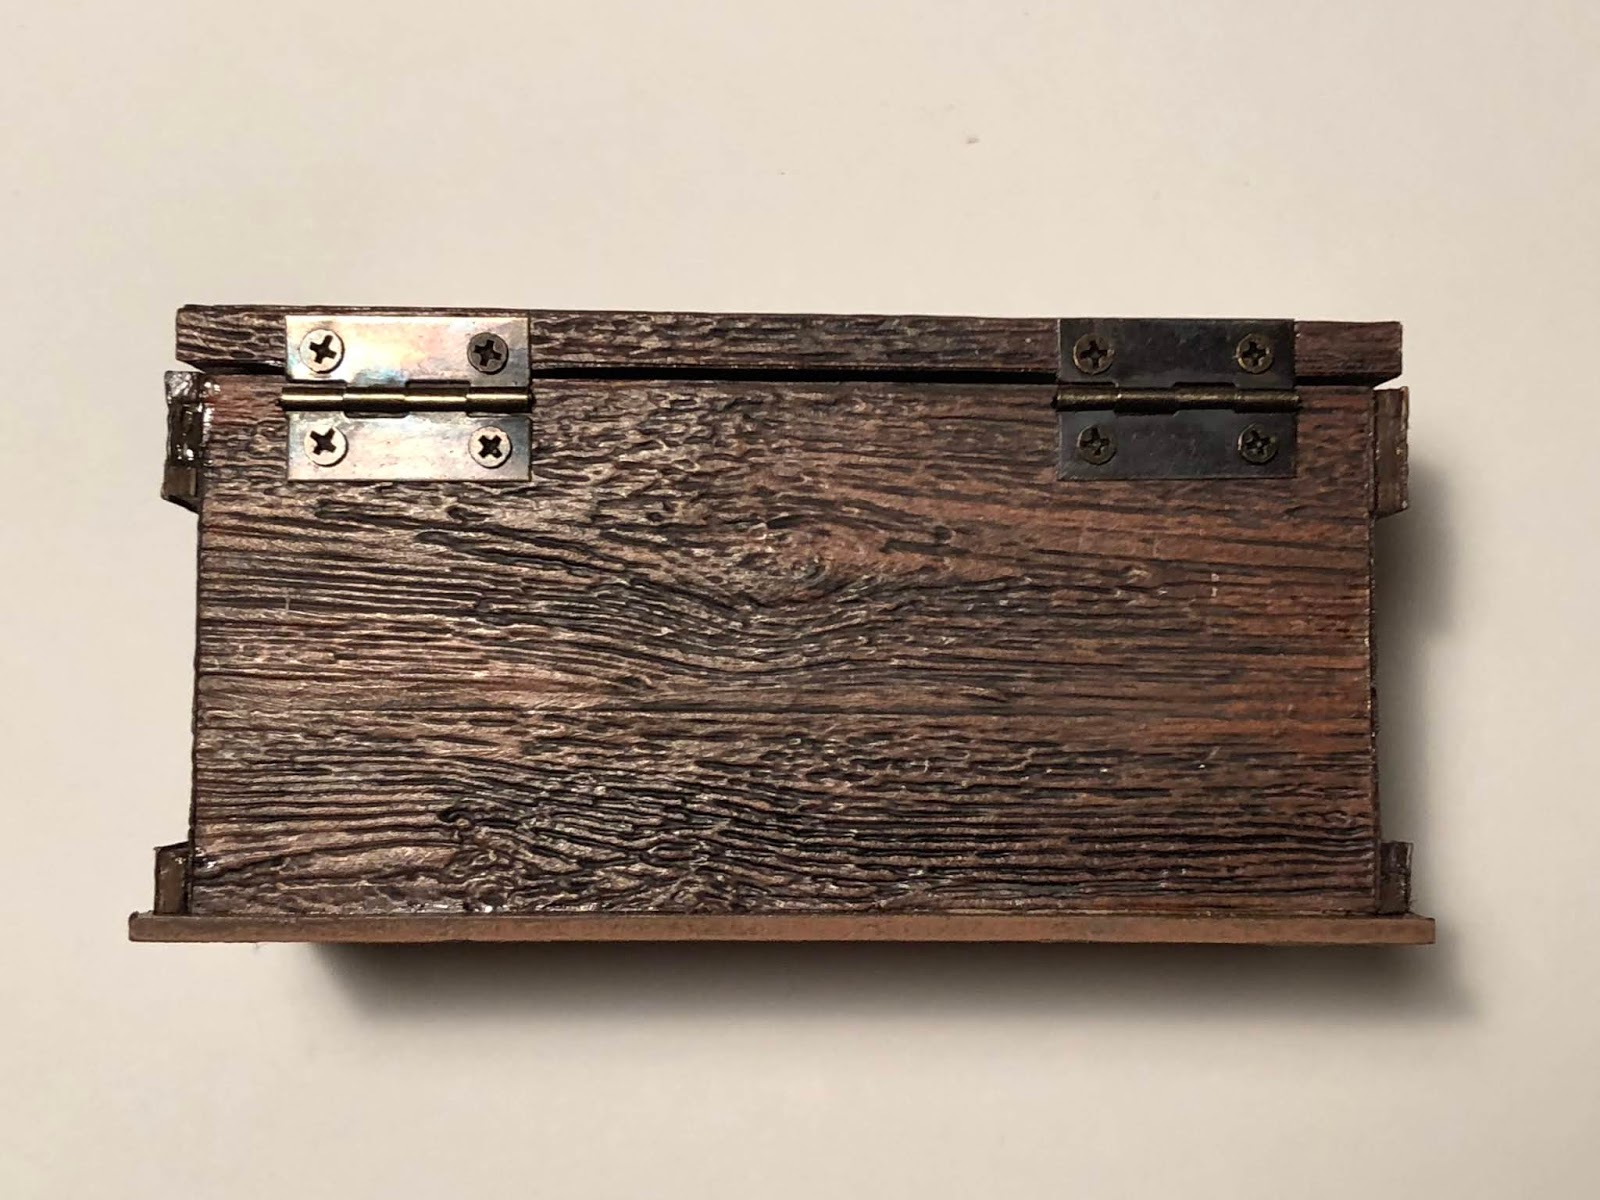
Once all of the exterior papers are applied, I install two hinges at the back of the lid. The small antique brass hinges have tiny screws that are easily attached by poking a hole and simply screwing into the chipboard. A latching mechanism is installed on the front of the lid to keep it closed.
With the added hardware, the box can be be displayed in an open position, if desired.
I love how the treasure chest looks even before I begin to embellish it to become a sunken treasure chest. This piece could be used in so many different ways, even as a simple keepsake box.
Now that the base of my project is complete, I set to making all of the pieces to create an undersea scene. I use multiple greenery dies and cut prices to mimic sea grass, coral and kelp. All of these pieces are colored with distress inks. The coral pieces are colored with distress oxide and when dry, I coat them with a layer of glue and sprinkle with rock candy glitter. This gives it a bit of texture and sparkle. When I create my embellishments, I always like to make a lot more than I believe I will need. This gives me more flexibility in placement, and whatever is left over I simply keep for future projects. I also put together a couple of mermaids from some favorite stamp sets. The mermaids are colored with distress inks, and copic markers then embellished with pieces of the die cuts and small shells. I also add some finish to a few resin blanks that will complete my scene.
The die cut pieces are adhered to the treasure chest with a multi purpose adhesive and allowed to dry.
Lastly, I add some vintage jewelry to "spill" out of the treasure chest, and arrange the two mermaids. I prop open the chest with a golden edged shell and miscellaneous
relics and pearls adorn the scene.
I hope that you enjoy these final weeks of summer, and perhaps this sunken treasure has inspired you to get creative. I truly appreciate you stopping by today.
~Ann

I am entering this project in:
Frilly and Funkie Challenge: Back to Nature

Materials used:
Catherine Moore Character Constructions Stamps:
She Sells Seashells #1, #5, #7
Copic markers:
E000, E00, E02, E04,  E21, E57, 0, YR000, YR000
DecoColor Premium gold metallic paint marker
Distress collage medium: matte, vintage
Distress crayon: black soot
Distress Inks:
bundled sage, cracked pistachio, forest moss, ground expresso,
lucky clover, mermaid lagoon, peeled paint, walnut stain
Distress Oxide Inks:
fossilized amber, wild honey
Distress Spray Stain: vintage photo
Distress Paints:
black soot, vintage photo, walnut stain
Distress Stickles: clear rock candy
Gypsy Soul Laser Cuts:
Sandra Evertson Relics and Artifacts: Coquille
Tim Holtz/Ranger:
Distress watercolor paper,  Mixed Media Heavystock
Tim Holtz/Sizzix 3-D Texture Fades: lumber
Tim Holtz/Sizzix Thinlits:
funky floral 1, funky floral 3, garden greens, holiday greens